0
Wizard™ International, Inc., 4600 116th St. SW, PO Box 66, Mukilteo, WA 98275 888/855-3335 Fax: 425/551-4350
wizardint.com
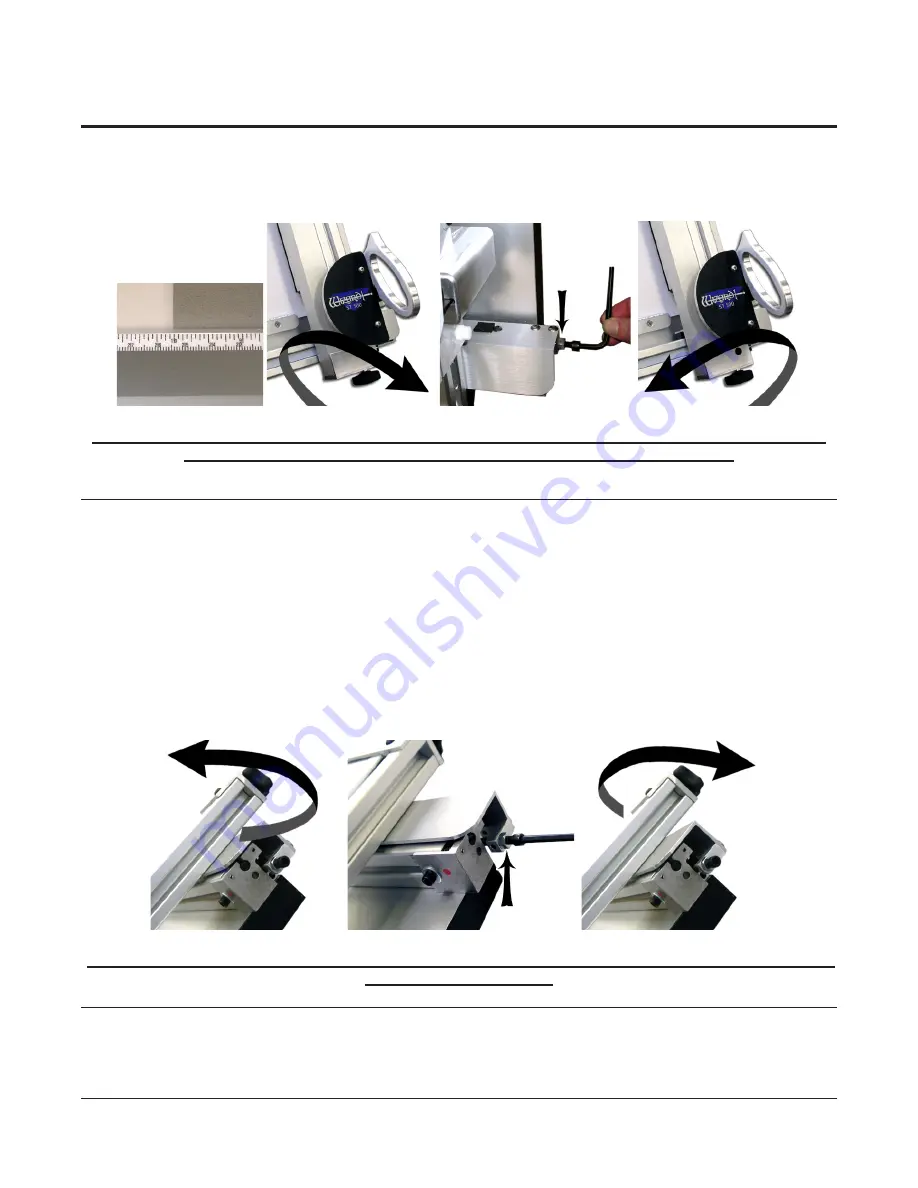
5. Cut the mat again... remember we are looking at the bottom of the mat. When the bottom of the matboard
cuts the correct width, retighten the Locking Nut (Arrow in Fig C) to keep the Alignment Adjustment Screw from
moving.
Fig A.
Fig B.
Fig C.
Fig D.
Fig A: Trim a piece of matboard and measure. Fig B: Turn bottom lock knob Clockwise. Fig C: Locking Nut, and ad-
justing Alignment Adjustment Screw. Fig D: Turn bottom lock knob Counter-Clockwise.
Calibrate the Top of the Straight Line Trimmer
1. Trim a tall piece of matboard at 10” and measure across the top and across the bottom. If it does not measure
10” across the top and across the bottom, continue.
2. Loosen the top locking knob by turning it Counter-Clockwise.
3. Using a 7/16” Open-Ended Wrench, loosen the Locking Nut (see Arrow in Fig B).
4. Turn the Alignment Adjustment Screw Clockwise to move the Trimmer to the Right; turn it Counter-Clockwise
to move the Trimmer to the Left (Fig B). When moving to the Left, you will need to push the Trimmer to the Left
so that the Alignment Adjustment Screw stays on contact with the rail.
5. Tighten the top locking knob by turning it Clockwise (Fig C).
6. Cut the mat again, and readjust if necessary. When the top of the matboard cuts the correct width, retighten
the Locking Nut (Arrow in Fig B) to keep the Alignment Adjustment Screw from moving.
Fig A.
Fig B.
Fig C.
Fig A: Turn top lock knob Counter-Clockwise. Fig C: Locking Nut, and adjusting Alignment Adjustment Screw. Fig D:
Turn top lock knob Clockwise.
*Do not use the Wizard to cut anything wider than 53” from the left
edge of the matboard... this INCLUDES the outside cut... without first
removing the Straight Line Trimmer.*


