background image

The Pen 

18 

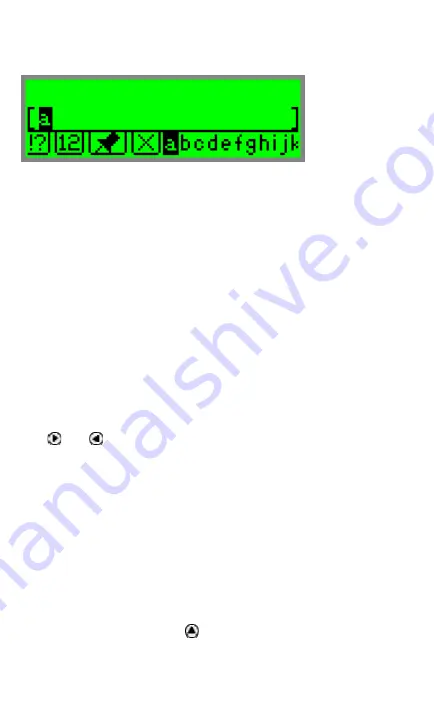
The Character Bar 


Use the 

Character Bar

 to manually insert or edit text. The 

Character Bar

 is only available when the Pen is in 

Edit 

Mode

. Scroll to the field you wish to edit and press ENT to 

activate 

Edit Mode

.  

Use the direction keys to scroll to the place you wish to 
insert text and press ENT to access the 

Character Bar

Press ESC to exit the 

Character Bar

Using the Character Bar 

The 

Character Bar

 works in two modes: 

Insert Mode

 and 

Overwrite Mode

 which are determined by the setting in the 

application's 

Edit Menu

. The default mode is 

Insert Mode

ƒ

 In 

Insert Mode 

characters are inserted at the site of 

the cursor.  

ƒ

 In 

Overwrite Mode

 each character that is inserted 

replaces the highlighted character. 

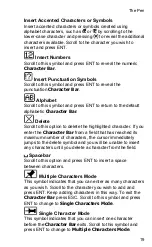
Use   and   to scroll to the character you wish to insert 
and press ENT. Do the same thing for each character you 
wish to insert. When you have finished, press ESC to return 
to the previous screen. 

Character Bar Options 

The default 

Character Bar

 contains the twenty six lower-

case ABC characters as well as the option to access 
numbers, punctuation characters, upper-case and accented 
characters and symbols.  

Insert Upper-Case Characters 

Insert upper case (capital) letters by scrolling to the lower-
case character and pressing   to reveal the upper and 
lower case options for the character. Scroll to the character 
you wish to insert and press ENT. 

Summary of Contents for Quicktionary 2 Premium Professional

Page 1: ...n 11 Main Pen Functions 11 The Quicktionary Application 12 The Quicktionary Screens 13 The Quicktionary Menus 15 Editing and Inserting Text 17 The Dictionary Entries 21 Hear Scanned Text Read Aloud 25...

Page 2: ...face 57 The Menu Bar 57 The Toolbar 59 Desktop Window 60 The WizCom Desktop Taskbar Icon 61 Changing the Desktop Interface Language 62 Pen PC Communication Settings 63 Communication Settings 63 Deskto...

Page 3: ...e productivity This manual is divided into four sections 1 Getting Started This section provides basic information on Pen functions and how to scan on using the CD you received with your Pen installin...

Page 4: ...amiliarizing Yourself with the Pen The Pen Parts Your Pen contains the following parts Front and Rear Views Top View Important Before using the headphones please adjust the volume using the Voice Sett...

Page 5: ...Pen to left handed scanning Basic Pen Commands The Pen Keys and their Functions The keypad contains seven keys for operating your Pen Use the keys as follows Power key Turn the Pen on and off ENT key...

Page 6: ...ite white on red blue on black and black on blue It does not recognize handwriting cursive fonts mathematical symbols or other profession specific signs Tips for Good Scanning To ensure optimum scanni...

Page 7: ...e and press ENT 5 Scroll down to OK and save the default file name A blank screen appears with a blinking cursor 6 Position the Pen at a 90 angle and center the following text between the feet of the...

Page 8: ...u can install any Add Ons Installing the WizCom Desktop While the Pen can be used as a stand alone device installing the WizCom Desktop from the CD allows you to transfer files between your Pen and PC...

Page 9: ...ettings and press ENT 3 The Connection Device submenu appears Press ENT 4 Select Cable and press ENT 5 Scroll down to Baud Rate and press ENT 6 The Baud Rate should be set to 115 200 Scroll down until...

Page 10: ...y the Port option accordingly 2 The Baud Rate should be set to 115 200 3 Click OK Note If the Prolific USB to Serial Comm Port is not listed under Ports COM LPT it means that the USB driver has not be...

Page 11: ...es application enables you to scan printed text into your Pen This text can later be transferred to your computer or beamed to an infra red device See page 29 Address Book The Address Book application...

Page 12: ...system See page 51 Preferences Allows you to change settings on your Pen such as the scanning language and the menu type See page 52 Information Displays information about your Pen s current status Se...

Page 13: ...e language of the selected dictionary and the highlighted section shows the input field After scanning text is displayed in the Split Screen or the Dictionary Screen Insert text using the Character ba...

Page 14: ...ghlighted word using the up down direction keys View the highlighted word in the Dictionary Screen by pressing ENT If the selected dictionary supports reading aloud use to scroll to the icon voice Hig...

Page 15: ...ined at the top The history list can store up to 80 words Once the list is full the oldest word is deleted from the list to make room for the most recent one To select one of these words and view its...

Page 16: ...ENT on Inverse Select this option to scan inverse text white text on dark background When inverse text mode is selected the red light in the tip of Quicktionary blinks rapidly and the icon is visible...

Page 17: ...rite the existing text Overwrite mode highlights the first character after the blinking cursor Any text that is inserted overwrites the text starting at the highlighted character When Overwrite Mode i...

Page 18: ...ode characters are inserted at the site of the cursor In Overwrite Mode each character that is inserted replaces the highlighted character Use and to scroll to the character you wish to insert and pre...

Page 19: ...highlighted character If you enter the Character Bar from a field that has reached its maximum number of characters the cursor immediately jumps to the delete symbol and you will be unable to insert a...

Page 20: ...activated the light in the tip of the Pen blinks rapidly 3 Slowly scan the character key from right to left or from left to right or touch the key gently with the tip of your Pen The letter appears in...

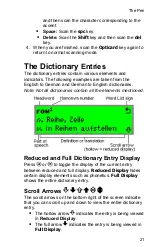
Page 21: ...dictionaries Note Not all dictionaries contain all the elements mentioned Reduced and Full Dictionary Entry Display Press or to toggle the display of the current entry between reduced and full displa...

Page 22: ...etween the dictionary entries dress and dressing When the scanned word is a homonym a word that is the same as another in spelling but different in meaning After scanning an idiom or phrasal verb the...

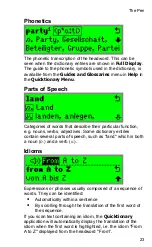
Page 23: ...on e g nouns verbs adjectives Some dictionary entries contain several parts of speech such as land which is both a noun n and a verb v Idioms Expressions or phrases usually composed of a sequence of w...

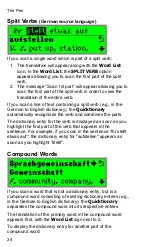
Page 24: ...y recognizes the verb and combines the parts The dictionary entry for the verb is displayed as soon as you highlight the first part of the verb that appears in the sentence For example if you scan in...

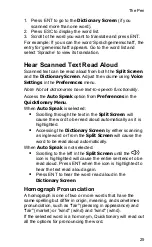
Page 25: ...ling through the text in the Split Screen will cause the word to be read aloud automatically as it is highlighted Accessing the Dictionary Screen by either scanning a single word or from the Split Scr...

Page 26: ...isplay Order Use this option to choose the preferred order in which entries from the sub dictionaries are displayed To set the preferred dictionary order a Scroll through the dictionary list using and...

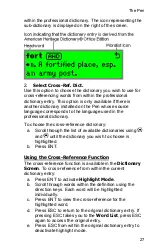
Page 27: ...list of available dictionaries using and until the dictionary you wish to choose is highlighted b Press ENT Using the Cross Reference Function The cross reference function is available in the Dictiona...

Page 28: ...ternal Cross Reference Directs you to the corresponding entry for the highlighted word in the selected cross reference dictionary Hearing Words Read Aloud in Highlight Mode Some dictionaries allow you...

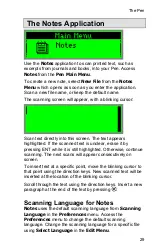
Page 29: ...it by pressing ENT while it is still highlighted Otherwise continue scanning The next scans will appear consecutively on screen To insert text at a specific point move the blinking cursor to that poi...

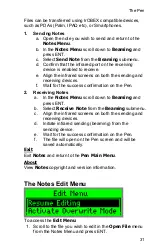
Page 30: ...he Pen Main Menu To change the default file transfer settings see Change File Transfer Settings on page 50 The Notes Menu The Notes Menu contains the following options Select the option to perform the...

Page 31: ...or the success confirmation on the Pen 2 Receiving Notes a In the Notes Menu scroll down to Beaming and press ENT b Select Receive Note from the Beaming submenu c Align the infrared screens on both th...

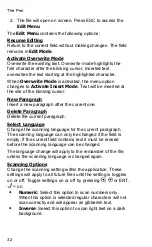
Page 32: ...ne Delete Paragraph Delete the current paragraph Select Language Change the scanning language for the current paragraph The scanning language can only be changed if the field is empty If the current f...

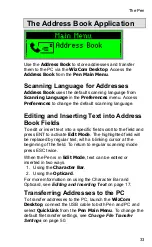
Page 33: ...nd press ENT to activate Edit Mode The highlighted field will be replaced by regular text with a blinking cursor at the beginning of the field To return to regular scanning mode press ESC twice When t...

Page 34: ...editing 2 Press to access the Addresses Menu Use the Addresses Menu to do the following 1 Find Address 2 Select Search Language 3 Delete Address 4 View Address 5 Edit Address Settings Change the defau...

Page 35: ...f you delete the current file you must open another file before you can continue scanning Note you can t delete the file mainadd from the Pen Beaming Beam and receive addresses via infrared communicat...

Page 36: ...address you wish to use as your business card Do the following a In the Address Book application scroll down to Beaming and press ENT b Select Select Business Card from the Beaming submenu c Scroll d...

Page 37: ...e menu option changes to Activate Insert Mode Text is inserted at the site of the blinking cursor Insert Line Insert an extra line into the current field Delete Line Delete a line from the current fie...

Page 38: ...the field and press ENT to activate Edit Mode The highlighted field will be replaced by regular text with a blinking cursor at the beginning of the field To return to regular scanning mode press ESC t...

Page 39: ...ess ENT again to open the link for editing 2 Press to access the Links Menu Use the Links Menu to do the following 1 Delete Link 2 View Link 3 Edit Link Settings Change the default settings for new li...

Page 40: ...ete the current file you must open another file before you can continue scanning Note you can t delete the main links file mainlnk from the Pen Exit Exit the Internet Links application About View Inte...

Page 41: ...regular scanning by pressing Toggle settings on or off by pressing or ENT on Numeric Select this option to scan numbers only When this option is selected regular characters will not scan correctly and...

Page 42: ...er Bar and Opticard see Editing and Inserting Text on page 17 Transferring Tables to the PC To transfer Tables files to the PC launch the WizCom Desktop connect the USB cable to both Pen and PC and se...

Page 43: ...ile for viewing or editing Delete File Delete an existing file Exit Exit the Tables application About View copyright and version information for the Tables application The Tables Edit Menu Scroll to t...

Page 44: ...option to scan numbers only When this option is selected regular characters will not scan correctly and will appear as gibberish text Inverse Select this option to scan light text on a dark backgroun...

Page 45: ...application open on screen the text will still be sent from the Pen but will not be accessible on the PC The WizCom Desktop does not need to be maximized on screen as long as it is running the icon ap...

Page 46: ...anned is shown on the screen and the user can choose whether to send the text on screen to the PC or to discard it or rescan it To send the text on screen press ENT To scan multiple lines scan a line...

Page 47: ...ace meaning that a space is inserted after each scan appears in the application Access Scan to PC Settings from the Pen Communications menu on the WizCom Desktop Menu Bar From the Scan to PC Settings...

Page 48: ...be set to the required language To confirm that the language settings are correct in the Windows application open the application you wish to scan text into and attempt to type text in the required la...

Page 49: ...er process has completed File Transfer Settings in the WizCom Desktop Use the File Transfer Settings dialog box to determine what happens to files saved on the Pen when you select the QuickLink option...

Page 50: ...lable for all applications 1 Synchronize Pen and PC The records on the Pen and computer are synchronized resulting in identical data files on the Pen and the computer If the same record was changed on...

Page 51: ...to interact with these applications If you wish to change it go through the list of Pen names find the one where the option is checked and deselect it 3 Click on the Host Settings button now enabled 4...

Page 52: ...u Modify the default Pen settings using this menu which can be accessed via the Pen Main Menu To select an option scroll to the required option using or and press ENT when the option is highlighted To...

Page 53: ...ating with the computer 1 Select Connection Device 2 Scroll to the required device using or and press ENT Baud Rate The Baud Rate should always be set to 115 200 1 Select Baud Rate 2 If the Baud Rate...

Page 54: ...1 Select Right Left Handed 2 Scroll to the mode you prefer using or and press ENT Menu Type Use this option to define whether your Pen menus appear as text only icons only or both text and icons 1 Se...

Page 55: ...higher the number the darker the display The Information Menu The Information menu displays the following Pen information Memory Status See how much memory is left on the Pen s extension card This op...

Page 56: ...the Desktop will automatically start running when you start your computer To open the Desktop window click the Desktop icon in the notification area of the Windows taskbar and select the Show Window...

Page 57: ...t Some menus can be activated using shortcut key commands which are shown on the right of the menu option Press the key sequence shown to execute the shortcut key command The File Menu The File Menu c...

Page 58: ...in the Files and Current Files Panes Toolbar Hide or show the Toolbar which contains icons for accessing some of the main Desktop functions Status Bar Hide or show the Status Bar at the bottom of the...

Page 59: ...owing options New Create a new file in the selected application Open Open a file in the selected application Save As Save the current file under a new name or in a different format Print Print the cur...

Page 60: ...iles Pane The Files Pane displays the list of files for the selected application Select a file name to view the contents of the selected file in the right pane the Current File Pane This Pane is only...

Page 61: ...exit the application but will cause it to minimize to the taskbar The Desktop is still running in this state Clicking on the icon will cause a pop up menu to appear with the following options The Task...

Page 62: ...e from the View menu on the Menu Bar The Interface Language dialog box appears 2 Select the interface language you want from the list and click OK 3 Restart the Desktop Note Your Windows settings non...

Page 63: ...ra Red The communications port on the computer to which the connection device is associated The communications baud rate the speed at which the data is transmitted if you are using a cable The Infra R...

Page 64: ...e enabled the communications port specified in the communications settings on the Desktop is busy and cannot be used for any other purpose Optimize the Pen File System When you delete data from your P...

Page 65: ...p application or by clicking in the Toolbar The dialog can only be launched when the Pen is connected to the PC and PC Controlled Communications has been selected on the Pen This dialog is for advance...

Page 66: ...ect Rename type the new name into the Rename box and click OK To delete a Pen Open the Pen Names menu and select the Pen Name you want to delete Select Remove click Yes when the confirmation message a...

Page 67: ...location and click Save To delete files Right click on the file you wish to delete in the Files Pane and select Delete File from the pop up menu Address Book and Internet Links To create new entries...

Page 68: ...s in the Pen It is not advisable to use the Pen with batteries that are not at the same voltage level Do not combine different types of batteries e g rechargeable and non rechargeable Dispose of used...

Page 69: ...and exit the application 4 When you connect the USB cable to both the Pen and PC make sure the cable jack is pushed all the way into the Pen and confirm that you hear the last little click when the ca...

Page 70: ...receive several options Select the remove option Once the driver has been removed restart your computer and reinstall the driver from the CD 4 Connect the USB cable to both the Pen and PC Make sure t...

Page 71: ...rogram running on your PC which is interfering with the installation Please try the following 1 Restart your computer 2 Make sure that you are administrator on the computer you are using 3 Close any p...

Page 72: ...not related to calibration you will be contacted prior to any work being done to check if you have a valid warranty and if not whether you agree to pay the extra repair charges Problem I installed a...

Page 73: ...nt to remove any dust particles that may have accumulated Replace the extension card firmly into the slot This should solve the problem Problem I ve changed my Pen user interface to another language a...

Page 74: ...wer ON button Product Specification Feature Description Display Information Resolution 122 x 32 pixels Size 61mm x 20mm 2 4 x 8 Keypad Push Buttons Power ESC ENT Up Down Left Right CPU ARM 7 TDMI Memo...

Page 75: ...rom WizCom or from WizCom s AUTHORIZED RETAILER This limited warranty extends only to the original Purchaser of the PRODUCT and is not assignable or transferable to any subsequent purchaser end user W...

Page 76: ...R WARRANTIES EXPRESSED OR IMPLIED AND TO THE FULLEST EXTENT PERMITTED BY LAW WIZCOM DISCLAIMS ALL OTHER WARRANTIES EXPRESSED OR IMPLIED INCLUDING BUT NOT LIMITED TO ANY IMPLIED WARRANTIES OF MERCHANTA...

Reviews: