background image

The modules are installed as follows:

1. Remove the module from its packaging and place the V-
shaped feet in stirrups at the bottom of the fuselage of the 
drone. Make sure the right side is facing forward.

2. Push until a click is heard. If you do not hear a click, rotate 
180 degrees and try again.

3. Then connect the plug to the matching slot provided for that 
purpose on the support base.

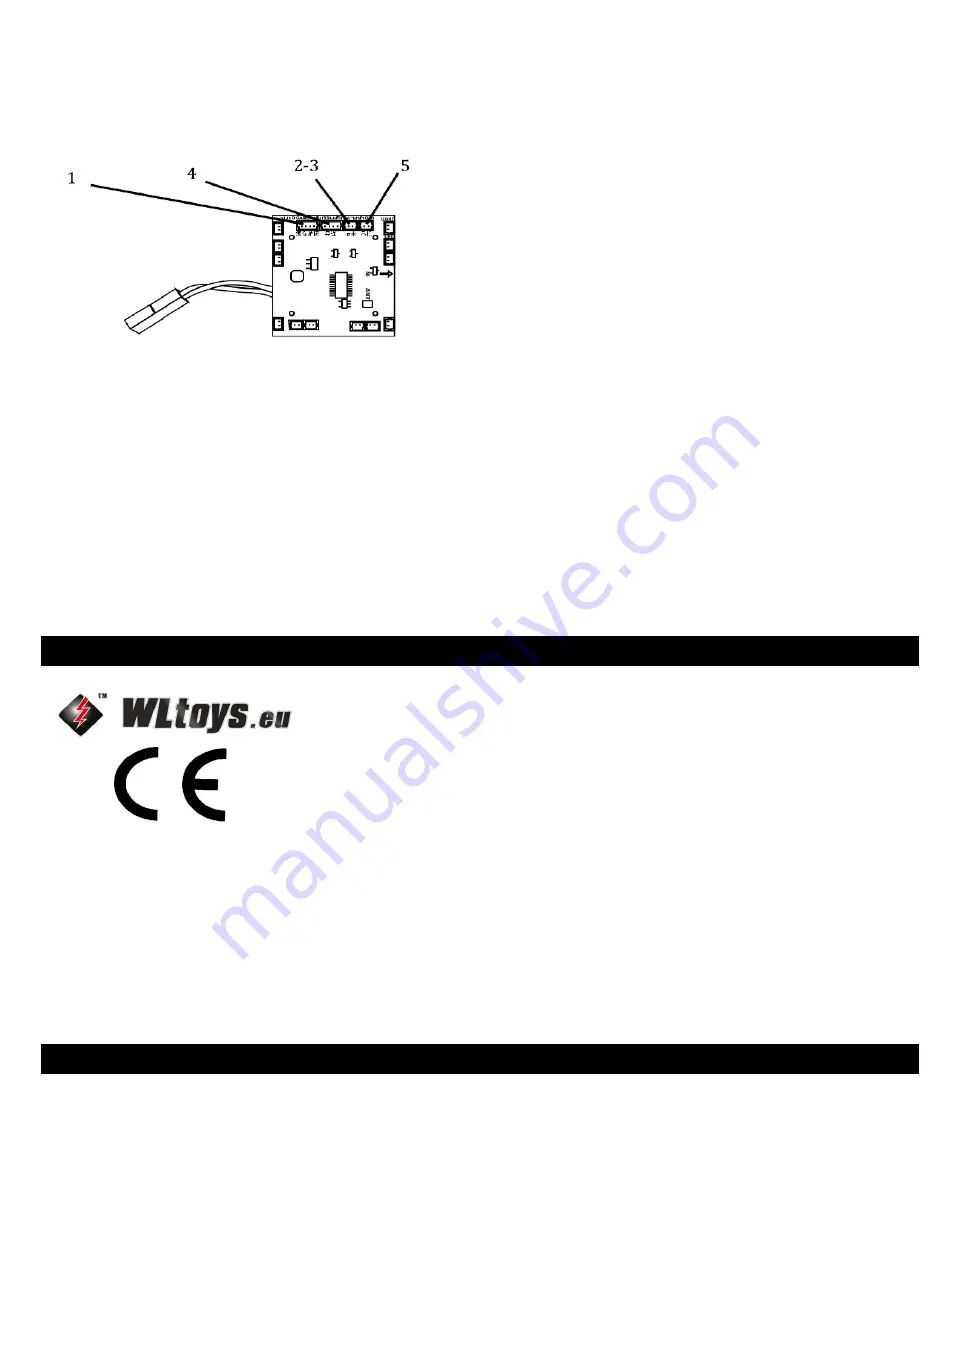
The various modules installation procedure is the same. Keep in 
mind that modules must be connected to the base 
corresponding to the support base. In the illustration you will find 
the exact location of these bases.

1. CAMERA = camera
2-3. SPRAYER = fountain or bubble blower
4. MISSILE = missile shooter
5. HOIST = Rescue module

NB: On www.wltoys.eu you will find the educational films where 
everything is explained step-by-step with images and sound.

Wltoys

Congratulations on your purchase of this product from wltoys.eu! Wltoys.eu offers its customers a high quality product. All our 
products are carefully tested before shipment. If unfortunately a problem persists, contact your dealer or visit www.wltoys.eu. Your 
dealer can also assist you in getting spare parts in case you need them. We hope you will enjoy your experience with our product.

WARNING: 
Non-compliance with safety rules may cause damage, injury and / or dangerous situations.

Warranty

The use of this product is entirely at your own responsibility and at your own risk. Since we have no control beyond this manual on 
when and how you use our product (both flying and maintenance), we are not responsible for any damages or costs incurred by 
improper use.

This warranty covers manufacturing and material defects in the context of normal use. We take no responsibility for damage 
caused indirectly.

The following are excluded from the warranty:

Summary of Contents for V333

Page 1: ...es away from blades Stand out of reach of moving parts of the copter Always fly in an open and safe environment where you will not cause any danger to others For the remote control we recommend AA bat...

Page 2: ...upplied by WLtoys When charging the battery always ensure that you do so on a non combustible surface Do not leave charging without supervision Always charge the battery to 100 Unequally charged batte...

Page 3: ...0 03V 1 Power LED 2 Module 1 Water jet bubble jet video basket up lead single missile 3 Throttle Yaw control stick 4 Throttle trim 5 Yaw trim 6 40 agility 7 60 agility 8 80 agility 9 LCD display 10 P...

Page 4: ...The mode available on this model is the mode 2 with the layout of the throttle on left It is not possible to switch mode on this model The different calibration buttons help keep the drone stationary...

Page 5: ...re arming of the motors first Turn on the copter as well as the controller then move trottle up and down to connect after this move throttle to the left low corner and the directional lever to the rig...

Page 6: ...exhausted Charge the battery or replace it with a charged battery 4 The main rotor continues to rotate after landing Confirm that the gear lever is oriented downward 5 The main rotor rotates but the d...

Page 7: ...nt 4 328 Foam fix part 4 329 Copper bush 8 330 PCB 1 331 Steel tube 4 332 Copper bush for gear 4 333 Li po battery 1 334 Motor 4 335 Tail frame 4 This model can be equipped with different modules This...

Page 8: ...ed step by step with images and sound Wltoys Congratulations on your purchase of this product from wltoys eu Wltoys eu offers its customers a high quality product All our products are carefully tested...

Page 9: ...d Damage caused by the failure to comply with security measures or instructions Overloading the vehicle or external influences Homemade modifications on the product Electric defects due to voltage ove...

Reviews: