Page 9
7.
Menu
: Press this button to display the OSD MENU. Refer to the
Using the OSD
Menu
section of this chapter for operation and content of these menus.
8.
Mode
:
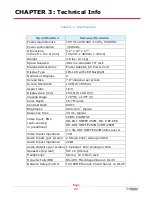
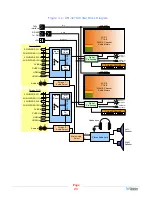
This button switches between the SDI 1, SDI 2, AV (CVBS), and HDMI
signal inputs. Pressing the
Mode
button repeatedly will cycle between the input
sources.
9.
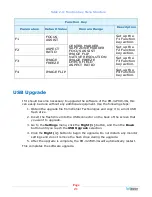
F1/Up
: The
Up
function is on the same button as the
F1
function. When the
OSD MENU is displayed, this button navigates up through the menu and sub-
menu selections and can be used to adjust the settings. When the OSD MENU is
not displayed, pressing this button initiates the
F1
function per its function key
menu setting.
10.
F2/Down
: The
Down
function is on the same button as the
F2
function. When
the OSD MENU is displayed, this button navigates down through the menu and
sub-menu selections and can be used to adjust the settings. When the OSD
MENU is not displayed, pressing this button initiates the
F2
function per its
function key menu setting.
11.
F3
: Pressing this button initiates the
F3
function per its function key menu
setting.
12.
F4
: Pressing this button initiates the
F4
function per its function key menu
setting.
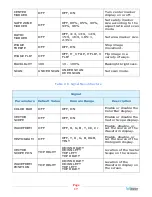
On-Screen Display Features
Functions and parameters can be selected and adjusted using the On Screen
Display (OSD) MENU. Refer to the
OSD Menus
section of this chapter.
Overlays can be added by the operator for
Area & Safety Markers
,
Center
Marker
, and to display names as
IMD
(
I
n
M
onitor
D
isplay) for identification.
Video effects such as
Focus Assist
,
Image Flip
,
Image Freeze
,
and other
features can be used to assist setup.
Overscan
,
Underscan and Native
modes control scaling and size of the video.
Audio level meter
displays, for up to sixteen channels can be displayed,
positioned in the lower left corner of the display. They show VU and PPM (PK) with
a -18db reference level.
Waveform
,
Vectorscope
, and
Histogram
displays (choice of two) can be can be
positioned in any corner of the display.


