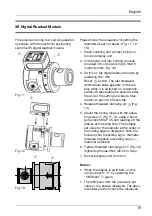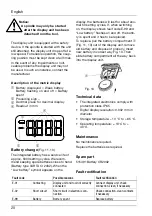
17
Notice:
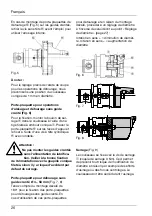
Do not make any diameter
adjustments in the clamped
state! The adjustment parts
could be damaged otherwise.
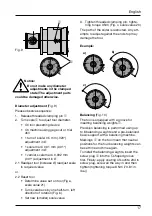
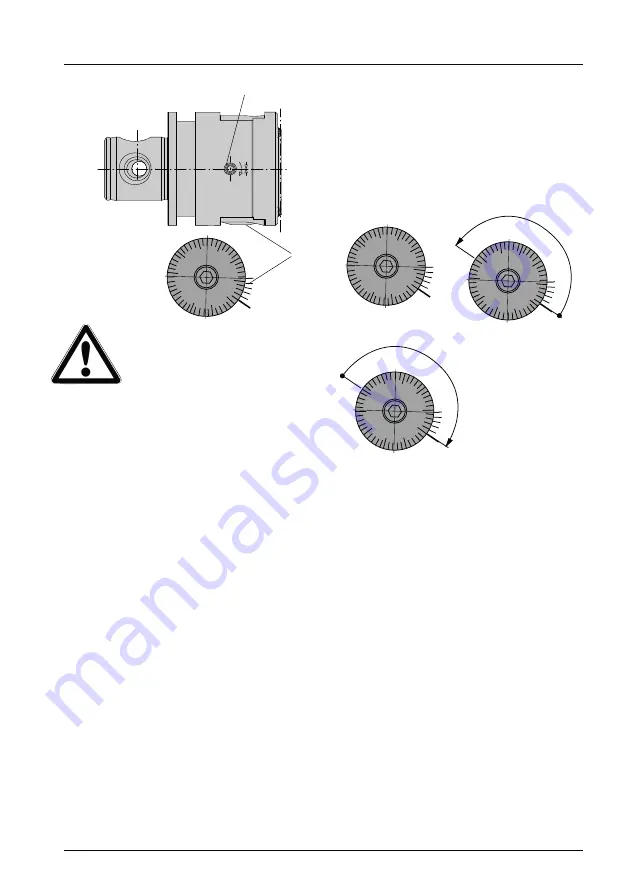
Diameter adjustment
(Fig. 9)
Please observe sequence:
1. Release threaded clamping pin
1
2. Turn scale
2
to adjust tool diameter.
• On tool presetting device
• On machine using gage cut or trial
drill
• 1 turn of scale: 0.5 mm (.020“)
adjustment in Ø
• 1 scale mark: 0.01 mm (.001“)
adjustment in Ø
• 1 vernier scale mark: 0.002 mm
(.001“) adjustment in Ø
2.1 Readjust tool (increase Ø) readjust scale
to required value
or
2.2 Reset tool
• Determine value set on tool (Fig a,
scale value 21)
• Turn scale back by one half-turn, left
direction of rotation (Fig. b)
• Set new (smaller) scale value
3. Tighten threaded clamping pin, tighte-
ning torque 3 Nm (Fig. c, scale value 20)
The path of the slider is restricted. Any att-
empts to adjust against the end stop may
damage the tool.
20
30
10
0
40
10
15
5
0
a)
20
30
10
0
40
10
5
0
15
b)
Example:
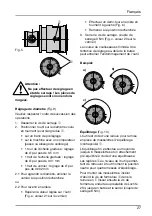
Balancing
(Fig. 10)
The tool is equipped with a groove for
inserting balancing weights
1
.
Precision balancing is performed using up
to 6 balancing weights and a pre-balanced
basic support with a balancing machine.
Markings
2
on the tool mean that neutral
positions for the four balancing weights can
be set time and time again.
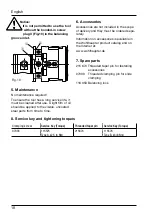
To install the balancing weights, insert the
screw plug
3
into the T-shaped groove
first. Finally, apply coating of Loctite 234 to
screw plug, screw all the way in and then
tighten (tightening torque 8 Nm (70.81 in.
lbs.))
Fig. 9
2
20
30
10
0
40
10
15
5
0
20
30
10
0
40
10
15
5
0
c)
English
1
Summary of Contents for VARIOBORE 536
Page 1: ......


