background image

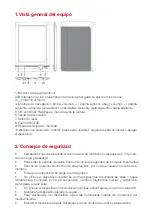
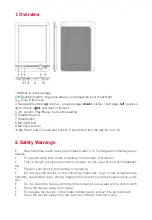
1. Overview

1.     Back to previous page

2.     Backlight switch, long press allows you to adjust the level of backlight

3.     Entry in the menu

4. Navigation buttons: 

up

: / previous page, 

down:

 volume - / next page, 

left

: previous 

track or back, 

right

: next track or forward

5. OK: confirm, Play/Pause, menu while reading

6. Headphone port

7. Reset button

8. Mini USB port

9. Memory card slot

10.      Power button: press and hold for 5 seconds to turn the device on or off

2. Safety Warnings

• 

New batteries reach peak performance after 2 to 3 charge and discharge pro-

cesses.

• 

To prevent data loss, make a backup of important information.

• 

This is a high precision electronic product, so the user should not disassem-

ble.

• 

Prevent your device from falling or bumping.

• 

Do not use the device in the following conditions: high or low temperatures, 

humidity, suspended dust, strong magnetic fields and prolonged exposure to sunli-

ght.

• 

Do not clean the device with chemical solutions, use water and a cotton cloth.

• 

Keep the device away from water.

• 

To dispose the device, follow local ordinances to protect the environment.

• 

Keep the device away from the reach of children to avoid injury.

3. Preparation for Usage

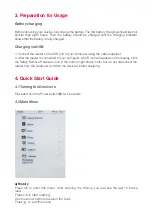
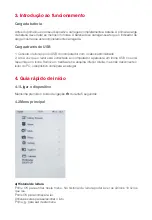
Battery charging

Before first using your device, fully charge the battery. The first battery charging should last not 

shorter than eight hours. Then the battery should be charged until the charging indicator 

shows that the battery is fully charged.

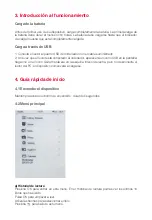
Charging via USB

1. Connect the reader to the USB port of your computer using the cable supplied

2. After the reader is connected to your computer, a USB icon will appear on the display, click 

the Safely Remove Hardware icon in the bottom right-hand corner but do not disconnect the 

reader from the computer, and then the device will start charging.

4. Quick Start Guide

4.1 Turning the Device on

Press and hold the Power button       for 5 seconds

4.2 Main Menu

a) History

Press OK to enter this menu. After entering the History, you can see the last 10 books 

read.

Press OK to start reading.

Use the arrow buttons to select the book.

Press       to exit this menu.

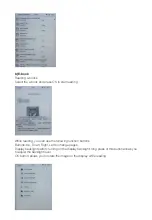
b) E-book

Reading e-books

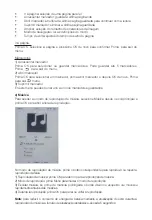
Select the e-book and press OK to start reading

While reading, you can use the following function buttons

Buttons: Up, Down, Right, Left to change pages

Display backlight switch: turning on the display backlight, long press of this button allows you 

to adjust the backlight level

OK button: allows you to rotate the image on the display while reading

Menu button: allows you to enter the settings

• 

Go to page: selection of a page to read

• 

Save bookmark: saving the last read page

• 

Load bookmark: opening the last saved page to resume reading

• 

Delete bookmark: deleting the last saved page

• 

Zoom: selection of the size of the displayed characters

• 

Browse mode: reading mode settings

• 

Flip time: setting the page turning time

Go to page

Press OK, select the page and press OK again to confirm. Press  to exit the menu.

Bookmarks

1) Saving bookmarks

Press OK to select or save bookmarks. You can save up to 5 bookmarks. Press       to exit the 

menu.

2) Displaying bookmarks

Press OK to select one bookmark, press load bookmark and then press OK again. Press        to 

exit the menu.

3) Removing bookmarks

In this menu you can individually delete all the saved bookmarks. 

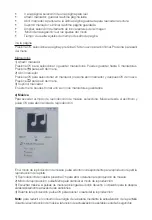
c) Music

To access the music playback mode, select Music from the desktop and press OK to open the 

playlist.

In the music playback mode, press the corresponding button to play or repeat the track playback.

1) Music playback: press OK to open or stop playing music

2) Playback mode: press Menu to change the playback mode

3) Listening to music: long press the right or left button to quickly scroll through the songs.

4) During playback, press OK to stop or resume playback.

Note: 

in order to reduce the battery power consumption by refreshing the screen while playing 

music, the refresh function is set every 5 seconds.

d) Images

Use the Up / Down buttons to select the Images option in the main menu. Press OK to select 

the list of images.

Select one image and then press OK to open it.

When viewing images, the buttons below perform the following functions:

'Up', 'Down': previous / next photo

'Left', 'Right': previous / next photo

OK: rotating the image in 2 directions

Menu: setting the viewing mode when the image is open

You can set the viewing mode. You can select the viewing mode in the manual mode or in the 

automatic mode.

e)  Settings

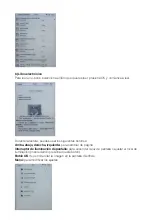
The Settings menu includes the following functions:

• 

Language: selecting the appropriate language

• 

Date and time: selection and setting the appropriate date ad time

• 

Auto off time: if you set the device to turn off after 3, 5, 10, 15 or 20 minutes, the device 

will turn off if not in use

• 

Clear history: deleting records concerning the read books from the browser history

• 

Restore default: restoring factory settings such as: language, date, time

• 

System information: you can check the software version, internal memory, and the 

memory card capacity

• 

Set bright: setting the level of display brightness for reading books at night

f) Explorer

Shows all the files on the device and the memory card; in this menu you can read books 

and browse photos

Button functions:

'Up', 'Down': scrolling the list of files

'Left', 'Right': buttons used for changing pages

OK: opening file

g) Calendar

Functions of the buttons in the calendar menu:

'Up', 'Down': changing months and days

'Left', 'Right': changing days

OK: selection of the month or year

4.3 Turning off

Press and hold the Power button          for 5 seconds to turn the device off.

5. Reset of the Device

If the reader displays the content improperly or crashes, it should be reset. To do this, you need a pin 

or a needle with which you press the Reset button located in a small opening in the bottom part of the 

device.

After a hard reset, the device should begin to work properly.

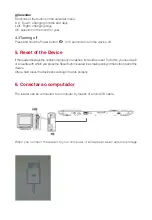
6. Conectar ao computador

The reader can be connected to a computer by means of a mini USB cable.

When you connect the reader to your computer, it will appear as an external storage. 

The following icon should appear on the display:

• 

When downloading or uploading files, do not disconnect the USB cable, otherwise you 

may damage the software

• 

If you want to disconnect the reader from your computer, make sure that the down-

loading or uploading process is complete

• 

If your computer uses Windows 2000 or Windows XP, you must remove the device by 

double-clicking on 'Safely Remove Hardware' or the data will be lost

• 

After the downloading or uploading process is complete 'Safely Remove Hardware' to 

disconnect the reader from your computer

More info and support

For more information about our products, practical advices, frequent questions, users 

manuals, updates, etc. visit http://www.wolderelectronics.com. 

To contact our technical support visit http://www.wolderelectronics.com/soporte/servicio-tecnico

Declaration of conformity

GLOBAL WOLDER GROUP S.L, Polígono Industrial de Barros nº29, 39408 Barros, Cantabria, 

Spain, declares that this product, model miBuk Ilusion, complies with the provisions of Directive 

99/05/CE on Radio Equiments and Telecommunications (R&TTE), and Directive 2004/108/CEE 

on Electromagnetic Compatibility, according to harmonized standards. 

Summary of Contents for miBuk ilusion

Page 1: ...Manual de usuario ...

Page 2: ...lcanzan el nivel máximo de rendimiento después de 2 ó 3 proce sos de carga y descarga Para evitar la pérdida de datos hace una copia de seguridad de los datos importantes Éste es un producto electrónico de alta precisión por lo que el usuario no debe des montarlo Evita que el dispositivo se caiga o reciba golpes No utilices el dispositivo cuando se den las siguientes circunstancias altas o bajas t...

Page 3: ...e el lector está conectado al ordenador aparecerá un icono USB en la pantalla haga clic en el icono Quitar hardware en la esquina inferior derecha pero no desconecte el lector del PC el dispositivo comenzará a cargarse 4 Guía rápida de inicio 4 1 Encender el dispositivo Mantén presionado el botón de encendido durante 5 segundos 4 2 Menú principal a Historial de lectura Presiona OK para entrar en e...

Page 4: ...ura puedes usar los siguientes botones Arriba abajo derecha izquierda para cambiar de página Interruptor de iluminación de pantalla para encender la luz de pantalla o ajustar el nivel de iluminación manteniendo presionado este botón Botón OK te permite rotar la imagen en la pantalla mientras Menú para modificar los ajustes ...

Page 5: ...OK de nuevo Presiona para salir del menú 3 Suprimir marcador En este menú puedes borrar uno a uno los marcadores guardados c Música Para acceder al modo de reproducción de música selecciona Música desde el escritorio y pulsa OK para abrir la lista de reproducción En el modo de reproducción de música pulsa el botón correspondiente para reproducir o repetir la reproducción de la pista 1 Reproducción...

Page 6: ...ona el idioma Configuración de hora selección y ajustes de fecha y hora Apagado automático puedes configurar el dispositivo para que se apague des pués de 3 5 10 15 o 20 minutos de inactividad Borrar historial te permite borrar los registros relativos a los libros en el historial del navegador Recuperar config predef restaura valores de fábrica idioma fecha hora Información del sistema permite com...

Page 7: ...e bloquea se debe restablecer Para ello es necesario un alfiler o una aguja con la que presionar el botón Reset que se encuentra en una pequeña abertura en la parte inferior del dispositivo Tras un restablecimiento completo el dispositivo debe comenzar a funcionar adecuadamente 6 Conectar al ordenador El lector ebook puede conectarse a un ordenador a través de un cable mini USB Cuando conectes el ...

Page 8: ...u ordenador Más información y soporte Para más información de nuestros productos consejos prácticos preguntas frecuentes manuales de usuario actualizaciones etc visita http www wolderelectronics com Para contactar con nuestro servicio de asistencia técnica visita http www wolderelectronics com soporte servicio tecnico Declaración de conformidad GLOBAL WOLDER GROUP S L Polígono Industrial de Barros...

Page 9: ...User manual ...

Page 10: ...teries reach peak performance after 2 to 3 charge and discharge pro cesses To prevent data loss make a backup of important information This is a high precision electronic product so the user should not disassem ble Prevent your device from falling or bumping Do not use the device in the following conditions high or low temperatures humidity suspended dust strong magnetic fields and prolonged expos...

Page 11: ...le supplied 2 After the reader is connected to your computer a USB icon will appear on the display click the Safely Remove Hardware icon in the bottom right hand corner but do not disconnect the reader from the computer and then the device will start charging 4 Quick Start Guide 4 1Turning the Device on Press and hold the Power button for 5 seconds 4 2 Main Menu a History Press OK to enter this me...

Page 12: ...ing you can use the following function buttons Buttons Up Down Right Left to change pages Display backlight switch turning on the display backlight long press of this button allows you to adjust the backlight level OK button allows you to rotate the image on the display while reading ...

Page 13: ...ks Press OK to select one bookmark press load bookmark and then press OK again Press to exit the menu 3 Removing bookmarks In this menu you can individually delete all the saved bookmarks c Music To access the music playback mode select Music from the desktop and press OK to open the playlist In the music playback mode press the corresponding button to play or repeat the track playback 1 Music pla...

Page 14: ...ing the appropriate language Date and time selection and setting the appropriate date ad time Auto off time if you set the device to turn off after 3 5 10 15 or 20 minutes the device will turn off if not in use Clear history deleting records concerning the read books from the browser history Restore default restoring factory settings such as language date time System information you can check the ...

Page 15: ...f the Device If the reader displays the content improperly or crashes it should be reset To do this you need a pin oraneedlewithwhichyoupresstheResetbuttonlocatedinasmallopeninginthebottompartofthe device After a hard reset the device should begin to work properly 6 Conectar ao computador The reader can be connected to a computer by means of a mini USB cable When you connect the reader to your com...

Page 16: ...Safely Remove Hardware to disconnect the reader from your computer More info and support For more information about our products practical advices frequent questions users manuals updates etc visit http www wolderelectronics com To contact our technical support visit http www wolderelectronics com soporte servicio tecnico Declaration of conformity GLOBAL WOLDER GROUP S L Polígono Industrial de Bar...

Page 17: ......

Page 18: ......

Page 19: ...Manual de utilizador ...

Page 20: ...as novas alcançam o nível máximo de rendimento depois de 2 ou 3 proces sos de carga e descarga Para evitar a perdida de dados faça uma cópia de segurança dos dados importan tes Este é um produto eletrónico de alta precisão pelo que o utilizador não deve des montá lo Evite que o dispositivo caia ou receba golpes Não utilize o dispositivo quando se deem as seguintes circunstâncias altas ou baixas te...

Page 21: ...strado 2 Uma vez que o leitor está conectado ao computador aparecerá um ícone USB no ecrã faça clique no ícone Remover o hardware na esquina inferior direita mas não desconecte o leitor do PC o dispositivo começará a carregar 4 Guia rápido de início 4 1 Ligar o dispositivo Mantenha premido o botão de ligação durante 5 segundos 4 2 Menu principal a Historial de leitura Prime OK para entrar neste me...

Page 22: ... leitura pode usar os seguintes botões Em cima em baixo direita esquerda para mudar de página Interruptor de iluminação de ecrã para ligar a luz do ecrã ou ajustar o nível de iluminação mantenha premido este botão Botão OK permite lhe entretanto rodar a imagem no ecrã Menu para modificar las definições ...

Page 23: ...r marcador e depois OK de novo Prima para sair do menu 3 Suprimir marcador En este menú puedes borrar uno a uno los marcadores guardados c Música Para aceder ao modo de reprodução de música selecione Música desde o ecrã principal e prima OK para abrir a lista de reprodução No modo de reprodução de música prima o botão correspondente para reproduzir ou repetir a reprodução da faixa 1 Reprodução de ...

Page 24: ... selecione o idioma Configuração da hora seleção e ajustes de hora e data Apagado automático pode configurar o dispositivo para que se apague depois de 3 5 10 15 ou 20 minutos de inatividade Apagar historial permite lhe apagar os registos relativos aos livros no historial do navegador Recuperar config predef restaura valores de fábrica idioma data hora Informação do sistema permite comprovar a ver...

Page 25: ...e bloqueia deve reinicializa lo Para isso é necessário um alfinete ou uma agulha para premir o botão Reset que se encontra numa pequena abertura na parte inferior do dispositivo Depois de um restabelecimento completo o dispositivo deve começar a funcionar ade quadamente 6 Conectar ao computador O leitor ebook pode conectar se a um computador através de um cabo mini USB Quando conecte o leitor eboo...

Page 26: ...o seu computador Mais informação e suporte Para mais informação dos nossos produtos conselhos práticos perguntas frequentes manuais de utilizador atualizações etc visite http www wolderelectronics com Para contactar com o nosso serviço de assistência técnica visite http www wolderelectro nics com soporte servicio tecnico Declaração de conformidade GLOBAL WOLDER GROUP S L Polígono Industrial de Bar...

Page 27: ......

Page 28: ......

Page 29: ...1 Manuel d utilisation ...

Page 30: ...r ou éteindre l appareil 2 Conseils de sécurité Les batteries neuves atteignent un niveau maximum de rendement après 2 ou 3 processus de charge et de décharge Afin d éviter la perte de données il est recommandé de réaliser une copie de sécurité des données importantes Ceci est un produit électronique de haute précision l utilisateur ne doit en aucun cas le démonter Évitez que l appareil ne chute o...

Page 31: ...ster en charge jusqu à ce que le voyant de charge indique que celle ci est complètement rechargée Charge grâce au port USB 1 Branchez le lecteur au port USB de l ordinateur à l aide du câble fourni 2 Une fois le lecteur connecté à l ordinateur une icône USB apparaitra sur l écran cliquez sur l icône Retirer le dispositif dans le coin inférieur droit mais sans débrancher le lecteur du PC l appareil...

Page 32: ...ous souhaitez lire cliquez OK et commencez à lire Durant la lecture vous pouvez utiliser les boutons suivants Haut bas droite gauche pour changer de page Interrupteur d éclairage de l écran pour allumer l éclairage de l écran ou régler le niveau d illumination maintenez appuyé ce bouton Bouton OK il vous permet la rotation de l image de l écran Menu pour modifier les définitions ...

Page 33: ...quez OK pour sélectionner un marque page cliquez ouvrir marque page et ensuite OK de nouveau Cliquez pour sortir du menu 3 Supprimer marque page Dans ce menu vous pouvez supprimer un à un les marque pages enregistrés c Musique Pour accéder au mode de lecture de musique sélectionnez Musique sur l écran principal et cliquez OK pour ouvrir la liste de lecture Danslemodedelecturedemusique appuyezsurle...

Page 34: ...nfiguration de l heure sélection et réglages de la date et de l heure Arrêt automatique vous pouvez configurer l appareil pour qu il s éteigne après 3 5 10 15 ou 20 minutes d inactivité Éteindre historique il vous permet de stopper les registres relatifs aux livres dans l histo rique du navigateur Restaurer config initiale restaurer les valeurs d usine langue date heure Information du système il p...

Page 35: ...initialiser Pour cela vous avez besoin d une fine tige ou d une aiguille pour enfoncer le bouton Reset qui se trouve dans une petite ouverture sur la partie inférieure de l appareil Après le redémarrage complet l appareil doit recommencer à fonctionner correctement 6 Brancher à un ordinateur Le lecteur ebook peut être branché à un ordinateur grâce à un câble mini USB Lorsque vous branchez le lecte...

Page 36: ... votre ordinateur Plus d information et support Pour plus d information concernant nos produits conseils pratiques questions fréquentes manuels d utilisation mises à jour etc rendez vous sur http www wolderelectronics com Pour contacter notre service d assistance technique rendez vous sur http www wolderelectronics com soporte servicio tecnico Déclaration de conformité GLOBAL WOLDER GROUP S L Zone...

Page 37: ......

Page 38: ......
Reviews: