background image

30

I

Ricambi

Interventi di riparazione

Condizioni di garanzia

Custodite con cura il certificato di garanzia compilato dal vendi-
tore oppure il documento d‘acquisto.

Per la durata di 24 mesi a partire dalla data d‘acquisto, la Ditta Wolf-
Garten presta garanzia in conformit al rispettivo stato della tecnica e 
allo scopo/campo d‘applicazione. I diritti legali del consumatore finale 
non vengono compromessi mediante i criteri di garanzia di seguito 
elencati.

Premesse per il diritto alla garanzia di 24 mesi:

-

Impiego dell‘apparecchio esclusivamente per uso privato

.

Nel campo industriale oppure negli esercizi di noleggio, la garan-
zia viene ridotta a 12 mesi.

- Uso conforme allo scopo e rispetto di tutte le avvertenze delle istru-

zioni sull‘uso che formano parte integrante delle nostre condizioni 
di garanzia.

- Rispetto degli intervalli di manutenzione prescritti.
- Nessuna variazione della costruzione su propria iniziativa.

- Montaggio delle parti di ricambio originali/accessori della WOLF.
- Presentazione del documento di garanzia compilato e/o del certifi-

cato d‘acquisto.

La garanzia non si estende alla normale usura delle lame, alle parti di 
fissaggio delle lame come ruote di frizione, cinghie trapezoidali e cin-
ghie dentate, ruote portanti/pneumatici, filtri dell‘aria, candele d‘ac-
censione e cappucci per candele. In caso di riparazioni effettuate in 
proprio, si estingue automaticamente ogni diritto di garanzia. I difetti e 
le carenze che si dovessero presentare le cui cause sono riconducibili 
a difetti di materiale o di produzione, vengono rimossi esclusivamente 
dalle nostre officine autorizzate (il venditore ha il diritto alla riparazi-
one) oppure dal produttore stesso, se egli fosse pi vicino alla Vostra 
sede. Sono escluse rivendicazioni non rientranti nella prestazione di 
garanzia. Non  ammessa una rivendicazione per la fornitura di parti di 
ricambio.  Eventuali danni dovuti al trasporto non devono essere seg-
nalati a noi, ma alla ditta competente per il trasporto, poich in caso 
contrario i diritti all‘indennizzo da parte di queste imprese decadono.

Articolo N°

Denominazione articolo

Informazione sul prodotto

4904 031

Sacco di raccolta

4908 096

Vi 34 X

Lama di ricambio

4908 074

caricabatterie

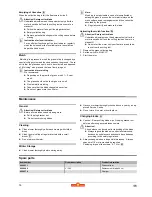
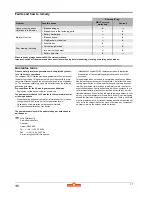
Rimedio (X):

Problema

Possibi causale

Officina Di 

assistenza WOLF

In modo

autonomo

Funzionamento rumoroso, 
forte vibrazione dell‘apparec-
chio

Lama danneggiata

X

---

Lama di fissaggio allentata

---

X

Il motore non funziona

• Accumulatore vuoto

---

X

• Lama bloccata

---

X

• Spina a ponte non inserita

---

X

Pessime prestazioni di raccol-
ta

 / 

Cattiva falciatura

Lama smussata

X

---

Cesto raccoglierba otturato

---

X

Altezza di taglio non regolata

---

X

• Accumulatore guasto

X

---

In caso dubbio rivolgersi sempre ad un‘officina di assistenza WOLF.
Attenzione, arrestare il tosaerba prima di ogni controllo, lavoro di pulitura o di lavori alla lama ed estrarre la chiave di accensione.

Le prestazioni in garanzia vengono rese dalle nostre officine au-
torizzata contrattualmente o nel caso di:

I

WOLF Italia S.r.l.
Via G. Galilei 5
20060 Ornago (Mi)

Tel.: ++ 39 (0 39) - 62 86 41
Fax: ++ 39 (0 39) - 6 01 02 57
E-mail: info@it.WOLF-Garten.com

Z

WOLF-Gartten Schweiz AG
Nordringstraße 16
4702 Oensingen

Tel.: ++ 41 (62) - 3 88 04 50
Fax: ++ 41 (62) - 3 88 04 60

Summary of Contents for Compact plus 34 AC

Page 1: ...visning 37 Käyttöohje 43 Bruksanvisning 49 Bruksanvisning 55 Návod k pouižtí 61 Használatiutasítás 67 Instrukcjaobslugi 73 Upute za upotrebu 79 Návod na obsluhu 85 Navodilo za uporabo 91 Инструкция за употреба 97 Инструкция по применению 103 Instrucţiuni de folosire 110 KullanımKılavuzu116 ΟδηγίεςΧρήσης122 Compact plus 34 AC ...

Page 2: ...2 F G E 1 2 D B C A ...

Page 3: ...3 click R Q L 6 0 5 0 40 30 20 M K H J S U 6 7 NM T 1 2 N P O ...

Page 4: ...r du guidon 10 Reglage de la hauteur de coupe 11 Croquis de la hauteur de coupe 12 Broche de levage raccord de fiche re tiré I 1 Interrutore per avviare 2 Archi di sicurezza 3 Regolazione profondit di lavoro 4 Deflettore 5 Raccoglierba 6 Interruttore CCM cut collect mulch 7 Spina a ponte 8 Indicatore di pieno carico 9 Regolazione altezza impugnatura 10 Regolazione dell altezza di taglio 11 Indicat...

Page 5: ...nd dem richtigen Gebrauch des Gerätes vertraut Der Be nutzer ist verantwortlich für Unfälle mit anderen Perso nen oder deren Eigentum Beachten Sie die Hinweise Erläuterungen und Vorschriften Lassen Sie nie Kinder oder andere Personen die die Gebrauchsanweisung nicht kennen den Rasenmäher benutzen Jugendliche unter 16 Jahre dürfen das Ge rät nicht benutzen Örtliche Bestimmungen können das Mindestal...

Page 6: ... Mähen Sie nicht an steilen Abhängen z Seien Sie besonders vorsichtig wenn Sie rückwärts Mähen und den Mäher zu sich ziehen z Schalten Sie den Mäher ab wenn Sie ihn kippen oder trans portieren z B von zum Rasen oder über Wege z Vorsicht nicht an laufende Schneiden greifen z Stellen Sie sich nicht vor die offene Grasauswurföffnung z Bevor Sie den Mäher aufheben oder wegtragen schalten Sie den Motor...

Page 7: ...Ladegerät Bringen Sie es im Fall einer Störung in eine Fachwerkstatt Akkus umweltgerecht entsorgen Entsorgung Montage Griffgestänge befestigen 1 Vorsicht Beim Zusammenlegen oder Ausklappen des Griffgestän ges kann das Kabel beschädigt werden z Das Kabel in den Kabelknickschutz einlegen z Beim Anpassen der Griffhöhe darauf achten dass das Kabel nicht gequetscht wird 1 Klappen Sie das Griffunterteil...

Page 8: ...ens lässt sich der Rasenmäher nicht einschalten Schnitthöhe einstellen 1 Achtung Rotierendes Messer Arbeiten Einstellungen am Gerät nur bei abgeschaltetem Motor und stillstehendem Schneidwerkzeug vornehmen z Motor ausschalten und Steckerbrücke ziehen 1 Ziehen Sie den Hebel nach außen 2 Stellen Sie die gewünschte Schnitthöhe ein 3 Drücken Sie Hebel wieder nach innen Schnitthöhe Graszustand z Mähen ...

Page 9: ...ndes Messer Arbeiten Einstellungen am Gerät nur bei abgeschaltetem Motor und stillstehendem Schneidwerkzeug vornehmen z Motor erst dann starten wenn Ihre Füße in sicherem Ab stand zum Schneidwerkzeug sind 1 Entfernen Sie den Fangsack 2 Drehen Sie den Schalter auf MULCH 3 Starten Sie den Motor Wartung Allgemein 1 Achtung Rotierendes Messer Vor allen Wartungs und Reinigungsarbeiten z Steckerbrücke z...

Page 10: ...ertigungsfehler zurückzuführen sind werden ausschließlich durch unsere Vertragswerkstätten der Verkäufer hat das Recht zur Nach besserung in Ihrer Nähe oder falls er näher liegt durch den Herstel ler beseitigt Über die Garantieleistung hinausgehende Ansprüche sind ausgeschlossen Ein Anspruch auf Ersatzlieferung besteht nicht Etwaige Transportschäden sind nicht uns sondern dem zuständigen Transport...

Page 11: ... and warnings Careless or improper use of the machine may cause serious or fatal injury The user is responsible for any accidents involving other people or other people s pro perty Never let children or other persons who are not familiar with the operating instructions use the lawnmower Ju veniles under l6 years may not use the equipment Lo cal regulations may specify the minimum age of the operat...

Page 12: ...or grass catchment devices z Caution do not touch running cutters z Always keep hands and feet away from rotating parts Do not stand in front of the grass ejector opening z Never lift or carry a lawnmower while the motor is running z Never open the guard flap while the motor is still running z Before removing the grass catchment device turn off the mo tor and wait until the cutting gear has stoppe...

Page 13: ...ction properly take it to a qualified service centre for in spection Dispose of batteries in an environmentally responsible manne Disposal Assembly Fasten handle bars 1 Caution The cable can be damaged while folding up or pulling out the handle bar z Inlay the cable in the bend protection z When adjusting the handle height take care that the ca ble is not crimped 1 Fold the bottom part of the hand...

Page 14: ...orrectly seated z The mower cannot be switched on during the charging process Set cut height 1 Attention Rotary cutter blade Undertake work adjustments on the equipment only after the motor is switched off and the cutting tool has come to a standstill z Switch the motor off and pull the plug bracket out 1 Pull the lever out 2 Set the desired cutting height 3 Press the lever back in Selection of Cu...

Page 15: ...y and manure the lawn Activating the mulch function 1 Attention Rotary cutter blade Undertake adjustments on the equipment only after the motor is switched off and the cutting tool has come to a standstill z Do not start the motor until your feet are at a safe dis tance from the cutting tool 1 Remove the grass collecting bag 2 Set the switch to MULCH 3 Start the motor Maintenance General 1 Attenti...

Page 16: ... plug connec tors Any guarantee claim shall be immediately void in the event of unauthorised repairs Faults and defects which can be traced to ma terial or manufacturing faults will be rectified exclusively by our con tracted workshops the seller has the right to remedy a defect in your vicinity or by the manufacturer if the latter is closer Any claims going beyond the provision of a guarantee are...

Page 17: ...mmandes et l utilisation correcte de la tondeuse L utilisateur est responsabledes acci dents causés aux tiers ou à leur propriété Observez les indications explications et prescriptions ne jamais laisser des enfants ou autres personnes n ayant pas lu la notice d utilisation utiliser la tondeuse L utilisation de cet appareil est interdit à tout adolescent de moins de 16 ans Respecter la réglementati...

Page 18: ...n terrain trs raide z Soyez particulirement prudent lorsque vous tondez en recu lant et que vous tirez la tondeuse vers vous z Arrtez la tondeuse lorsque vous voulez la basculer la vider ou la déplacer par exemple depuis la zone gazonnée ou pour al ler jusqu la zone gazonnée ou pour passer des allées de jar din z N utilisez jamais la tondeuse si ses dispositifs de protection sont abîmés ou ses dis...

Page 19: ...r le câble pourrait endommager à la fois la fi che et le câble et compromettre ainsi la sécurié électrique z N utiliser jamais le chargeur lorsque le câble la fi che ou le chargeur lui même ont été endommagés pardes effets extéri eurs Confi er alors le chargeur à l atelier de réparation le plus proche z Eviter d affecter le refroidissement du chargeur en obstruant les fentes de refroidissement Ne ...

Page 20: ...rd de fiche 2 Brancher la fiche de l appareil de charge sur l accumulateur 3 Enfincher la fiche de l appareil de charge dans une prise une lampetémoin rouge s éclaire alors sur l appareil de charge 4 L accumulateur est entirement chargé lorsque cette lampe s éteint 3 Il faut charger les tondeuses accumulateur plomb avant leur hivernage de mme qu aprs chaque tonte z Temps de charge avec l appareil ...

Page 21: ...de commencer 3 Instructions pour l indicateur de niveau Pour un fonctionnement efficace de l indicateur de niveau nettoyez régulièrement les trous d au dessous de l indica teur de niveau du sac de collecte à l aide d une brosse à main Paillage mulch Le paillage consiste à couper l herbe à plusieurs reprises à l aide d un système de coupe spécial et de la remettre sur le sol Il n y a donc pas de dé...

Page 22: ...ce qu il faut effectuer une vérification de l équilibre conformément aux règlements de sécurité z Faites changer toujours les aubes dans un atelier spécialisé Un torquemètre de 10 mm est obligatoirement éxigé Couple de serrage pour les vis 6 7 N m z N employez que des pièces de rechange d origine Pièces de rechange Comment remédier aux pannes T U U Numéro d article Désignation pour la commande Inf...

Page 23: ... dents ni aux pièces de fixation de ces dents telles que les disques de friction les courroies trapézoïdales dentées les roues pneus le s filtre s à air les bougies cosses d allumage En cas de réparation arbitraire tout droit à la garantie est automatiquement supprimé Les défauts et les imperfections dont les causes sont attribuées à un défaut de matériau ou de fabrication sont réparés exclusiveme...

Page 24: ...enti di comando e con il coretto uti lizzo dell apparecchio L utente è responsabile degli incidenti causati ad altre persone o alla loro proprietà Osservare le idicazioni le spiegazioni e le prescrizioni Non lasciare mai bambini o altre persone che non co noscono le istruzioni per l uso nei pressi della falciatri ce Non è consentito a persone al di sotto dei 16 anni di utilizzare questo apparecchi...

Page 25: ...rasportarlo per es da verso il prato o su strada z Non utilizzare mai l apparecchio con dispositivi di protezione danneggiati o dispositivi di sicurezza mancanti come disposi tivi di deviazione e o raccoglierba z Prestare particolare attenzione a non afferrare le lame ment re lavorano z Non portare mai mani o piedi in vicinanza delle parti rotanti Non intrattenersi davanti all apertura di scarico ...

Page 26: ...el caricaricabatterie sia sempre garantito tenendo pulita e libera la griglia di raffredda mento Non utilizzare il caricabatterie nelle vicinanze di sor genti di ca lore z Non tentare di smontare il caricabatterie o di aprire Smaltire le batteria in modo ecologico Smaltimento rifi uti Montaggio Fissare l asta dell impugnatura 1 Cautela Il cavo può venire danneggiato quando viene piegata od estratt...

Page 27: ...ere effettuata sfi lare la spina Impostate l altezza del taglio 1 Attenzione Lama rotante Fate dei lavori regolazioni sull attrezzo solo dopo aver spento il motore e dopo che l elemento da taglio si sia com pletamente fermato z Spegnere il motore e staccare la spina a ponte 1 Tirare la leva verso l esterno 2 Impostare l altezza di taglio desiderata 3 Premere di nuovo la leva all interno Altezza di...

Page 28: ...carificate e concimate il prato regolarmente Attivare la funzione di mulching 1 Attenzione Lama rotante Iniziate regolazioni sull attrezzo solo dopo aver spento il motore e dopo che l elemento da taglio si sia completamente fermato z Non avviate il motore fino a che i vostri piedi non siano ad una distanza di sicurezza dall elemento da taglio 1 Togliere il raccoglierba 2 Ruotare l interruttore su ...

Page 29: ...nducibili a difetti di materiale o di produzione vengono rimossi esclusivamente dalle nostre officine autorizzate il venditore ha il diritto alla riparazi one oppure dal produttore stesso se egli fosse pi vicino alla Vostra sede Sono escluse rivendicazioni non rientranti nella prestazione di garanzia Non ammessa una rivendicazione per la fornitura di parti di ricambio Eventuali danni dovuti al tra...

Page 30: ...chtig door en stelt u zich op de hoogte van de bedieningsorganen en het correcte gebruik van het apparaat De gebruiker is aannsprakelijk voor ongevallen met andere personen en voor schade aan hun eigendommen Neem de aan wijzingen voorschriften en de verklarende teksten in acht Kinderen of andere personen die de gebruiksaanwij zing niet kennen mogen de grasmaaier nooit gebrui ken Veranderingen en t...

Page 31: ...zijn of zelfs ontbreken z Let op geen snijdende vlakken aanraken z Houdt uw handen en voeten altijd uit de buurt van roterende delen Ga niet voor de opening staan waaruit het gras uitge worpen wordt z Til een grasmaaier nooit op en draag hem nooit als de motor nog loopt z Open de veiligheidsklep nooit als de motor nog loopt z Voor het afnemen van de grasopvangbak Motor afzetten en wachten totdat d...

Page 32: ...n Gebruik het apparaat niet in de buurt van warmtebronnen z Open in geen geval de acculader Breng deze bij een storing naar een erkende vakwerkplaats Accu s milieugerecht verwijderen Afvalverwijdering Montage Duwboom bevestigen 1 Opgelet De kabel kan beschadigen tijdens het opbergen of het verwijderen van de vergrendeling z Plaats de kabel in de in de beschermhoes z Wanneer men de hoogte van de he...

Page 33: ...hoogte in 1 Opgelet Roterend snijmes Verricht enkel werkzaamheden aanpassingen aan de apparatuur nadat de motor uitgezet is en het snij onderdeel tot stilstand is gekomen z Zet de motor uit en trek de stekkerbrug los 1 Trek de hendel naar buiten 2 Stel de gewenste maaihoogte in 3 Druk de hendel weer naar binnen Maaihoogte Grasconditie z Maait u indien mogelijk bij droog weer Daarmee wordt het gras...

Page 34: ...lmatig loswerken en bemesten Mulchfunctie activeren 1 Opgelet Roterend snijmes Verricht enkel aanpassingen aan de apparatuur nadat de motor uitgezet is en het snij onderdeel tot stilstand is gekomen z Start de motor niet totdat uw voeten zich op een veilige afstand van het snij onderdeel bevinden 1 Verwijder de vangzak 2 Draai de schakelaar naar MULCH 3 Start de motor De verzorging Algemeen 1 Opge...

Page 35: ...den uitsluitend door onze contractueel gebon den werkplaatsen in uw buurt of indien deze dichterbij gesitueerd is door de fabrikant verholpen Buiten de verstrekte garantie ressorte rende claims zijn uitgesloten Een aanspraak op levering van reserve onderdelen bestaat niet Eventueel door het transport resolterende beschadigingen dienen niet aan onze firma doch aan de bevoegde met het transport bela...

Page 36: ...nformitätsverfahren Conformity assessment procedure followed La procédure appliquée pour l évaluation de la conformité procedura di conformità applicata toegepaste conformiteitmethode Anvendte overensstemmelsesmetoder sovellettu vastaavuusmenettely anvendt konformitetsprosess använt konformitetsförfarande Anhang VI Name und Anschrift der beteiligten benannten Stelle name and address of the notifie...

Page 37: ...járások Stosowana procedura zgodnosci primijenjeni postupak konformiteta použitý spôsob odsúhlasenia uporabljenemu postopku o skladnosti Приложен метод на съгласуване Применённая методика соответствия Procedura de conformitate aplicată Uygulanan uygunluk yöntemi Διαδικασία που εφαρμόζεται σχετικά με την πιστοποίηση Anhang VI Prípadne jméno a adresa jmenovaného podílejícího se místa a nevezett rész...

Page 38: ...www WOLF Garten com Teil Nr 0054 503 TB ...

Reviews: