47
W415-1600 / 06.01.16
B
C
D
If ThE PoWER sUPPLy CABLE Is DAMAGED, IT MUsT BE REPLACED By AN AUThoRIZED TEChNICIAN To AVoID
ALL RIsKs.
WARNING
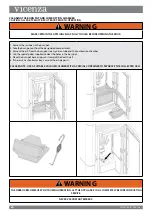
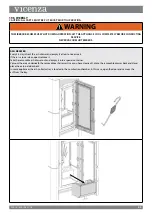
THE FRONT EDGE OF THE HOPPER LID BECOMES VERY HOT, DO NOT TOUCH THE AREA BELOW THE HANDLE.
THIS ROD BECOMES VERY HOT DURING OPERATION. WAIT UNTIL APPLIANCE HAS COOLED COMPLETELY OR WEAR HEAT
RESISTANT GLOVES WHEN CLEANING OR HANDLING THIS APPLIANCE.
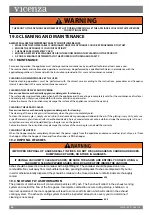
19.7 RoUTINE MAINTENANCE CARRIED oUT By AUThoRIZED TEChNICIANs
Routine maintenance must be performed at least once a year.
As the appliance uses pellets as fuel, it needs an annual routine maintenance interval that must be performed by an authorized
technician by only using original spare parts.
Failure to do so can affect the appliance's safety and you may no longer be entitled to the warranty conditions.
By following the cleaning schedule reserved to the user and reported in the user and maintenance manual, one ensures correct
combustion in the appliance over time, thereby preventing any anomalies and/or malfunctions that may require more work to be
performed by the technician. Requests for routine maintenance are not covered by the product's warranty.
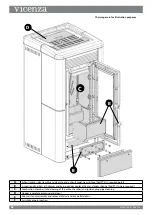
DooR, Ash DRAWER AND BURN PoT GAsKETs
The gaskets ensure the tightness of the appliance and its consequent proper operation.
They must be checked periodically: in the event they are worn or damaged they must be replaced immediately.
These operations must be carried out by an authorized technician.
CoNNECTIoN To ThE fLUE
Vacuum and clean the pipe that leads to the flue yearly or whenever necessary. If there are horizontal sections, any debris must be
removed before it obstructs the flue.
19.8 PUTTING ThE EQUIPMENT oUT of sERVICE (END of ThE sEAsoN)
At the end of every season, before shutting down the appliance, we recommend completely emptying the hopper and using a vacuum
cleaner to clear up any pellets and dust residue inside it.
You should also completely disconnect the appliance and disconnect the power supply cable.
Routine maintenance must be performed at least once a year.
Summary of Contents for Vicenza V5.2
Page 15: ...SECURING kit FIGURE 2 15 W415 1600 06 01 16...
Page 26: ...TRIVET 7 REPLACE TRIVET 26 W415 1600 06 01 16...
Page 56: ...57 W415 1600 06 01 16 24 0 NOTES 44 1...
Page 57: ...58 W415 1600 06 01 16 44 1...
Page 72: ...14 W415 1600 06 01 16 KIT DE FIXATION FIGURE 2...
Page 83: ...25 W415 1600 06 01 16 GRILLE REMPLACER LA GRILLE...


