background image

2 | Español

Cocina de inducción

Nota importante:

Para garantizar que este producto se instala y funciona de 
la forma más eficaz y segura posible, tenga en cuenta la 
información que se destaca en esta guía:

Cuando aparece 

NOTA IMPORTANTE

, se resalta 

información que resulta especialmente importante. 

PRECAUCIÓN

 indica una situación en la que se pueden 

sufrir heridas leves o provocar daños al producto si no se 
siguen las instrucciones.

AVISO

 indica el peligro de que se produzcan heridas graves 

o incluso la muerte si no se respetan las precauciones. 

NOTA IMPORTANTE:

 Este aparato debe instalarse de 

acuerdo con las normativas vigentes y solo puede ser 
utilizado en un lugar que esté bien ventilado. Lea las 
instrucciones antes de instalar o utilizar este aparato.

NOTA IMPORTANTE:

 conserve estas instrucciones para el 

inspector eléctrico local.

Información del producto

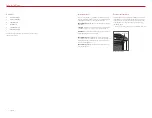
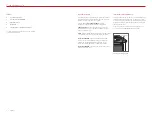
En la placa de datos del producto encontrará información 
importante, incluyendo el modelo y el número de serie.  
La placa de datos se encuentra en la parte derecha inferior 
del panel de mandos, junto encima del horno. Observe la 
siguiente ilustración.

Si necesita recurrir a un servicio técnico, póngase en 
contacto con su distribuidor de Wolf autorizado.

Índice

2


Cocina de inducción

3


Precauciones de seguridad

4


Especificaciones

5


Instalación

7


Localización y solución de problemas


Las características y especificaciones están sujetas a 
cambios sin previo aviso.

PLACA DE DATOS

 
Ubicación de la placa de datos


Summary of Contents for ICBDO30PM-S-PH

Page 1: ...Induction Range Installation Guide Gu a de instalaci n Guide d installation Guida all installazione Installationsanleitung Installatiehandleiding...

Page 2: ...regulations in force and only used in a well ventilated space Read the instructions before install ing or using this appliance IMPORTANT NOTE Save these instructions for the local electrical inspector...

Page 3: ...ance without the anti tip device in place and engaged Failure to do so can result in death or serious burns to children or adults To reduce the risk of burns do not move this appliance while hot ANTI...

Page 4: ...e through a fused connection unit or a suitable isolator which complies with national and local safety regulations The on off switch should be easily accessible after the appliance has been installed...

Page 5: ...eg clockwise to raise and counterclockwise to lower HINGE LOCK SCREW Oven door removal Installation Anti Tip Bracket To prevent the range from tipping forward the anti tip bracket must be installed To...

Page 6: ...Connect L2 to position five 6 Connect L3 to position four 7 Tighten the screws on the strain relief and install the terminal block cover Troubleshooting IMPORTANT NOTE If the range does not operate pr...

Page 7: ...United States and other countries Efficiency Rating BURNER EFFICIENCY 762 mm RANGE ZONE mm RATING Wh kg Cooking Zones 160 x 160 134 6 2 200 x 200 163 4 250 x 250 181 6 Total Energy Consumption 158 5...

Page 8: ...solo puede ser utilizado en un lugar que est bien ventilado Lea las instrucciones antes de instalar o utilizar este aparato NOTA IMPORTANTE conserve estas instrucciones para el inspector el ctrico loc...

Page 9: ...o el dispositivo antivuelco Si no se siguen estas instrucciones podr a causar graves quemaduras o incluso la muerte de ni os o adultos Para reducir el riesgo de quemaduras no mueva la unidad mientras...

Page 10: ...nacionales y locales El interruptor de encendido apagado debe encontrarse en un lugar accesible despu s de haber instalado el aparato Si no es posible acceder al interruptor despu s de la instalaci n...

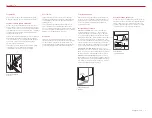
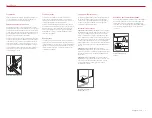
Page 11: ...a subirlas y hacia la izquierda para bajarlas TORNILLO BLOQUEO DE LA BISAGRA Extracci n de la puerta del horno Instalaci n Soporte antivuelco Debe instalarse el soporte antivuelco para evitar que la c...

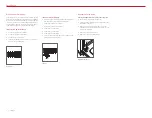
Page 12: ...cuatro cinco y seis Observe la siguiente ilustraci n 2 Conecte la toma de tierra a la posici n 1 3 Conecte el neutro a la posici n 2 4 Conecte L1 a la posici n seis 5 Conecte L2 a la posici n cinco 6...

Page 13: ...se responsabiliza de las tareas de mantenimiento que deban realizarse para corregir una instalaci n inadecuada Sub Zero Sub Zero Design Sub Zero Snowflake Design Dual Refrigeration The Living Kitchen...

Page 14: ...s e uniquement dans un endroit bien ventil Lisez toutes les instructions avant d installer ou d utiliser cette cuisini re REMARQUE IMPORTANTE Conservez ces instructions pour l lectricien local charg d...

Page 15: ...lace et engag le support antibasculement La non observation de cette recommandation peut causer des br lures graves voire mortelles aux enfants comme aux adultes Pour minimiser le risque de br lures n...

Page 16: ...on ou un sectionneur adapt conform ment la r glementation nationale et locale en mati re de s curit lectrique On doit pouvoir acc der facilement l interrupteur une fois la cuisini re install e Si ce n...

Page 17: ...tournant le pied dans le sens des aiguilles d une montre pour le rehausser et dans le sens contraire pour le baisser VIS LOQUET DE CHARNI RE D montage de la porte du four Installation Support antibas...

Page 18: ...talliques des Positions 4 5 et 6 Reportez vous l illustration ci dessous 2 Connectez la masse en Position 1 3 Connectez le neutre en Position 2 4 Connectez L1 en Position 6 5 Connectez L2 en Position...

Page 19: ...able des d pannages requis en raison d une mauvaise installation Sub Zero Sub Zero Design Sub Zero Snowflake Design Dual Refrigeration The Living Kitchen Great American Kitchens The Fine Art of Kitche...

Page 20: ...Leggere le istruzioni prima di installare o utilizzare l elettrodomestico NOTA IMPORTANTE Conservare le istruzioni per l elettricista locale Informazioni sul prodotto Le informazioni importanti che r...

Page 21: ...tivo antiribaltamento non in posizione e agganciato La mancata osservanza di queste istruzioni potrebbe causare ustioni o il decesso a bambini o adulti Per ridurre il rischio di ustioni non spostare l...

Page 22: ...rezza nazionali e locali L interruttore on off deve essere facilmente raggiungibile in seguito all installazione dell elettrodomestico Se dopo l installazione l interruttore non accessibile sar necess...

Page 23: ...llo deve essere effettuata solo da installatori o tecnici di assistenza certificati Non sollevare o trasportare lo sportello del forno tenendolo dall impugnatura Per la rimozione aprire completamente...

Page 24: ...passare i fili attraverso il foro di scarico tensione e nella morsettiera INSTALLAZIONE MONOFASE 1 Collegare la terra alla posizione uno 2 Collegare il neutro alla posizione due 3 Collegare L1 alla po...

Page 25: ...non sar ritenuta responsabile dell assistenza richiesta per correggere un installazione difettosa Sub Zero Sub Zero Design Sub Zero Snowflake Design Dual Refrigeration The Living Kitchen Great America...

Page 26: ...allieren und darf nur in einem gut bel fteten Raum verwendet werden Vor der Installation bzw der Verwendung dieses Ger ts die Anweisungen lesen WICHTIGER HINWEIS Bewahren Sie diese Installations anwei...

Page 27: ...chutz vorrichtung installiert und eingerastet ist Eine Nichtbeachtung dieser Anweisung kann bei Kindern und Erwachsenen zum Tod oder zu ernsthaften Verbrennungen f hren Um das Risiko von Verbrennungen...

Page 28: ...ngsmodul oder einen geeigneten Trennschalter vorgenommen werden das bzw der den nationalen und rtlichen Sicherheitsvorschriften entspricht Der Ein Aus Schalter sollte nach der Installation des Ger ts...

Page 29: ...es Beins nach oben und unten in der H he verstellt werden SCHARNIER RIEGEL SCHRAUBE Abbauen der Backofent r Installation Kippschutzhalterung Um ein Abkippen des Herdes nach vorne zu verhindern muss di...

Page 30: ...tfernen Siehe Abbildung unten 2 Erdleiter an Position 1 anschlie en 3 Neutralleiter an Position 2 anschlie en 4 L1 an Position 6 anschlie en 5 L2 an Position 5 anschlie en 6 L3 an Position 4 anschlie...

Page 31: ...Wolf ist nicht f r Servicearbeiten verantwortlich die zur Korrektur einer fehlerhaften Installation erforderlich sind Sub Zero Sub Zero Design Sub Zero Snowflake Design Dual Refrigeration The Living K...

Page 32: ...gels ge nstalleerd en wordt alleen in een goed geventileerde ruimte gebruikt Lees de instructies voordat u dit apparaat installleert of gebruikt BELANGRIJK Bewaar deze instructies voor de plaatselijke...

Page 33: ...iening niet is geplaatst en naar behoren werkt Dit kan dodelijke gevolgen hebben of tot ernstige brandwonden leiden bij kinderen en volwassenen Verplaats dit apparaat niet als het heet is om brandwond...

Page 34: ...olator te worden aangesloten die voldoet aan nationale en plaatselijke veiligheidsvoorschriften De aan uit schakelaar moet gemakkelijk te bedienen zijn na installatie van het toestel Als de schakelaar...

Page 35: ...e achterste wielen aan te passen Draai de voorste poten rechtsom om te verhogen of linksom om te verlagen SCHROEF SCHARNIER PUNT Verwijderen van ovendeur Installatie Anti kantelbeugel Om te voorkomen...

Page 36: ...es vier vijf en zes Zie de afbeelding hieronder 2 Sluit de aarde aan op positie n 3 Sluit neutraal aan op positie twee 4 Sluit L1 aan op positie zes 5 Sluit L2 aan op positie vijf 6 Sluit L3 aan op po...

Page 37: ...Wolf is niet verantwoordelijk voor onderhoud na een ondeskundige installatie Sub Zero Sub Zero Design Sub Zero Snowflake Design Dual Refrigeration The Living Kitchen Great American Kitchens The Fine...

Page 38: ...2 Wolf 2 3 4 5 7...

Page 39: ...wolfappliance com 3 38 48 mm 3mm...

Page 40: ...m 914 mm 914 mm 413 mm 240 V 50 3 4 240 220 240 V AC 50 60 Hz 3 380 415 V AC 50 Hz 762 mm 51 A 19 A 914 mm 60 A 33 A 3 mm EN60335 3 mm 100 C A 914 mm 305 mm 330 mm 457 mm 152 mm 914 mm W 762 mm 914 mm...

Page 41: ...wolfappliance com 5 3 4 1 4 7 16 8 5 mm 12 10 mm 38 mm 3 8 38 mm 48 mm 159 mm 38 48 mm...

Page 42: ...6 3 1 2 3 L1 4 3 1 2 3 4 L1 5 L2 6 L3 7 1 2 3 4 5 6 5 4 3 2 1 3 6 5 4 3 2 1...

Page 43: ...Zero Sub Zero Design Sub Zero Snowflake Design Dual Refrigeration The Living Kitchen Great American Kitchens The Fine Art of Kitchen Design Wolf Wolf Design Wolf Gourmet W Design red colored knobs Co...

Page 44: ...WOLF APPLIANCE INC P O BOX 44848 MADISON WI 53744 USA WOLFAPPLIANCE COM 800 222 7820 9027756 REV B 11 2020...

Reviews: