Induction Range (IR) Series
Induction Range (IR) Series
Component Removal
3-12
#827176 - Revision A.1 - December, 2016
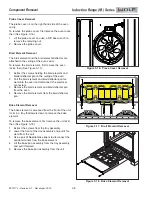
Cooling Fan Removal
The cooling fan is located behind a support bracket on
the back of the unit.
To remove the cooling fan, first remove the back panel,
then (See Figure 3-27):
Extract the screws from the fan motor bracket going
1
into the inner side panels.
Extract the screws from the fan motor bracket into
2
the cooling fan.
Push the fan motor bracket down.
3
Rotate the top of the cooling fan down while pulling
4
the cooling fan out.
Disconnect the electrical wires from the cooling fan.
5
Remove the cooling fan.
6
Terminal Block Removal
The terminal block is located on the back of the unit.
Connecting the unit to power can be done by removing
the access cover. Replacing the terminal block requires
the unit to be pulled from the installation.
To remove the terminal block, first remove the back
panel, then (See Figure 3-28):
Disconnect the wires from the terminal block.
1
Extract the screws holding the terminal block to the
2
back wall of the unit.
Remove the terminal block.
3
NOTE:
When using a three wire connection (L1, L2,
and Ground) the connection between the ground screw
and terminal block remains in tact. When using a four
wire connection (L1, L2, N, and Ground) the connection
between the ground screw and terminal block is broken.
Induction Cooktop Wiring Harness
The induction cooktop wiring harness is connected
directly to the terminal block and is separate than the
unit wiring harness. The induction wiring harness
includes a noise filter on the harness (See Figure 3-29).
Figure 3-27. Cooling Fan Removal
Figure 3-28. Terminal Block Removal
Figure 3-29. Noise Filter on Induction Harness


