


20
03/2009
7.2
Safety instructions regarding dust
Caution! Ultra-fine sanding dust!
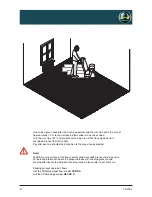
Wear a dust mask when sanding woodfloor or floorboard flooring.
A dust mask is supplied as accessory with the machine.
When the machine is used for its proper purpose, the sanding of wooden floors naturally
produces dust. The machine is equipped with an integrated dust absorption system to blow
the dust into the dust bag. The dust is collected in the dust bag. Nevertheless, the system can-
not prevent the release of fine and ultra-fine dust.
Caution! Health hazard!
Wood dust, particularly when treated with impregnating agents, solvents or coatings,
can cause allergic reactions (e.g. of the skin or respiratory system) after an allergisation
period. Beechwood and oakwood dust is classified as carcinogenic (nasal mucosa
cancer). Dust from other types of wood is suspected of having carcinogenic effects.
Caution! Risk of fire!
No smoking! Do not smoke while sanding!
Ignition sources are prohibited in rooms where sanding work is being carried out!
Air the rooms thoroughly.
In combination of an ignition source and the oxygen in the air, wood dust can cause
fires and explosions.
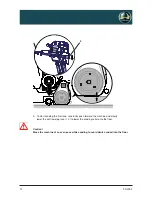
Caution! Risk of fire!
Sanding over metal parts, like e.g. nails, can produce sparks which are blown
into the dust bag together with the wood dust. Glowing metal chips can ignite
a fire in the dust bag even hours later.
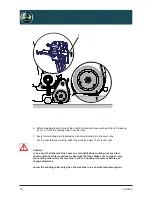
Every time the machine is stopped or after completing work, immediately empty
the sanding dust in the dust bag to a fireproof, non-flammable container.
The container must be covered with a fireproof, non-flammable lid.
Store the container only outdoors.


