7
8
Before Your First Use
Read all instructions in this manual carefully.
Place your oven on a level surface such as a countertop or table.
Be sure the sides, back and top of the oven are at least four inches away
from any walls, cabinets or objects on the counter or table.
Remove Wire Baking Rack, Drip/Roasting/Baking Pan, Wire Broiling
Rack and Crumb Tray. Wash them in hot, sudsy water and dry
thoroughly before placing in the oven.
When you are ready to use the oven, be sure that the TEMP and TIME
Controls are in the “OFF” position. Plug the cord into a 120-volt
AC outlet.
We recommend a “trial run” at a high temperature to familiarize yourself
with your oven and to eliminate any protective substance or oil that may
have been used for packing and shipping. Set the TEMP Control to Broil,
and the TIME Control to 15 minutes. After the first 10 minutes, switch the
TEMP Control to 450° to activate the lower heating elements. Next, turn
your Function Control to “Toaster” and your Shade Control to “5” and
depress the Bread Lifter. A small amount of smoke and odor may be
detected in both your oven and toaster during this trial run. This is
normal.
To avoid scratching, marring, discoloration or fire hazard, do not store
anything on top of the oven, especially during operation.
This appliance requires 1,200 watts and should be the only appliance
operating on the circuit.
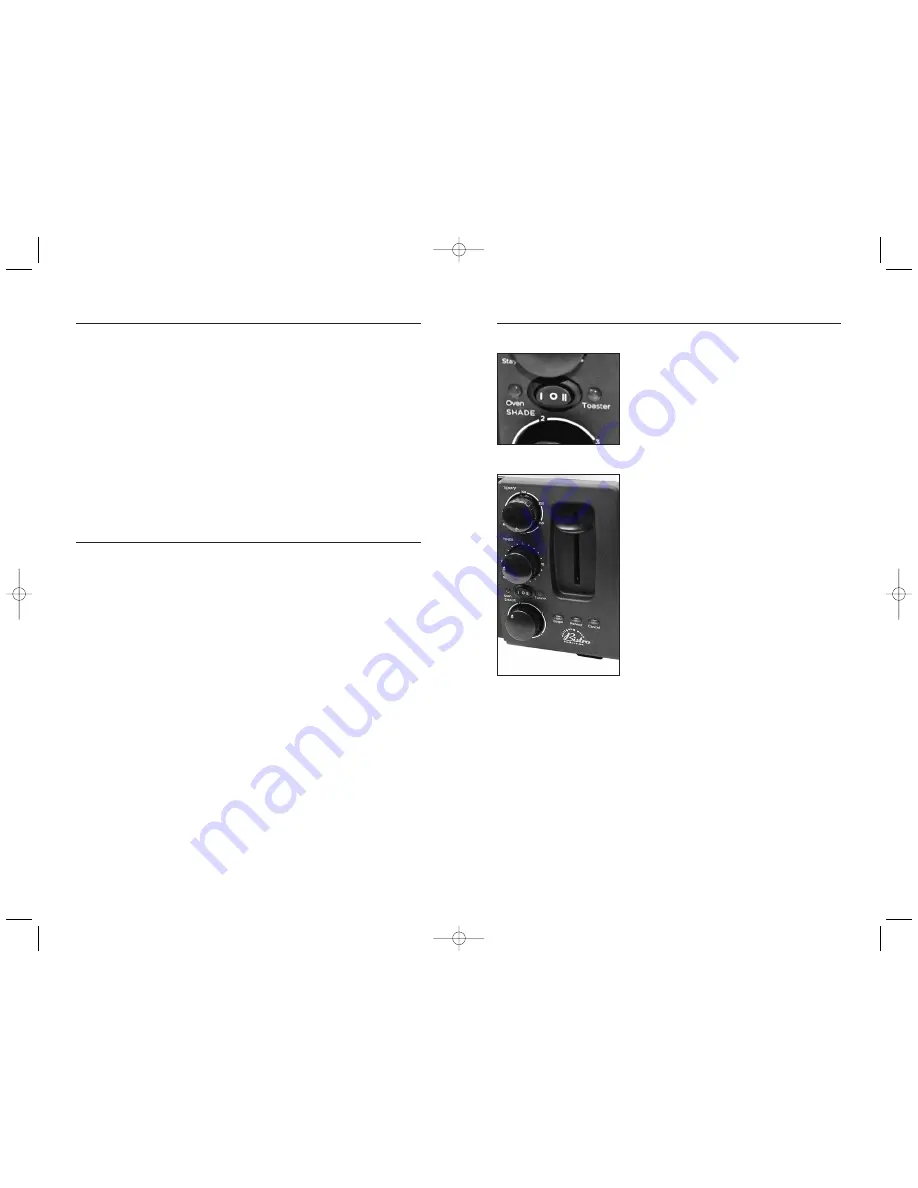
Function Control
You cannot operate both the toaster and
the oven at the same time. This allows the full
1,200 watts to be available to either setting.
To use the oven, simply press the Function
Control labeled “I”. To use the Toaster, use the
Function Control labeled “II”. The Indicator
light for the selected function will illuminate
based upon your setting. If your indicator is
left in the center position, your oven will
remain off.
TEMP Control
Choose the desired or recommended
temperature up to 450°. You will notice a
deliberate click to set your temperature to
the 450° setting. Both bottom and top
heating elements operate when the
temperature is set up to 450°. Only the top
heating elements will work when you set
your TEMP control to “Broil”.
TIME Control
Your oven comes equipped with a 15-minute
timer and “Stay-on” function. To bypass the
timer and keep your oven on, turn the timer
knob counter clockwise to the “Stay-on”
position. You must manually turn your oven
off when you have completed using your oven.
To utilize the 15-minute timer, simply turn it
clockwise to the desired setting. Your oven will
turn off and a signal bell will sound indicating
the time has expired.
Shade Control
The Shade Control is only applicable in
“Toaster” mode. Both TEMP and TIMER
controls are inactive in “Toaster” mode.
Toast Function
Your Toaster comes equipped with a bagel,
reheat, and cancel button. To utilize these
functions, you must first place your bread in
the toaster, lower the bread guide and then
press the applicable function.
Control Panel Operation
Figure 1
•
Do not operate while unattended.
•
Do not cook, warm, or toast rice cakes, fried foods, non-bread items
or toaster pastries in Toaster. Toaster pastries should be heated in a
toaster oven broiler.
•
Do not use Toaster for any food product that has been spread or
iced with margarine, butter, jelly, frosting, syrup, or other spread.
•
Do not cover toaster or use near curtains, drapes, walls, cabinets,
paper or plastic products, cloth towels, etc.
•
Close supervision is necessary when used by or near children.
•
Never cover toaster or toast slots during operation.
•
Always unplug toaster when not in use.
•
Failure to follow these instructions can result in death or fire.
TOASTER WARNING
Fire Hazard
ToasterOven manual07 2/7/07 4:04 PM Page 7


