background image

ENGLISH

Please observe the following:

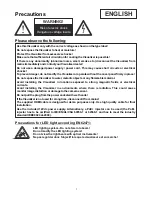
Risk of electric shock

Dangerous voltage inside

WARNING!

Precautions

1

Use this Visualizer only with the correct voltage as shown on the type label !
Do not expose the Visualizer to heat or moisture !
Protect the Visualizer from excessive shocks !
Make sure that sufficient air circulation for cooling the Visualizer is possible!
If there is any abnormality (abnormal noise, smell, smoke etc.) disconnect the Visualizer from 
mains immediately and contact your Visualizer dealer!
Do not use a damaged power supply / power cord. This may cause short circuits or electrical 
shocks!
To prevent danger, do not modify the Visualizer or operate without the cover panel firmly in place!
Do not expose the Visualizer to water, metallic objects or any flammable material.
Avoid  installing  the  Visualizer  in  locations  exposed  to  strong  magnetic  fields  or  electrical 
currents.
Avoid  installing  the  Visualizer  in  environments  where  there  is  radiation.  This  could  cause 
monitor image distortion or damage to the camera sensor.
Do not pull the plug from the power socket with wet hands!
If the Visualizer is not used for a long time, disconnect it from mains!
The supplied HDMI cable is designed for demo purposes only. Use high quality cable for final 
installation.
Use  the  included  12Vdc  power  supply. Alternatively,  a  PoE+  injector  can  be  used  (the  PoE+ 
injector has to be certified to IEC/EN/UL/CSA 60950-1 or 62368-1 and has to meet the industry 
standard IEEE802.3at-2009).

Precautions for LED light according EN62471:

LED lighting system - Do not stare into beam!
Do not modify the LED lighting system!
Do not view the light beam with optical instruments!
Ne pas regarder dans l'objectif lorsque le visualiseur est en marche!

Summary of Contents for VZ-8light4

Page 1: ...ternet homepage for additional information www wolfvision com support BEDIENUNGSANLEITUNG BEDIENUNGSANLEITUNG INSTRUCTIONS INSTRUCTIONS Remote Pack Remote Pack ENGLISH DEUTSCH R VZ 8neo VZ 8neo 4 VZ 8light 4 VZ 8light ...

Page 2: ...any flammable material Avoid installing the Visualizer in locations exposed to strong magnetic fields or electrical currents Avoid installing the Visualizer in environments where there is radiation This could cause monitor image distortion or damage to the camera sensor Do not pull the plug from the power socket with wet hands If the Visualizer is not used for a long time disconnect it from mains ...

Page 3: ...user s authority to operate the equipment Information to the user and integrator Worldwide Patents Copyright Information Copyright by WolfVision All rights reserved WolfVision Wofu Vision and are registered trademarks of WolfVision HoldingAG Austria No part of this document may be copied reproduced or transmitted by any means without prior written permission from WolfVision Except documentation ke...

Page 4: ... one of the two following methods 1 Connect a pre prepared USB stick to the Visualizer and follow the on screen instructions OR 2 Use vSolution Link Software by WolfVision selecting the Administration tab and then clicking on Online OfflineActivation Using the prepared USB Stick Connect a power source and a monitor to the Visualizer then switch on the Visualizer Plug in the USB stick Apop up messa...

Page 5: ...iver camera head 3 Camera keys for camera control and menu navigation see page 9 4 IR remote control see pages 5 and 6 1 2 3 4 Connectors 1 5 USB port to Client to peripheral devices for external storage units see page 9 R VIS UA LIZ ER VZ 8 ne o ZOOM 1 3 4 VZ 8light4 VZ 8neo PoE HDMI IN OUT 2 VZ 8light4 VZ 8neo 5 5 ...

Page 6: ...e enter the Advanced Settings Miscellaneous Settings and set the IR Code to A B C or D code A is default To change the IR code on the remote control simultaneously press PRESET 1 PRESET 2 and ZOOM TELE ress PRESET 1 PRESET 2 and ZOOM WIDE on screen menu go to 10 15 Each time this key combination is used the code switches fromAto B C D A in the given order For resetting the remote control to codeA ...

Page 7: ...y Pressing this key activates the Auto Focus 14 Manual FOCUS keys For focusing the picture 15 ZOOM keys To enlarge or downsize the pick up area of the camera 16 USB key For displaying pictures of the USB memory see page 8 17 EXT key Shows the signal of the external input use the VZ key to display the live image again see pages 7 and 8 18 SNAPSHOT key Pressing this key activates the SNAPSHOTfunctio...

Page 8: ...e displayed Additionallya status line with picture information is shown on the bottom of the screen Pressing the VZ key 12 returns to the camera live image temporarily The presentation will stay at the last shown picture to continueuse the MEM key To select one of the currently displayed pictures move the picture bar with the NAVIGATION keys and confirm it with the ENTER key Use MEMORY keys 4 6 to...

Page 9: ...n you connect the USB stick with the prepared XML file a respective on screen message will pop up for information As soon as the USB stick is removed the previous settings are restored The file will be stored in the default USB folder which can be changed in the on screen menu WOLFVISION by default All settings of the Visualizer can be changed in the on screen menu see next page Built in Digital S...

Page 10: ...de B three times for code C and four times for code D For regular use of the WolfVision Visualizer it is not necessary to go into the Visualizer s menu and change settings Inexperienced users should not make any adjustments here To enter the on screen menu press the MENU key 21 on the remote control or use the key on the camera head and keep it pressed until the menu appears Settings of the Visual...

Page 11: ... verwenden Andernfalls kann es zu Kurzschlüssen und zu elektrischen Schlägen kommen Am Gerät keinerlei Umbauten vornehmen und das Gerät niemals ohne Gehäusedeckel in Betrieb nehmen Keine entflammbaren oder metallischen Gegenstände oder Flüssigkeiten in das Geräteinnere dringen lassen Das Gerät nicht im Bereich von starken Magnetfeldern und elektrischen Feldern in Betrieb nehmen Das Gerät nicht im ...

Page 12: ...8847 0 EU 0 362 737 US 5 027 219 und weitere Copyright Information Copyright WolfVision Alle Rechte vorbehalten WolfVision Wofu Vision und sind registrierte Warenzeichen der WolfVision Holding AG Austria Dieses Dokument darf ohne vorherige schriftliche Zustimmung von WolfVision weder als Ganzes noch in Teilen mit irgendwelchen Mitteln kopiert reproduziert oder übertragen werden Ausgenommen sind Ko...

Page 13: ...lgenden Methoden 1 Anschließen eines vorbereitetem USB Stick und Befolgung der On ScreenAnweisungen ODER 2 vSolution Link Software by WolfVision Administration Tab Online OfflineAktivierung Aktivierung mittels vorbereitetem USB Sticks Visualizer mit dem Stromnetz und einem Monitor verbinden und einschalten USB Stick am Visualizer anschließen Eine Pop Up Meldung zurAktivierung erscheint Mit den Nav...

Page 14: ...Z ER VZ 8 ne o ZOOM 1 3 4 PoE HDMI IN OUT 2 4 VZ 8light VZ 8neo 5 5 4 VZ 8light VZ 8neo Teile des Visualizers Anschlüsse 1 1 Anschlüsse auf der Geräterückseite siehe weiter unten 2 IR Empfänger Kamerakopf 3 Kamera Tasten zur Steuerung und Menünavigation siehe Seite 9 4 IR Fernbedienung siehe Seiten 5 und 6 ...

Page 15: ... gewünschten Code Code A ist Standard Auf der Fernbedienung selbst ändern Sie den Code durch gleichzeitiges Drücken beider PRESET 1 PRESET 2 nd der ZOOM TELE Taste PRESET 1 PRESET 2 und ZOOM WIDE 10 u 15 Jedes Mal wenn diese Tastenkombination gedrückt wird wechselt der Code vonAzu B C D undA usw Mit der Tastenkombination wird die Fernbedienung wieder auf CodeAzurückgesetzt Verschiedene IR Codes We...

Page 16: ...aste Durch Drücken derAF Taste wirdAutofokus aktiviert 14 Manual FOCUS Tasten Zum Fokussieren 15 ZOOM Tasten Vergrößert oder verkleinert denAufnahmebereich der Kamera 16 USB Taste Zur Darstellung der Bilder vom USB Stick siehe Seite 8 17 EXT Taste Zur Darstellung des externen Signals Mit der VZ Taste zeigt der Visualizer wieder das Livebild siehe Seiten 7 und 8 18 SNAPSHOT Taste Aktiviert die SNAP...

Page 17: ...der VZ Taste 12 wechselt der Visualizer zurück zum Livebild Die Präsentation bleibt beim zuletzt gezeigten Bild stehen für eine Fortsetzung drücken Sie die MEMTaste Zur Auswahl eines der dargestellten Bilder verschieben Sie den farbigen Rahmen mit den NAVIGATIONS Tasten und Drücken Sie dann die ENTER Taste Benutzen Sie dann MEMORY Tasten 4 6 um das vorige nächste Bild darzustellen Mit der ENTERTas...

Page 18: ...rte Einstellungen USB Stick Sobald ein USB Speichermedium mit einer geeigneten XML Datei angesteckt wird erscheint zur Information eine entsprechende Pop Up Meldung auf dem Bildschirm Sobald das USB Speichermedium wieder entfernt wird werden die vorherigen Einstellungen wieder hergestellt Die Dateil wird im Standardverzeichnis auf dem USB Stick gespeichert WOLFVISION Alle Einstellungen des Visuali...

Page 19: ...Ändern der Grundeinstellungen des USB Anschlusses Geräte Info In diesem Untermenü ist die Versionsnummer der aktuell installierten Firmware ersichtlich sowie auch der Status der aktivierten Feature Packs 9 CODES Kurzbefehle mit der Fernbedienung Preset speichern Drücken Sie die gewünschte PRESET Taste 10 für 2 Sekunden Aufrufenvon Presets DrückenSie die gewünschtePRESETTaste 10 kurz Bilderspeicher...

Page 20: ...33 9465 Fax 81 0 3 6233 9466 E mail wolfvision japan wolfvision com Canada WolfVision Canada Inc Ottawa Tel 1 613 741 9898 Toll free 877 513 2002 Fax 1 613 741 3747 E Mail wolfvision canada wolfvision com United Kingdom WolfVision UK Ltd Maidenhead Tel 44 1628 509067 Fax 44 1628 509100 E Mail wolfvision uk wolfvision com Toll free Asia WolfVision Pte Ltd Singapore Tel 65 6636 1268 E mail wolfvisio...

Reviews: