background image

6

3 .


G E N E R A L   I N S T A L L A T I O N   R E Q U I R E M E N T S

3.1

The installation must be in accordance with these instructions.

For the user’s protection, in the United Kingdom it is the law that all gas appliances are

installed by competent persons in accordance with the current edition of the Gas Safety

(Installation and Use) Regulations. Failure to install the appliance correctly could lead to

prosecution. The Council for the Registration of Gas Installers (CORGI) requires its

members to work to recognised standards.

In the United Kingdom the installation must also be in accordance with:

a)


All the relevant parts of local regulations.

b)


The current edition of the Building Regulations issued by the Department of the

Environment and the Welsh Office or the Building Standards (Scotland) Regulations

issued by the Scottish Development Department.

c)


All relevant codes of practice.

d)


The relevant parts of the current editions of  the following British Standards:-

BS 715

BS 5440 Part 1

BS5440 Part 2

BS 5482 Part 1
BS 5871 Part 1

BS 6461 Part 1

BS 6891

In the Republic of Ireland the installation must also conform to the relevant parts of:

a)


The current editions of:-

IS 813

b)

All relevant national and local rules in force.

3.2

Before installation, ensure that the local distribution conditions (identification

of the type of gas and pressure) and the adjustment of the appliance are compatible.

3.3

This appliance is designed for use with a Selkirk IL twin-wall 100mm (4in)

residential gas vent system with a minimum effective height of 10 ft (3.05m).

3.4

This appliance must not be installed in any room which contains a bath or

shower or where steam is regularly present.

3.5

An extractor fan may only be used in the same room as this appliance, or in any

area from which ventilation for the appliance is taken, if it does not affect the safe

performance of the appliance. Note the spillage test requirements detailed further on in

this manual. If the fan is likely to affect the appliance, the appliance must not be installed

unless the fan is permanently disconnected.

3.6

I

n the United Kingdom (GB)


no special ventilation bricks or vents are required

in the room for this appliance

.

In the Republic of Ireland (I.E.), permanent ventilation must comply with the regulations

currently in force.

3.7

Note that soft wall coverings (e.g. embossed vinyl, etc.) are easily affected by heat.

They may scorch or become discoloured when close to a heating appliance.  Please bear

this in mind when installing.

3.8

Minimum clearances to combustible surfaces and for servicing access are shown

in figure 1.

3.9

Propane gas appliances must not be installed in a cellar, basement or any room,

which is built entirely below ground level (See BS5482 Part 1).

3.10

The top castings, front castings above the access door and the glass window are

working surfaces. They become hot in use and should not be touched until the stove is

switched off and allowed to cool.

Summary of Contents for 530U PRESIDENT

Page 1: ... r C o a l s w i t h L o g s o r C o a l s w i t h L o g s o r C o a l s w i t h L o g s o r C o a l s Please keep in a safe place for future reference 600B264 06 Discard the installation and owner s manual supplied with the original Balanced flued Type C appliance when using the open flue conversion kit no 9500388 Install in accordance with this manual ...

Page 2: ... us on 0121 386 6203 In the Republic of Ireland call 353 183 75114 P l e a s e l e a v e t h i s I n s t a l l e r G u i d e w i t h t h e u s e r As supplied this appliance is for use with natural gas G20 When converted using conversion kit no 9500390 this appliance is for use with propane gas G31 This appliance is for use in the United Kingdom GB and the Republic of Ireland IE only C U S T O M E...

Page 3: ...tor 9 6 FLUE INSTALLATION APPLIANCE FIXING 10 6 1 Preparing for Floor Fixing 10 6 2 Flue system installation 10 7 FITTING SIDES SWITCH 11 8 GAS SUPPLY INSTALLATION 12 9 CERAMIC FUEL BED INSTALLATION 13 9 1 Ceramic Walls Installation 13 9 2 Ceramic Logs Installation 14 9 3 Ceramic Coals Installation 15 10 WINDOW REFITTING CHECKING 16 11 FULL OPERATING CHECKS 17 11 1 Control operation check 17 11 2 ...

Page 4: ...f the above kits must be used with each installation 1 2 Additional optional features Remote control unit Hand operated control for flame heat adjustment It may be fitted before the stove is installed or retrofitted at a later date Kit No 9500397 1 3 LP Gas LPG Conversion kit Burner injector kit for conversion from natural gas to propane Kit No 9500390 1 4 Flues This appliance is designed for use ...

Page 5: ...re sealed within a heavy duty polythene bag clearly labelled as RCF waste This is not classified as hazardous waste and may be disposed of at a tipping site licensed for the disposal of industrial waste Protective clothing is not required when handling these articles but we recommend you follow the normal hygiene rules of not smoking eating or drinking in the work area and always wash your hands b...

Page 6: ...nt of the appliance are compatible 3 3 This appliance is designed for use with a Selkirk IL twin wall 100mm 4in residential gas vent system with a minimum effective height of 10 ft 3 05m 3 4 This appliance must not be installed in any room which contains a bath or shower or where steam is regularly present 3 5 An extractor fan may only be used in the same room as this appliance or in any area from...

Page 7: ...ting 1 Top infill plate Sides pack 1 Front casting unit 2 Side casting units 1 Top air deflector 1 Switch mounting bracket 2 Self cutting screws 4 Machine screws 4 Washers Open flue conversion kit No 9500388 1 Flue adapter unit with flue monitor switch 1 Thermocouple interrupter 1 Case rear cover plate 2 P clips for flue switch leads 1 Smoke match tube 1 Spillage test label Remote control unit No ...

Page 8: ...nd electrode unit is at the left end of the burner Push in the lighting knob and turn anticlockwise through the IGN position to PILOT A spark should flash across from the pilot electrode to the pilot burner shield See figure 3 5 3 Check flame control motor 1 Fit the four batteries into the battery box Which is attached to the switch leads 2 Temporarily connect the black connector pad to the contro...

Page 9: ...he right side of the inside of the case Fit the flue switch lead to the clip See figure 10 4 Disconnect the thermocouple from the valve block See figure 11 5 Fit the thermocouple interrupter to the valve block See figure 12 6 Connect the flue switch leads into the thermocouple interrupter Screw the thermocouple into the interrupter block until finger tight Make sure that the leads are properly loc...

Page 10: ...ce away Plug the holes if necessary 6 2 Flue system installation Reposition the appliance in its final location Connect the 100mm Selkirk draughthood connector Code No 29304 to the adapter collar Install the flue system in accordance with the Selkirk instructions supplied with the system If installing the flue system into an existing masonry chimney the chimney must be cleaned and checked to make ...

Page 11: ...to the handset transmitter c If fitting remote control and active side switch Caution Don t connect the batteries in the remote control receiver until the leads are connected to the burner control unit A short circuit could result in destruction of the electrical components Snap fit the switch into the opening in the switch mounting bracket See figure 15 Fit the two switch lead clips to the right ...

Page 12: ...f the switch rocker turns the fire up See figure 22 8 G A S S U P P L Y I N S T A L L A T I O N 1 Extend the gas supply pipe to a convenient point and connect it to the inlet pipe at the rear left corner of the stove The connection is Rp1 4 1 4in B S P The supply pipe must be of rigid material e g copper Flexible connections must not be used 2 Provision for isolation of the gas supply upstream of ...

Page 13: ...l in the channel at back of the firebox and flat against the back of the firebox See figure 23 2 Locate the side walls in the channels at the sides of the firebox See figure 24 3 Remove two screws from under the top front of the firebox Using these screws fit the port cover See figure 25 Figure 25 Figure 24 Figure 23 ...

Page 14: ...ront of the firebox See figure 28 4 Place the right side log in the hollow at right of the base log Rest the narrow nose of this log on the projection at front centre of the base log It is important that the narrow nose does not drop down to touch the burner See figure 29 5 Place the left side log on base log at the left side Locate its nose tip behind the nose of the right side log It is importan...

Page 15: ... be near the middle front of the firebox See figure 32 3 Place the right front coal behind the metal lip at the front of the firebox Its left side should rest over the projection on the left front coal See figure 33 4 The centre right coal has letter R embossed underneath Place this coal behind the front right coal See figure 34 5 The centre left coal has letter L embossed underneath Place this co...

Page 16: ...ring loaded bolts through the bottom of the window and tighten to secure the bottom of the window See figure 36 4 Pull the top of the window forward and release to check that the window opens slightly and returns in the event of a delayed ignition explosion See figure 37 5 Similarly check the bottom of the window by pulling it forward and releasing See figure 38 6 Apply light hand pressure against...

Page 17: ...thermostat set at its maximum position After checking turn off the appliance Remove the pressure gauge and replace the test point sealing screw Relight the appliance Turn to the maximum thermostat position and test around the sealing screw for gas soundness with a suitable leak detection fluid 11 3 Conduct spillage check A spillage check must be made before leaving the installed appliance with the...

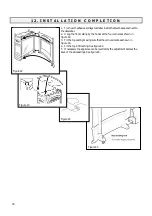
Page 18: ...g the front casting by the hooks at the four corners as shown in figure 42 3 Fit the top casting making sure that the corners locate as shown in figure 43 4 Fit the top infill casting See figure 44 5 If necessary the appliance can be levelled by the adjustment bolts at the back of the side castings See figure 45 Figure 45 Figure 44 Figure 43 Figure 42 ...

Page 19: ...s checked for safety at least every 12 months h If the fire goes out for any reason wait at least five minutes before relighting 3 Hand over to the customer this guide and the users guide 4 Advise the customer to read the Owner s Guide before operating the stove and always to follow the advice in the section headed Cleaning 1 4 S E R V I C I N G Always turn off the gas supply before commencing any...

Page 20: ...your own future reference The information should always be quoted in any correspondence with your original supplier or Wonderfire service department In the United Kingdom please telephone 0121 386 6203 In the Republic of Ireland please telephone 353 183 75114 Model 530U President Universal with Open Flue Front Tick box Black Textured Black Enamelled Green Enamelled Fuel Effect Tick box Logs Coals ...

Reviews: