Setup & Operation
Preparing The Sawmill For Towing
2
2-29
HDSdoc091108
Setup & Operation
Never use flammable fuels or liquids. If these types of liquids are
necessary to clean the blade, remove it and clean with a rag. Fail-
ure to do so may result in serious injury or death.
Before removing the blade, engage the clutch/brake lever. Let the blade spin with water running on
it for about 15 seconds. This will clean the blade of sap buildup. Wipe the blade dry with a rag
before storing or sharpening.
If you are sawing in freezing temperatures, remove the water lube bottle from the sawmill when
done sawing and store it in a warm place. Blow any remaining water from the water lube hose.
To remove water from the water valve on Super models, turn the key switch to accessory (#3), turn
the feed rate knob down to ‘0’ and place the feed switch in the forward position. Blow any remain-
ing water from the water lube hose and valve. Return the forward/reverse switch to neutral and
turn the key switch to off (#0).
2.20 Preparing The Sawmill For Towing
The Wood-Mizer trailer package makes transporting your sawmill easy and convenient. To get
your sawmill ready for towing, follow these instructions.
CAUTION!
If the weight of the sawmill exceeds 3,000 lbs (1361
Kg) for any reason, an auxiliary braking system (such as electric
brakes) must be used. Failure to do so may result in severe
machine damage.
1.
Move the saw carriage to the front end of the sawmill. Raise the rear outriggers.
2.
Move the clamp all the way in toward the main bed frame tube.
CAUTION!
Move the hydraulic clamp and turner to provide max-
imum ground clearance before towing. Failure to do so may result
in damage to the sawmill.
3.
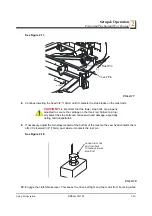
Use the hydraulic controls to raise the log turner and loader as high as they will go. Manually lift
the loader and hook the loader chain to the elbow of the turner. Use the hydraulic turner lever to
lower the turner until the chain is tight. Push the loader lever down to bring the loader arm chan-
nels up to the loader.
4.
Move the carriage forward to the travel position over the rear bed rail.
5.
Position the hole in the saw head over the travel rest pin.
6.
Lower the saw head until it is seated firmly on the rest pin.
7.
Secure the rest pin in the vertical position with the locking pin.
Summary of Contents for LT40 DH
Page 1: ......
Page 2: ......
Page 69: ...Maintenance Carriage Track Wiper Scrapers Maintenance HDSdoc091108 3 5 3 FIG 3 3 ...


