Sawmill Alignment
Complete Alignment Procedure
Sawmill Alignment
50HD07doc072310
7-31
7
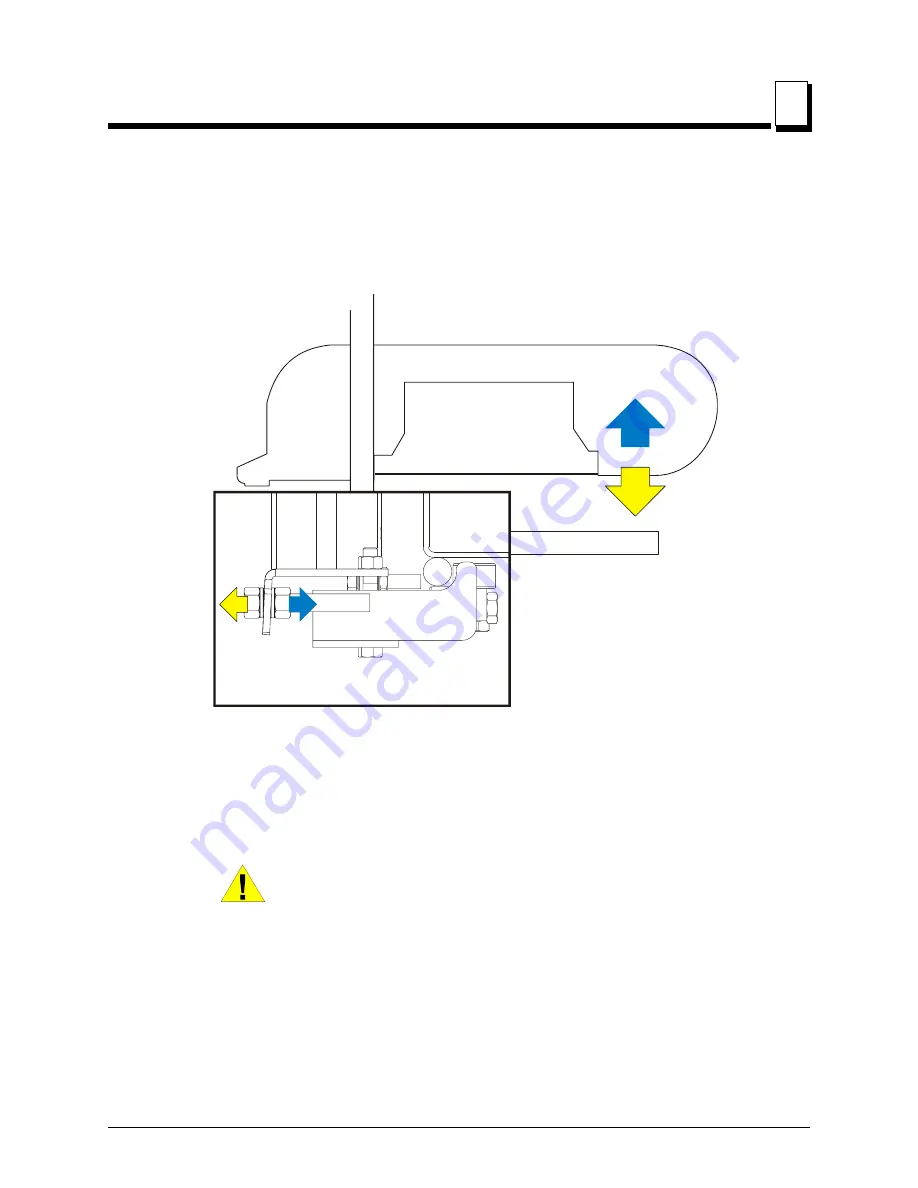
See Figure 7-26.
To adjust the saw head tilt, use the horizontal adjustment nuts. To raise
the outside of the saw head, loosen the four inner adjustment nuts 1/2 turn then tighten
the four outer nuts. To lower the outside of the saw head, loosen the four outer adjust-
ment nuts 1/2 turn then tighten the inner nuts. Recheck the saw head tilt and readjust the
nuts as necessary.
8.
After the lower track rollers are adjusted properly, adjust the upper and lower stop screws.
Tighten each screw until it just touches the rail. Then, back the screw off 1/2 turn. The gap
will be approximately 1/32" (0.8mm).
CAUTION!
It is important that the lower stop bolts are prop-
erly adjusted to secure the carriage on the track rail. Failure
to properly adjust the stop bolts can cause saw head dam-
age, especially during mill transportation.
FIG. 7-26
3H0125-2
Adjust nuts in to raise
saw head; Adjust nuts out
to lower saw head.
DETAIL OF LOWER TRACK ROLLER ASSEMBLY


