Sawmill Alignment
Complete Alignment Procedure
Sawmill Alignment
60HD-R04doc112210
7-29
7
Bed Rail Adjustment
1.
Move the clamp so it is 10" from the clamp stop. Adjust the clamp down to its lowest pos-
tion. Move the saw head forward until it is positioned over the clamp. Raise the saw head
until the blade measures 15 5/16" (385 mm) from the clamp at its lowest position.
2.
Adjust the front pivot rail 90° to the main bed tube.
3.
Move the saw head to center the blade over the front pivot bed rail.
4.
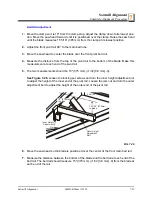
Measure the distance from the top of the pivot rail to the bottom of the blade. Make this
measurement at each end of the pivot rail.
5.
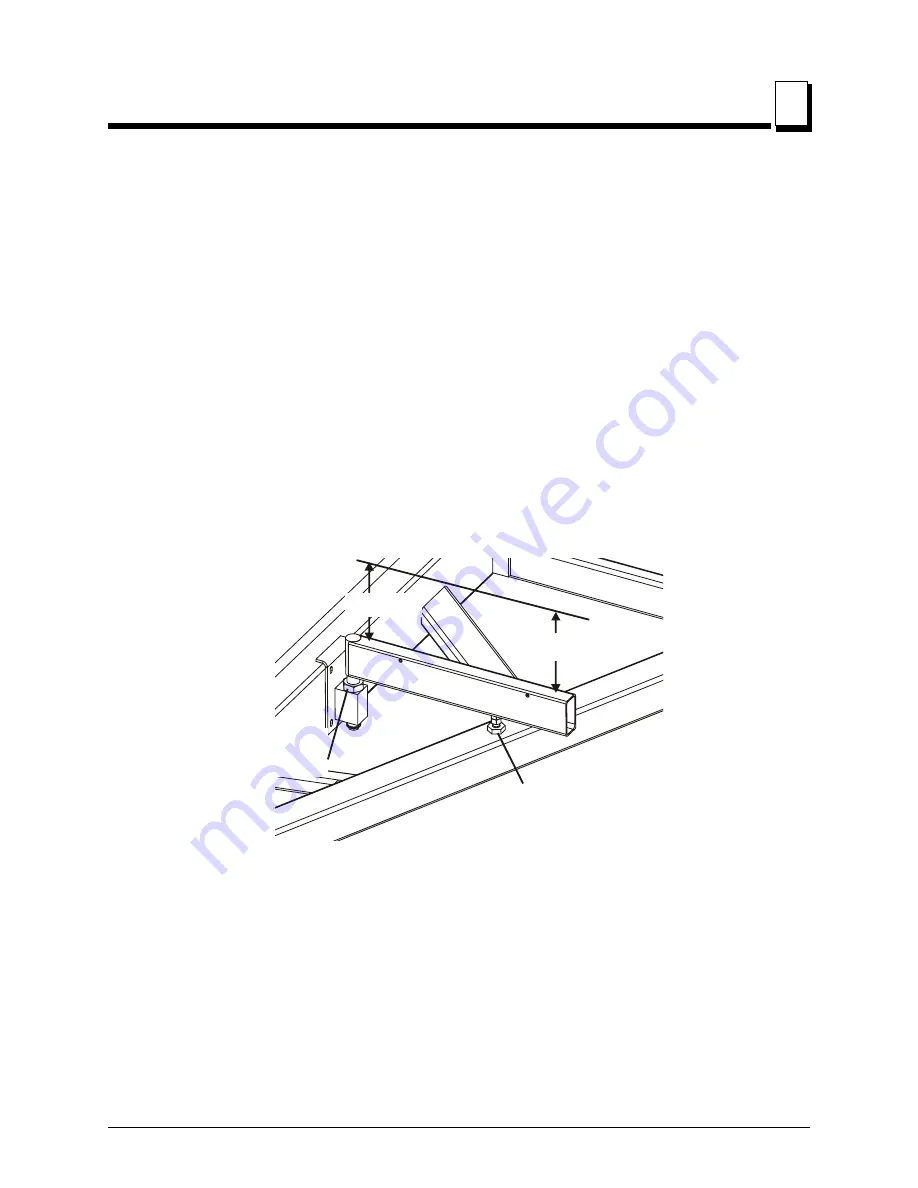
The two measurements should be 15" (375 mm) (+1/32 [0.8 mm] -0).
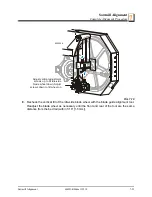
See Figure 7-26.
Loosen the locking set screws and turn the inner height adjustment nut
to adjust the height of the inner end of the pivot rail. Loosen the jam nut and turn the outer
adjustment bolt to adjust the height of the outer end of the pivot rail.
6.
Move the saw head so the blade is positioned over the center of the front main bed rail.
7.
Measure the distance between the bottom of the blade and the bed rail at each end of the
bed rail. The bed rail should measure 15" (375 mm) (+1/32 [0.8 mm] -0) from the blade at
each end of the rail.
FIG. 7-26
SM0134B
Inner Height
Adjustment
Nut
Outer Height
Adjustment
Bolt
15 1/32" (375mm)
to blade
15" (375mm)
to blade


