Cascade Gas-Fired Rotisserie & Charbroiler
Installation and Operation Manual
16
An ongoing program of product improvement may require us to change
specifications without notice.
WS-GFR-MB, Revised November 2014.
Doc no: M0050.01
info@woodstone-corp.com
or visit
woodstone-corp.com
wood stone corporation
1801 w. bakerview rd.
bellingham, wa 98226 usa
tf. 800.988.8103
t. 360.650.1111
f. 360.650.1166
DAILY OPERATION
BEGINNING OF DAY
FILLING THE WATER BATH
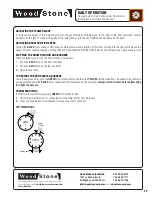
To fill the water bath, turn the water valve knob counter clockwise (to the left)� The water bath should always be filled to the level of
the drain stand pipe when the rotisserie is in operation� Failure to fill the cabinet with water can result in warping of the cabinet and
fire hazard from grease accumulation� Wood Stone recommends allowing the water to trickle into the tray while the rotisserie is in
use to allow grease to flow safely out of the cabinet through the drain, which must be connected to a grease trap�
DAILY OPERATION
LOADING/UNLOADING THE ROTISSERIE
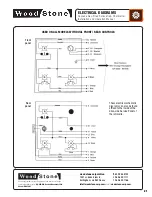
Open both doors to load the rotisserie� The drum will stop automatically anytime the rear doors are opened� To advance
the rotisserie drum with the doors open, simply push and hold the
GREEN
start rotation button, which will now act like
a job button� Release the button when the rotisserie drum reaches the desired position and it will stop� When loading,
make certain product does not hit the back wall or the optional smoker box as the drum turns� Note: drum rotates from
the bottom up�
NEVER ATTEMPT TO PLACE OR REMOVE SPITS WHEN THE ROTISSERIE DRUM IS MOVING.
BURNERS WON'T TURN ON IF DRUM IS NOT TURNING.
LOADING THE SPITS EVENLY
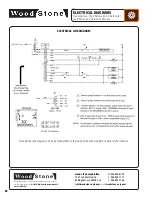
The spits can only be inserted into the rotisserie drive one way� When loading the rotisserie, make sure the load is evenly distributed
by loading equally weighted spits and/or baskets opposite each other� The round end of the spit or basket is always inserted first�
Push the round end of the spit into the hole until there is clearance to insert and seat the square end into its socket� Be sure to fully
seat the spit so that it locks into place and the round end will rotate freely when the drum turns�
1.
Insert the pointed end of the
spit into the round hole, which
is opposite the motor side of the
rotisserie�
2.
Then back the other end of the spit
into the square hole on the motor
side�
3.
Make sure that the pointed end of
the spit is backed out of its hole
far enough to allow the spit to turn
freely�
Motor side
GFR-6 CAPACITY
The 6-spit GFR-6 model has a total
capacity of 36–42 chickens weighing
2�5 lbs each, or 18–24 chickens for
the narrow model�
GFR-10-MB CAPACITY
With the 10-spit GFR-10 model,
when using all 10 spits, the
operational maximum product load
will be approximately 6–7 chickens
weighing 2�5 lbs each per spit�
To load larger product, it is possible
to run the rotisserie with five spits,
removing every other spit for
balance�
See next page for spit dimensions�
USER INFORMATION


