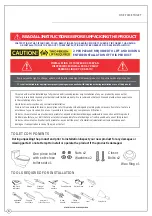
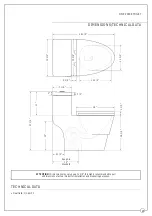
background image

ONE PIECE TOILET

CLEANING & TROUBLESHOOTING (FILL VALVE)

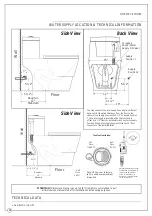
Shut off water supply line 
before filter cleaning.

Water level is too high or
too low

Improper water level 
adjustment

Adjust the water level

Fill valve fails to shut off

or fails to fill the water 
into the toilet's tank

Use soft sponges or soft-cloths to clean the surface. Always rinse thoroughly any cleaning solutions immediately after cleaning. Do 
not any chemical remain on the surface for extended periods of time.

Do not pour any mounts of chlorine or any other chemicals into the tank. Use of chemical products will result in damage to the fill valve and 
flush valve components and may cause flood and property damage

Note: 

fill and flush valves are maintenance free. No maintenance is required.

1. Inlet valve switch is 

turned on.
2. Inlet valve float crashed 
against ceramic wall

3. Filter screen is clogged 
due to dirty water
4. Improper refill hose 
installation

1. Turn on inlet valve switch
2. Adjust inlet valve position
3. Clean the filter screen
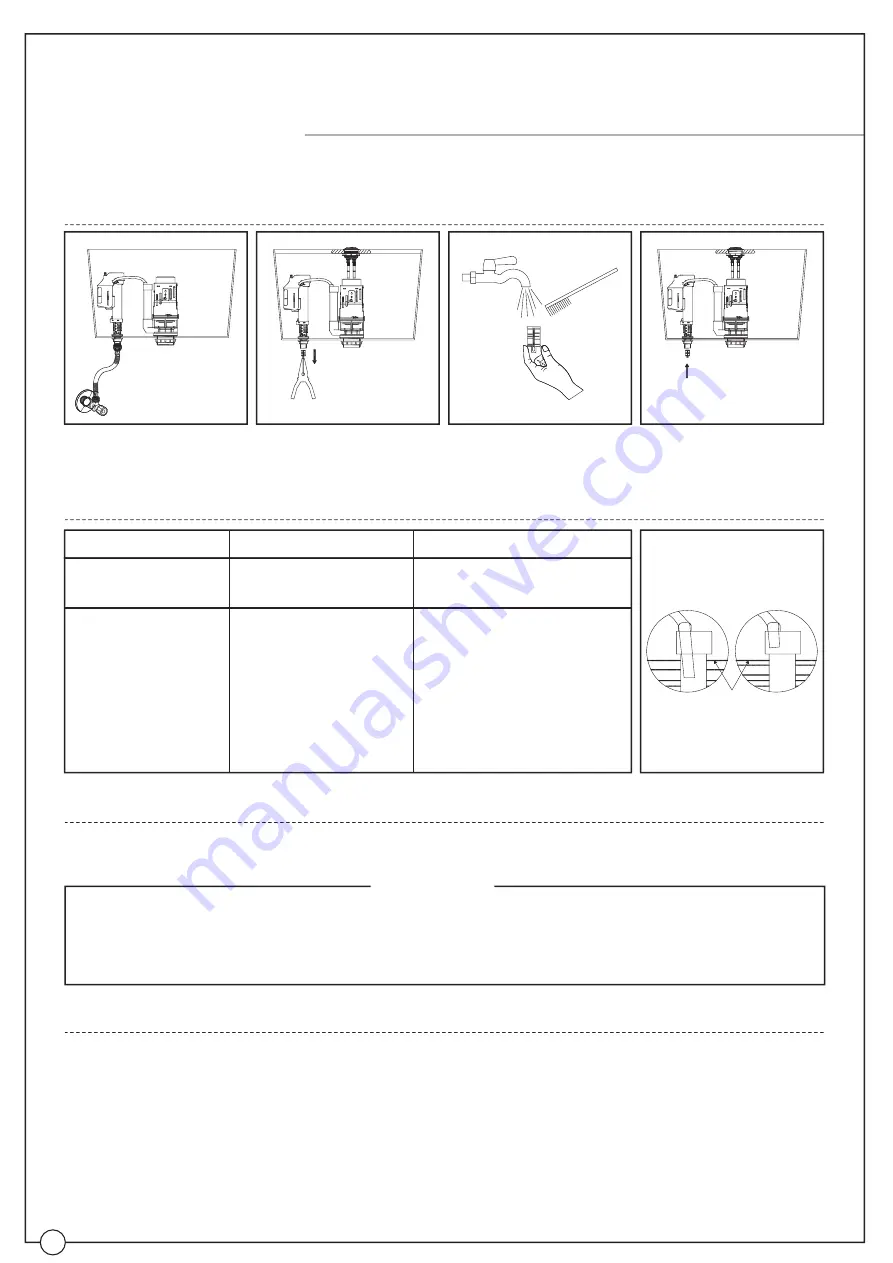
4. Install refill hose correctly (see 

diagram on the right)

Carefully, take out the filter 

from inlet by using pliers.

Use water to wash and clean 

the filter and adapter from any 
debris.

Re-install the filter and 
re-connect the water supply 
line.

FILL VALVE CLEANING

TROUBLESHOOTING

FILL/FLUSH VALVES MAINTENANCE & CARE

MAINTENANCE & CARE

Issue

Cause

Solu

on

Solu

on #4

RIGHT

WRONG

Water

Level

Retain these installa

on instruc

ons for future reference!

Thank you for using our products!
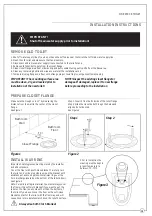
IMPORTANT! 

DO NOT USE: 

Abrasive cleaners such as: acid, ammonia, bleach, and simmilar solutions. Use of such solutions may cause 

corrosion, finish peeling, and/or dull the surface.

DO NOT USE: 

Abrasive sponges or cloth. Never use steel, wool, or wired brushes that will permanently scratch the surface.

9

Summary of Contents for B0940

Page 1: ...ONE PIECE TOILET MPN T0001 B0940 INSTALLATION INSTRUCTIONS R WOODBRIDGE...

Page 2: ...t to change update modify alter redesign this manual product or its policies without prior no ce We shall not be liable for any injuries or property damages in connection with this product during inst...

Page 3: ...h 1 1 6 GPF ATTENTION Dimensions may vary by up to 3 8 It is highly recommended to pull all dimensions of actual model for installation and measuring purposes 18 28 1 2 12 5 1 2 Rough in Standard 16 1...

Page 4: ...GPF amount is factory set No addi onal adjustment is required Tank Top View Inside Half Flush 1GPF You may connect the water supply line using two different options In both options distance from the...

Page 5: ...the holes and align bolts horizontaly See Figure 2 Bathroom Wall Bathroom Floor Closet Flange 12 Rough in Figure 3 INSTALL WAX RING Important safety glasses must be worn by the installer and all byst...

Page 6: ...er damage or flood caused due to use of this product Under no circumstances We shall not be liable for any and all fees cost of installation reinstallation removal subsequent damage or transportation...

Page 7: ...ONE PIECE TOILET TOILET SEAT ADJUSTMENT 6...

Page 8: ...just the push button and lock the nut to make it well fixed in the tank The distance between the rod tail and valve push button must be 1 2mm Rotate the valve clockwise to adjust its position inside o...

Page 9: ...sition water volume will gradually increase when the adjuster is moved upward from the bottom 1 PREPARATION 2 WATER LEVEL ADJUSTMENT Press and unscrew Solution 1 Pull upwards press down to desired hei...

Page 10: ...n 2 Inlet valve float crashed against ceramic wall 3 Filter screen is clogged due to dirty water 4 Improper refill hose installation 1 Turn on inlet valve switch 2 Adjust inlet valve position 3 Clean...

Reviews: