background image

R

WOODBRIDGE 

R

WOODBRIDGE 

R

WOODBRIDGE 

R

WOODBRIDGE 

R

WOODBRIDGE 

R

WOODBRIDGE 

1

www.woodbridgebath.com

R

WOODBRIDGE 

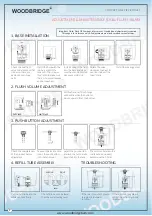
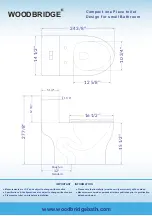
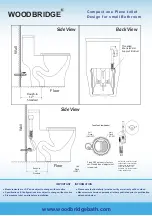
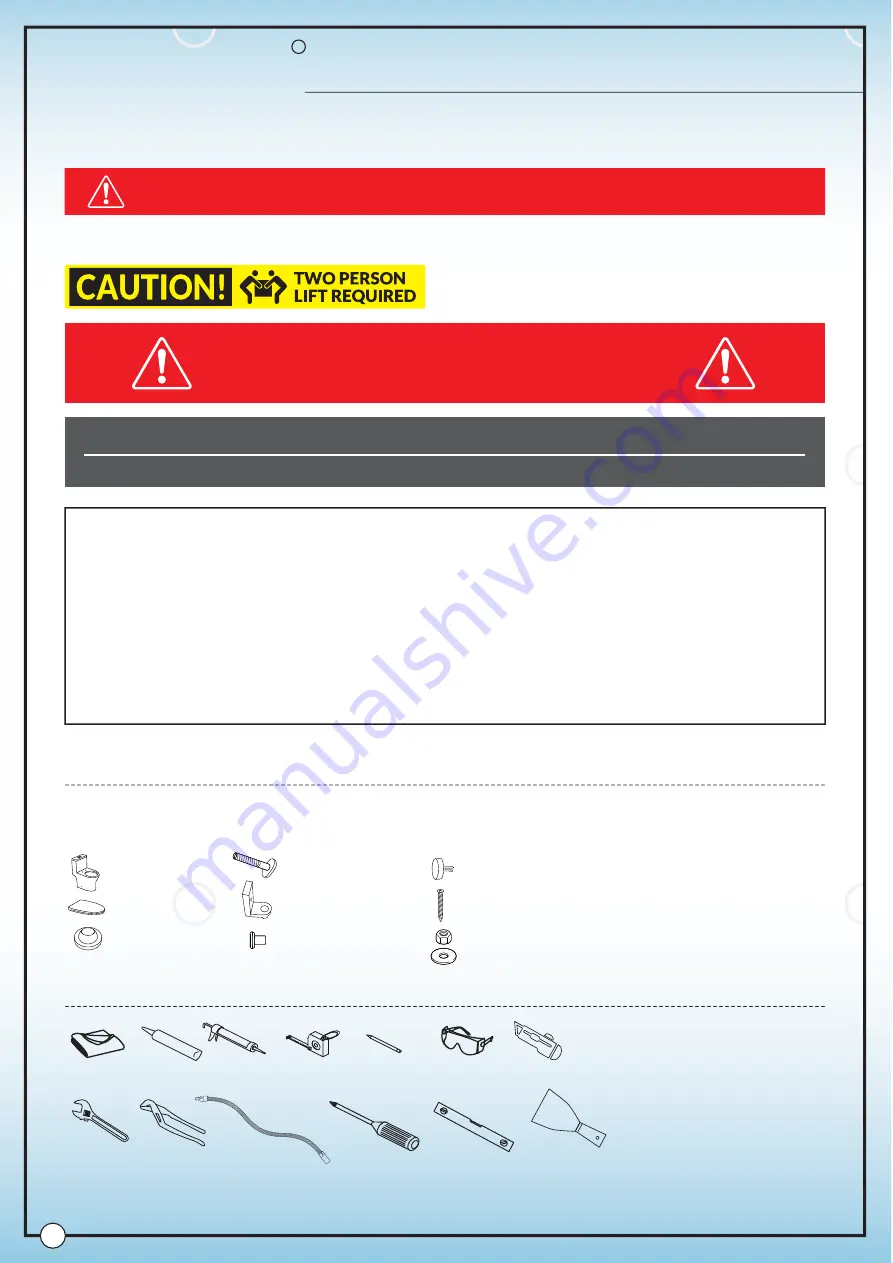
COMPACT ONE PIECE TOILET

TOOLS REQUIRED FOR INSTALLATION

TOILET COMPONENTS

So

ft

 Cloth

or Blanket

Silicone

Silicone/

Caulk Gun

OTHER TOOLS MAY BE REQUIRED

Tape

Measure

Pencil/Marker

Safety Glass

Knife

During unpacking the product and prior to installation inspect your new product for any damages or
missing parts. Do not attempt to install or operate the product if the product is damaged.

Adjustable

Wrench

Channel

Lock Pliers

Adjustable

Socket Extension

Philips

Screwdriver

Level

Pu

tt

y Knife

Bowl with lid

x 1

Toilet Seat Set

x 1

Wax Ring 

x 1

Moun

ti

ng T-Bolt

x 2

bolt cap decora

ti

on

x 2

Moun

ti

ng Screw 

x 2

T-Bolt Nuts and Washers

x 2

The plas

ti

c piece

x 2 

Plas

ti

c washer

x 2


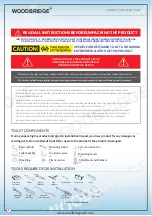
READ ALL INSTRUCTIONS BEFORE UNPACKING THE PRODUCT

2 PEOPLE ARE REQUIRED TO LIFT AND DURING

ENTIRE INSTALLATION OF THIS PRODUCT

INSTALLATION OF THIS PRODUCTS BY AN

INEXPERIENCED INSTALLER MAY RESULT

PERSONAL INJURY OR DEATH!

INSTRUCTIONS THAT, IF IGNORED COULD RESULT IN DEATH OR SERIOUS INJURY CAUSED BY INCORRECT HANDLING

OR INSTALLATION OF THE PRODUCT. THESE INSTRUCTIONS MUST BE OBSERVED FOR SAFE INSTALLATION.

We reserves the right to change, update, modify, alter, redesign this manual/product or its policies without prior no

ti

ce!

We

 shall not be liable for any injuries or property damages in connection with this product during installation or use of this product!

This products must be installed by a fully insured and licensed plumber only. Installation of any our product by anyone other
than fully insured and licensed plumber shall void limited warranty. We recommends that such licensed plumber have experience
in the installation of products.
Limited warranty is void on any commercial installation
We are not responsible for local code compliance for this product. Building and plumbing codes may vary from state-to-state in
accordance to your location. We are not resonsible for providing any compliance certifications.
Under no circumstances we are shall not be liable for any and all incidental damages sustained in connection with this product
Neither manufacture, nor distributor, nor retailer is responsible for water damage or flood caused due to use of this product.
Under no circumstances We shall not be liable for any and all fees, cost of installation/reinstallation/removal, subsequent
damage or transportation in case of the product defect

Summary of Contents for T-0031/B0500

Page 1: ...ARE GUIDE 2015 Uniform Plumbing Code UPC 2018 International Plumbing Code IPC 2018 International Residential Code IPC CSA B45 5 IAPMO Z124 2017 Plastic Plumbing Fixtures Compliance with the following...

Page 2: ...NS MUST BE OBSERVED FOR SAFE INSTALLATION We reserves the right to change update modify alter redesign this manual product or its policies without prior notice We shall not be liable for any injuries...

Page 3: ...ge without notice Pls measure toilet on site before installation Please note that installer s must be certify or warranty will be voided Measurements herein supersede all others published prior to pur...

Page 4: ...ll others published prior to purblication date shown below 12 Rough in Standard Wall Floor 12 Rough in Standard Side View Side View Back View Wall Floor Flush GPF amount is factory set No additional a...

Page 5: ...the closet bolts through the holes and align bolts horizontaly See Figure 2 Figure 3 INSTALL WAX RING Important safety glasses must be worn by the installer and all bystanders Cover the floor with a s...

Page 6: ...ler is responsible for water damage or flood caused due to use of this product Under no circumstances We shall not be liable for any and all fees cost of installation reinstallation removal subsequent...

Page 7: ...e hinges Clip on the toilet seat and cover Clip on the toilet seat and cover Aligh the toilet seat and cover with ceramic Take off the toilet seat and cover by pressing both pushbuttons Insert the hin...

Page 8: ...o make it well fixed in the tank The distance between the rod tail and valve push button must be 1 2mm Rotate the valve clockwise to adjust its position inside of the toilet s tank Install the sealing...

Page 9: ...sing parts 1 Press buckle and unscrew 2 Pull the valve upwards or press down to desired height 3 Unscrew the valve body and fasten the buckle Rotating screw rise or lower the water level to adjust wat...

Page 10: ...Improper refill hose installation 1 Turn on inlet valve switch 2 Adjust inlet valve position 3 Clean the filter screen 4 Install refill hose correctly see diagram on the right Carefully take out the...

Page 11: ...dbridgebath com R WOODBRIDGE 10 NOTES DATE OF INSTALL INSTALLER S NAME PLUMBER CONTRACTOR LICENSE INSTALLER INFORMATION NOTES DATE OF INSTALL INSTALLER S NAME PLUMBER CONTRACTOR LICENSE INSTALLER INFO...

Page 12: ...e without notice Pls measure toilet on site before installation Please note that installer s must be certify or warranty will be voided Measurements herein supersede all others published prior to purb...

Page 13: ...l others published prior to purblication date shown below Compact one Piece toilet Design for small Bathroom 12 Rough in Standard Wall Floor 12 Rough in Standard Side View Side View Back View Wall Flo...

Reviews: