


R
WOODBRIDGE
R
WOODBRIDGE
R
WOODBRIDGE
R
WOODBRIDGE
R
WOODBRIDGE
R
WOODBRIDGE
R
WOODBRIDGE
R
WOODBRIDGE
5
www.woodbridgebath.com
R
WOODBRIDGE
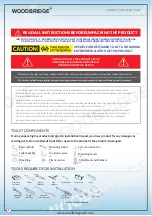
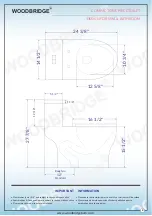
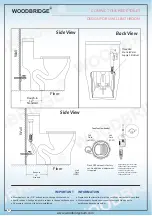
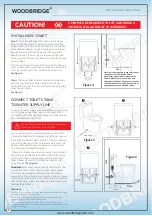
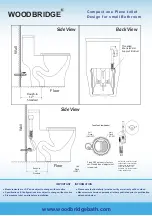
COMPACT ONE PIECE TOILET
CONNECT TOILET'S TANK
TO WATER SUPPLY LINE
Connect the water supply line between the tank and water
shut-off valve using a toilet hose (not supplied). When
connecting toilet hose tighten coupling nut to the tank by
1/4 turn beyond the hand tight.
Turn on valve on water supply line and allow tank to fill.
Check all connections for leakages and tighten as needed.
Once tank is filled with water flush it 4-5 times to perform
a test of the flushing system. At the same time check the
bottom of the toilet for leaks to make sure that the wax
ring is properly installed and sealed.
If there are no leaks you are ready finalize the installion. If
any shims are installed at the bottom of the toilet's bowl
you may trim them. Apply silicone around base of the
toilet's. Allow 24 hours for silicone to dry before start
using the toilet.
See Figure 6
Important:
Leaks may not occur during or right after the
installation. Make sure to check for leaks every couple
hours first day installed and and occasionally check it
everyday for the next week to ensure that toilet is properly
installed and no leaks occur. If any leaks occur immediately
shut off the water supply line valve and contact your local
plumber to fix all leaks.
Important:
Under no circumstances We shall not be liable for any and all incidental damages
sustained in connection with this product
Neither manufacture, nor distributor, nor retailer is responsible for water
damage or flood caused due to use of this product.
Under no circumstances We shall not be liable for any and all fees, cost of
installation/reinstallation/removal, subsequent damage or transportation in case
of the product defect
Figure 6
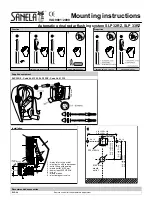
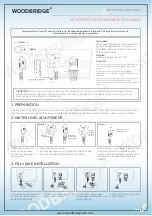
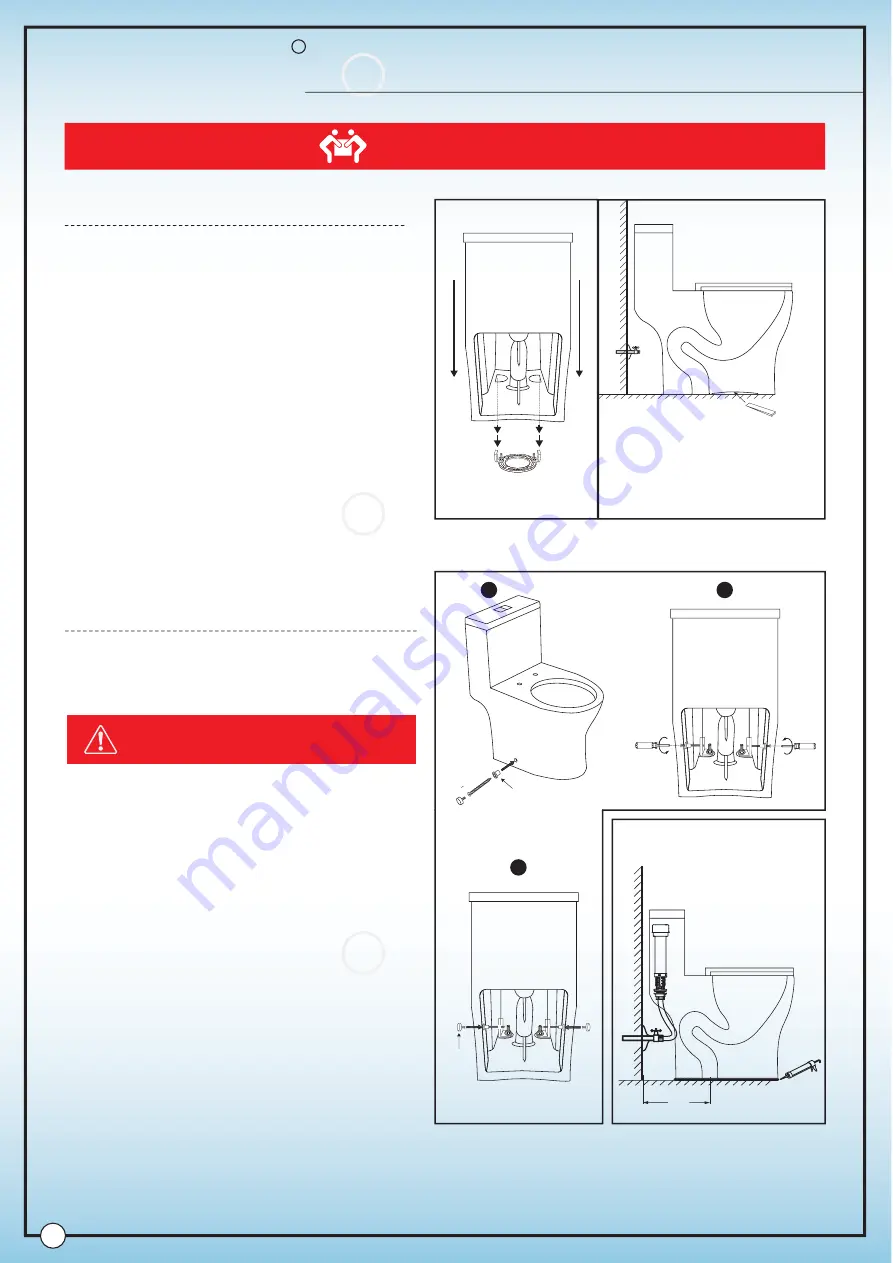
INSTALL NEW TOILET
Step 1.
Lift and carefully put the toilet over the closet
flange so the closet bolts can go through the mounting
holes in the toilet's base. Once the bowl is in the position
press the bowl down with slight twisting motion in level
position towards the floor. Apply your body weight to
evenly compress the wax ring to create watertight seal.
Make sure that the bowl is as leveled as possible to have a
nice seal tight.
Do not rock the toilet back and forth and side to side as it
may and will break a seal and you will need to replace the
wax ring again and start the installation process over.
See Figure 4
Step 2.
Once the toilet is set and leveled install washers
and nuts over the closet bolts. Tighten nuts. Do not
overtighten the nuts. It may and will cause damage to the
toilet's ceramic base.
See Figure 5
Do not overtighten nut on the tank connection.
It may and will cause water leakage.
CAUTION!
2 PEOPLE ARE REQUIRED TO LIFT AND DURING
ENTIRE INSTALLATION OF THIS PRODUCT
Wa
ll
Floor
Note: It may be required to use shims under
the edge of the toilet's bowl. Due to
manufacturing process of vitreous china
ceramic products, every toilet may have
slight level variations. It does not mean that
the toilet is defective. In addition your floor
might be uneven or not leveled as well.
bolt cap
decora
ti
on
Figure 5
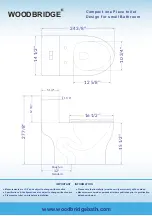
12"
Rough-in
Standard
W
all
Floor
Figure 4
2
1
3
Plas
ti
c washer