6.5 SETTING DEPTH OF CUT
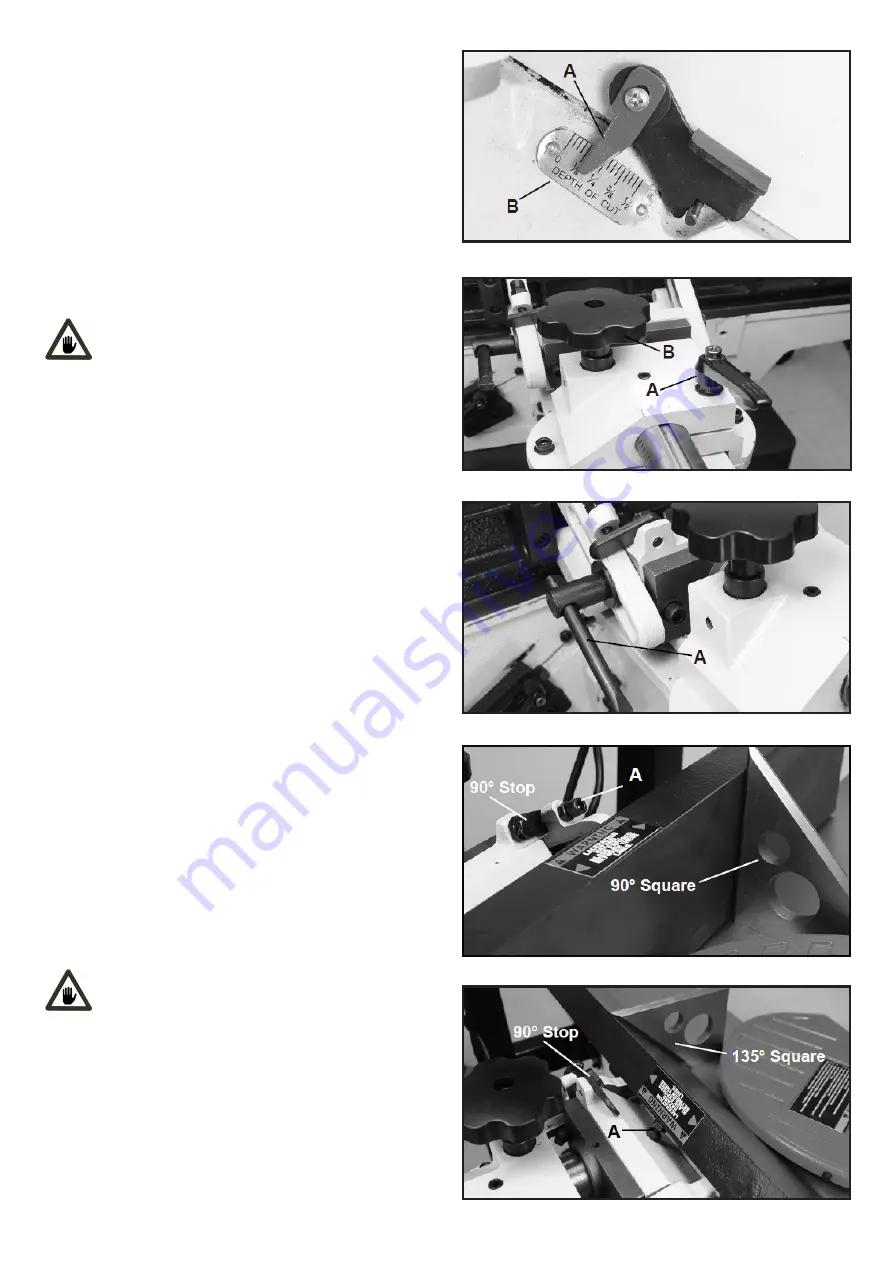
The jointer can be set to cut any depth from a very thin
shaving to 1/8” deep. The pointer (A) on the scale (B) is to
indicate the depth of cut. FIG.6.5.
6.6 FENCE ADJUSTMENTS
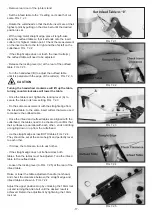
- To move the fence across the table, loosen the lock
lever (A), then turn the knob (B) until the fence is in the
desired position on the table and then retighten the lock
lever. FIG. 6.6.1.
The handle direction of the lock lever (A) can be
repositioned by pulling up the lever and reposition-
ing it on the nut located underneath the lever.
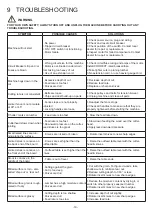
- To tilt the fence, loosen the lock lever (A), and tilt the
fence to the desired angle. Then retighten the lock lever.
FIG. 6.6.2.
- The fence has adjustable positive stops at the most used
fence positions of 90 degrees and 135 degrees.
6.7 SETTING THE FENCE TO 90° and 135°
To check and adjust the positive stops to the 90 and 135
degree settings:
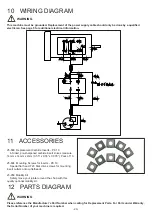
- Put a square on the table with one end against the fence
and adjust the fence until it is exactly 90 degrees to the
table.
FIG. 6.7.1.
- Loosen the locking nut with a 13mm hex wrench and
adjust the Allen screw (A) until a 90 degree setting is
reached. Tighten the locking nut to retain the adjustment.
FIG. 6.7.1.
- To check the 135 degree setting flip the 90 degree stop
tab away from the 90 degree stop bolt. Put a square on
the table with one end against the fence and adjust the
fence until it is exactly 135 degrees to the table. FIG.
6.7.2.
With the fence set at 135°, the jointer will produce a
45° bevel on your workpiece.
- Loosen the locking nut with a 13mm hex wrench and
adjust the stop bolt (A) until a 135 degree setting is
reached. Tighten the locking nut to retain the adjustment.
FIG. 6.7.2.
-15-
FIG.6.5
FIG.6.6.1
FIG.6.6.2
FIG.6.7.1
FIG.6.7.2
CAUTION
CAUTION


