3 Repairs
Copyright © WOODLEY EQUIPMENT COMPANY LTD.
98
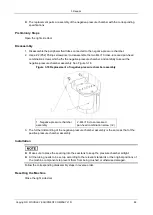
Installation
⚫
All the wirings need to be set up according to the working procedures or the original positions of
the machine components to prevent them from being crushed or otherwise damaged.
⚫
Pay attention to the position of wires when installing the sensor panel so as to prevent the wires
from breaking.
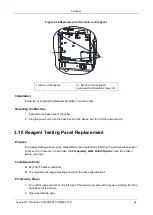
Follow the corresponding disassembly steps in reverse order.
Resetting the Machine
1. Close the corresponding left side door.
2. Plug the power cord into the back panel of the device and turn on the power switch on the left
panel of the device.
3.11 Disassembling and Replacing the Temperature
Sensor
Purpose
The temperature sensor can be disassembled and replaced by following the procedures specified in
this section; however, in each case,
3.2 Preparatory Work before Repairs
you begin.
Tools/Spare Parts
⚫
#2 (Ph2) Phillips screwdriver
⚫
2 hex-socket screwdrivers
⚫
The replacement temperature sensor with the same specifications
Preliminary Steps
1. Turn off the power switch on the left side of the device and pull out the power cord plug from the
back panel of the device.
2. Open the left side door and the front panel cover.
Disassembly
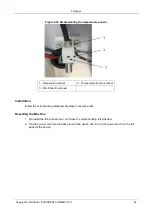
Loosen the screws in the bracket for temperature sensor to take the sensor out. Then replace it with
a new sensor and tighten the screws. See Figure 3-32.


