5 Comprehensive Device Tuning
Copyright © WOODLEY EQUIPMENT COMPANY LTD.
107
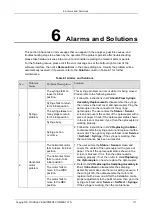
Figure 5-4 Auto Calibration Using Calibrators
3. Input the calibrator lot No.
JZQX-01
in the text box for
Lot No.
, and click
Exp. Date
to set the
expiry date of the calibrator.
4. Input the target value of the current calibrator parameter.
The calibration mode is
Whole Blood
by default, so there is no need to set the mode.
5. Set the well-mixed calibrator under the sample probe, then press the aspiration key on the
analyser to start the calibration counting.
6. Repeat step 5 for a total of 12 times to get 12 results of calibration counting.
➢
After the counting is complete, a dialog box will pop up indicating that the test is complete.
Click the
Save
button to save the calibration result.
➢
If significant differences are found across results, a dialog box for data abnormality will pop
up. Please redo the calibration.
5.4.2 Calibration in Predilute Mode
1. In standby mode, click
Cal
to enter the calibration screen.
2. Select
Predilute
on the right side of the screen.
3. Input the calibrator lot No.
JZYXS-01
in the text box for
Lot No.
, and click
Exp. Date
to set the
expiry date of the calibrator.
4. For calibration using the prediluted calibrators, please refer to steps 4~6 in whole-blood mode.


