THIS STOVE IS DESIGNED TO BURN
WOOD FUEL ONLY!
Hardwood,
18˝
to
20˝
/ 45cm to 50cm should be
air dried (seasoned), for a minimum of 6 months. Logs
grater than 6
˝
/152mm in diameter should be split. Wood
should be stored in a dry, well ventilated area. The
humidity content for usable
fir
ewood must be less than
20% of the weight of the log.
Attempts to use wet or unseasoned wood will
cause:
- ignition problems
- rapid creosote build-up resulting in chimne
y fire
- incomplete combustion
- low heat yield
- blackened windows
NOTICE: USE SOLID WOOD MATERIALS ONLY.
DO NOT BURN GARBAGE OR FLAMMABLE
FLUIDS SUCH AS GASOLINE, NAPHTHA OR
ENGINE OIL. DO NOT USE COAL. THIS STOVE
IS NOT DESIGNED TO ACCOMMODATE THE AIR
FLOW (DRAFT) NECESSARY TO PROPERLY
BURN COAL OR COAL PRODUCTS. DO NOT
ELEVATE FIRE OR USE GRATES OR AND-
IRONS. BUILD FIRE DIRECTLY ON BOTTOM
OF FIREBOX.
OPTIMAL FUEL CONSUMPTION
This stove is designed to get the most ef
fi
cient
transfer of heat energy from the wood fuel and radiate
it into your living environment. The
fire
box introduces
combustion air through four sources. (1) Immediately
beneath the door opening below the window is a Lower
Primary Air Ori
fi
ce (LPAO). (2) The primary air inlet
control (center control lever) brings air into the
fireb
ox
and controls the rate of burn (and the amount of heat
the stove radiates). (3) The high burn duct control (right
control lever) provides additional air for maximum burn
rate. (4) The secondary air tubes at the top of the
fi
rebox
are designed to ignite the combustion gases (smoke)
given off by the burning wood and increases the ef-
ficiency of the st
ove and reduces chimney emissions.
Smoke given off by burning fuel consists of very
small organic liquid droplets. If these droplets condense,
they form a sticky tar-like substance called creosote.
When operated properly, this stove is designed to burn
these droplets. Burning these droplets releases heat
that would otherwise be lost up the chimney as smoke.
Following the instructions below will help you operate
your stove properly to maximize the stove’s perfor-
mance. Actual performance is dependent on chimney
CAUTION: HOUSE FIRE HAZARDS
-
TOR, UNDERNEATH STOVEPIPE, OR ANY-
WHERE WITHIN MINIMUM CLEARANCES FROM
COMBUSTIBLE SURFACES SPECIFIED FOR
THIS STOVE.
YOU ARE OVER FIRING IF A UNIT OR CHIMNEY
CONNECTOR GLOWS RED.
OPERATING SAFETY PRECAUTIONS
1. NEVER OVER FIRE THIS STOVE BY BUILD-
ING EXCESSIVELY HOT FIRES AS A HOUSE/
BUILDING FIRE MAY RESULT. YOU ARE OVER
FIRING THE STOVE IF UNIT OR STOVEPIPE
BEGINS TO GLOW OR TURN RED.
2. NEVER BUILD EXTREMELY LARGE FIRES
IN THIS TYPE OF STOVE AS DAMAGE TO
THE STOVE OR SMOKE LEAKAGE MAY
RESULT
3. ON MODELS WITH GLASS DOOR, DO NOT
BUILD FIRE TOO CLOSE TO GLASS. DO
NOT OPERATE WITH CRACKED OR BRO-
KEN GLASS.
4. UNIT IS HOT WHILE IN OPERATION. KEEP
CHILDREN, CLOTHING, AND FURNITURE
AWAY. CONTACT MAY CAUSE SKIN BURNS.
DO NOT TOUCH THE STOVE AFTER FIRING
UNTIL IT HAS COOLED.
5. PROVIDE AIR INTO THE ROOM FOR PROP-
ER COMBUSTION.
6. INSPECT STOVEPIPE EVERY 60 DAYS.
REPLACE IMMEDIATELY IF STOVEPIPE IS
RUSTING OR LEAKING SMOKE INTO THE
ROOM.
WARNING: EXPLOSION HAZARD
START THE FIRE.
GASOLINE-TYPE LANTERN FUEL, KEROSENE,
CHARCOAL LIGHTER FLUID, OR SIMILAR
FLAMMABLE LIQUIDS TO START OR “FRESH-
ESPECIALLY GASOLINE, OUT OF THE
VICINITY OF THE STOVE — WHETHER IN USE
OR IN STORAGE.
continued on next page
OPERATING INSTRUCTIONS
17
Summary of Contents for WS-TS-1500
Page 6: ...6 Minimum Clearances for installation according to UL 1482 US ULC S627 CAN A ...
Page 7: ...7 Top A A Alcove ...
Page 8: ...philips BLOWER ATTACHMENT 8 4 places A GASKET ...
Page 9: ...9 WS TS 2500 23 8 6 ...
Page 10: ...10 6 ...
Page 20: ...20 ...
Page 21: ...21 ...
Page 23: ...23 BAFFLE REMOVAL ...
Page 24: ...24 BAFFLE REMOVAL ...
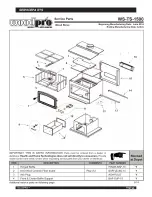
Page 25: ...SERVICE PARTS 25 ...
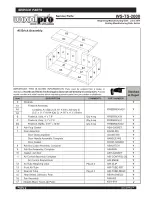
Page 26: ...SERVICE PARTS 26 ...
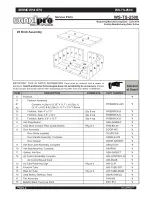
Page 27: ...SERVICE PARTS 27 ...
Page 28: ...SERVICE PARTS 28 ...
Page 29: ...SERVICE PARTS 29 ...
Page 30: ...SERVICE PARTS WS TS 2500 30 ...
Page 33: ...DATE OF SERVICE PERFORMED BY DESCRIPTION CHIMNEY STOVE MAINTENANCE LOG 33 ...
Page 35: ...Warranty 35 ...
Page 36: ...36 www woodprostoves com 2 ...


