Page 8
NOTE:
This log splitter was partially assembled at the factory. Refer to the drawings and parts list should it become
necessary to disassemble the unit for repair or replacement of parts. The drawings in this manual are for refer
-
ence only. Some of the components on your log splitter may look slightly different.
STEP 1:
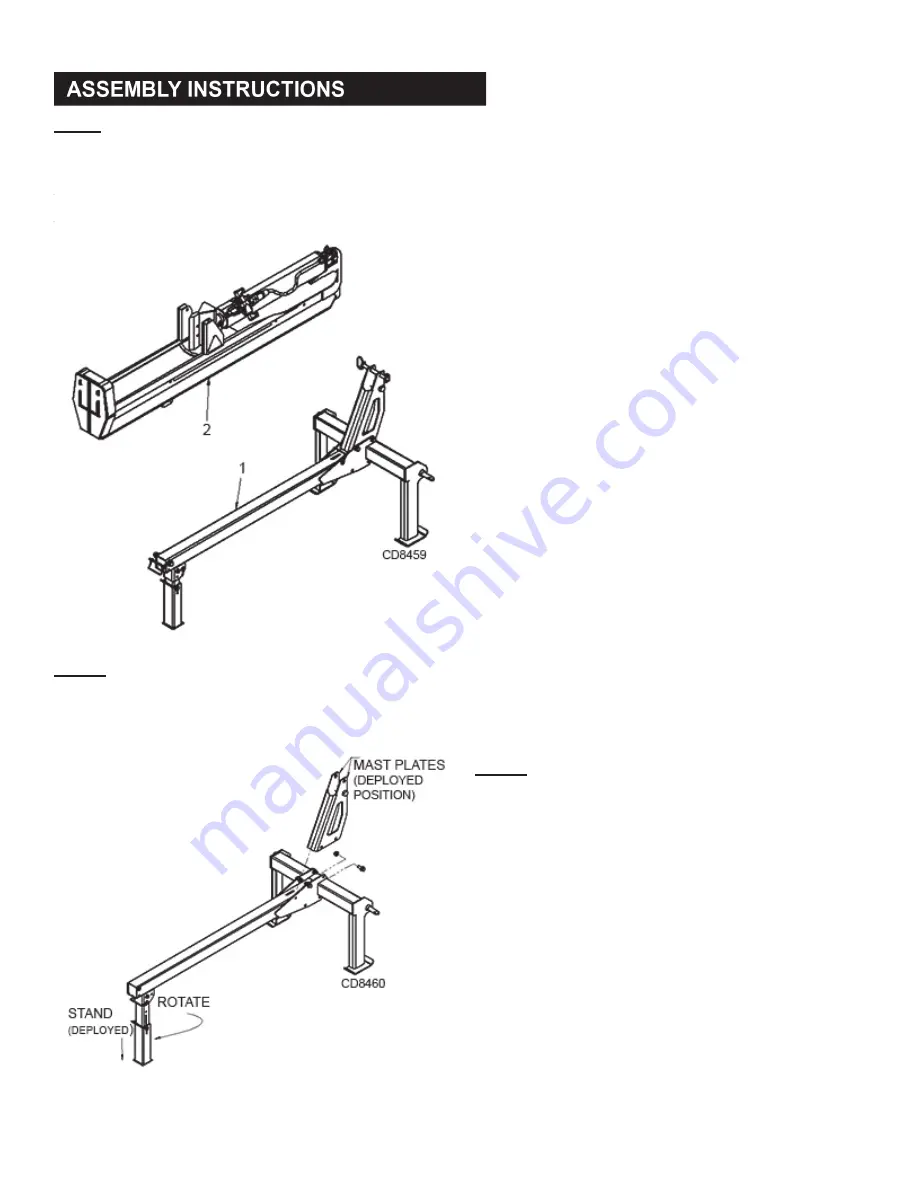
Remove all the components from the container. Inspect each piece for shipping damage. If any part is damaged, con
-
tact your dealer or delivering carrier.
STEP 2:
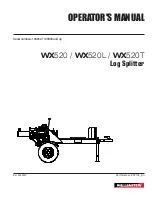
Remove lock pin and rotate stand to vertical position.
Replace pin to lock in place.
Remove second lock pin to release leg and slide to
deployed position. Replace pin to lock in place.
Remove stowed mast plates by removing 4 screws.
Attach mast plates as shown using same 4 screws.
ITEM
DESCRIPTION
QTY
1
FRAME ASSEMBLY
1
2
BEAM ASSEMBLY
1


