
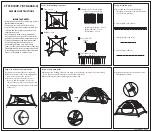

Step 11: Disassembly
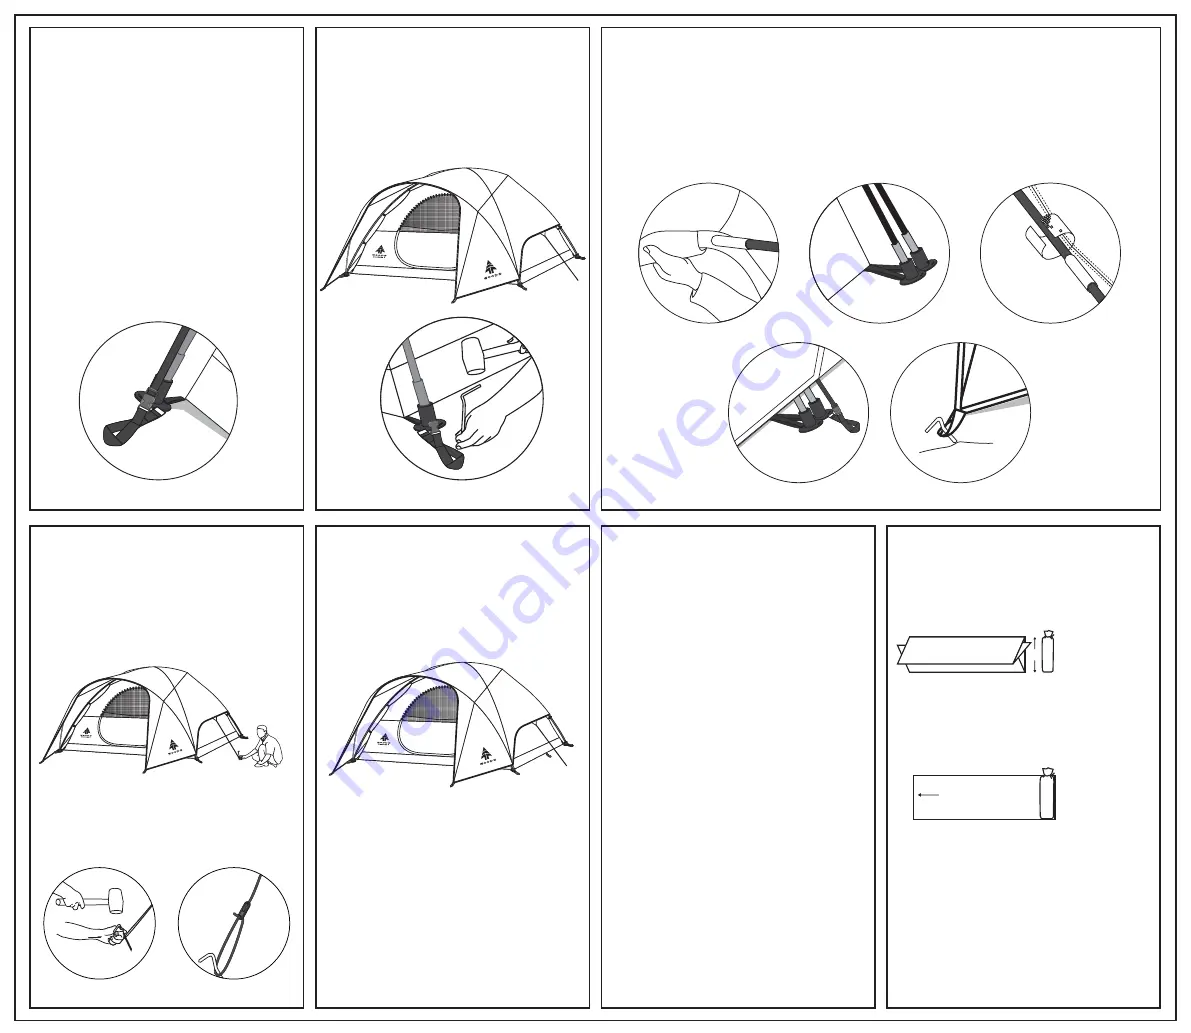
Step 12: Packing the tent
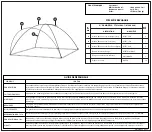
Step 9: Secure guy lines
1) Secure tent using all guy lines and stakes.
Tent must be secured for proper function.
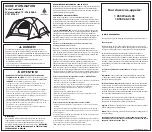
1) Spread tent flat, distribute evenly.
2) Fold into quarters not to exceed the length
of pole bag.
3) Lay pole bag at opposite end from door.
Tightly roll bag, skin and fly forcing air
through unzipped door.
4) Secure with ties and place in carry bag with
stakes and accessories.
5) Tent must be clean and dry before storage.
Store off concrete floor.
Be certain campfires are extinguished.
Dispose of trash appropriately.
Dimension A should
be close to but not
exceed the length
of the pole bag.
A
Fold tent into a
rectangular shape.
Front of tent
(door unzipped)
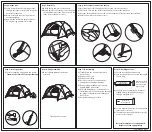
Step 6: Stake tent
1) Stake down the tent by inserting a stake
through the stake loops, located along the
perimeter of the tent.
2) Make certain the tent floor is pulled out
evenly and tightly.
3) Hammer the stakes into the ground at a
45˚ angle using a hammer or mallet.
Step 10: Fully assembled
Tent appears as shown.
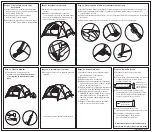
Step 7: Attach fly
Step 8: Secure fly pole and fasten the fly
CTC181009-7 06/17
1) To take down the tent, disassemble in
reverse order.
2) Remove accessories.
3) Remove and fold fly.
4) Be sure to leave doors and windows
unzipped to avoid zipper damage.
5) Remove stakes with hammers or stake
puller. DO NOT pull on tent.
6) Carefully disengage poles from fast feet.
carefully push pole away from you through
the hanger to minimize risk of damage to
tent or poles.
7) Keep stakes in bags provided.
1) Gear loft with tablet pocket can be
attached.
1) Unfold the fly and place over the tent.
2) Attach the fly to the tent by connecting the
adjustable buckles at the fly corners and the
stake loops at the back corners.
1) Insert the fly pole (C) through the sleeve found over the front door.
2) Place pole ends into the fast feet at the outer corners of the tent front.
3) Wrap the hook and loop fasteners sewn on the underside of the fly around the tent frame.
4) Attach fly buckles at front tent corners.


