background image

Owner Service 

17

MAN1192 (1/13/2017)

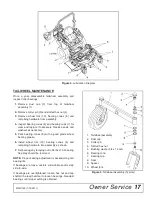
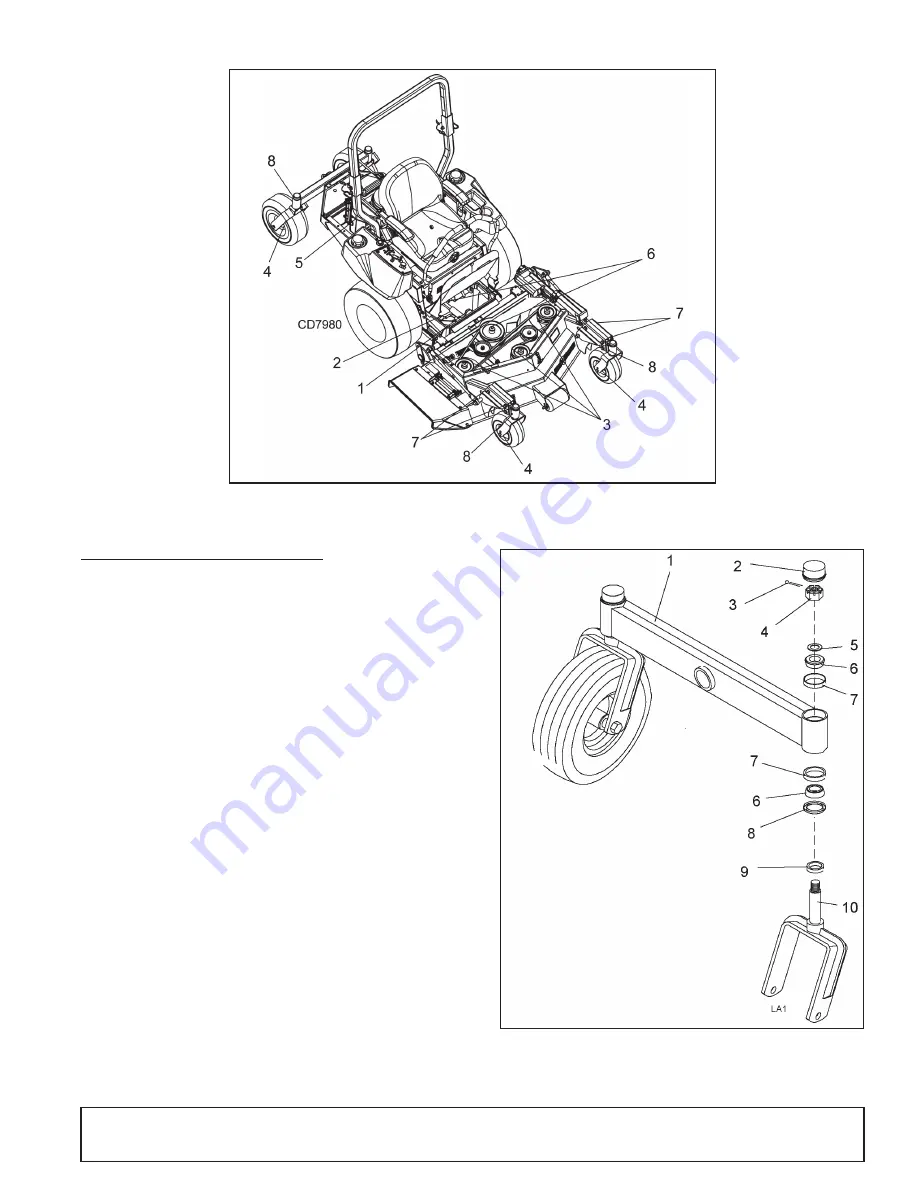
 Figure 4

. Lubrication Diagram

TAILWHEEL MAINTENANCE

Once a year, disassemble tailwheel assembly and
inspect roller bearings:

1.

Remove dust cap (2) from top of tailwheel
assembly (1).

2.

Remove cotter pin (3) and slotted hex nut (4).

3.

Remove wheel fork (10), bearing cones (6) and
remaining hardware from assembly.

4.

Inspect bearing cones (6) and bearing cups (7) for
wear and replace if necessary. Replace seals and
washers as necessary.

5.

Pack bearing cones (6) with a good grade wheel
bearing grease.

6.

Install wheel fork (10) bearing cones (6) and
remaining hardware into assembly as shown.

7.

Set bearings by torquing nut to 26 lbs-ft. All bearing
free play should be removed.

NOTE: 

Proper bearing adjustment is essential to good

bearing life. 

If bearings are loose, casters will wobble and/or slap
side-to-side. 

If bearings are overtightened, loosen hex nut and rap
shaft with a lead hammer to loosen bearings. Readjust
bearings until proper setting is obtained.

 Figure 5

. Tailwheel Assembly (Typical)

1. Tailwheel assembly
2. Dust cap
3. Cotter pin
4. Slotted hex nut
5. Bushing washer 3/4 x 14 GA
6. Bearing cone
7. Bearing cup
8. Seal
9. Spacer

10. Wheel fork

Summary of Contents for MOW'N MACHINE FZ22-2

Page 1: ...OPERATOR S MANUAL MOW N MACHINE MAN1192 1 13 2017 FZ22 2 TM ...

Page 2: ... at www WoodsEquipment com or in the United States and Canada call 1 800 319 6637 The equipment you have purchased has been carefully engineered and manufactured to provide dependable and satisfactory use Like all mechanical products it will require cleaning and upkeep Lubricate the unit as specified Observe all safety information in this manual and safety decals on the equipment For service your ...

Page 3: ...TIONS 44 INDEX 45 REPLACEMENT PARTS WARRANTY 47 PRODUCT WARRANTY BACK COVER This product contains chemicals including lead known to the State of California to cause cancer and birth defects or other reproductive harm Wash hands after handling WARNING The engine exhaust from this product contains chemicals known to the State of California to cause cancer birth defects or other reproductive harm WAR...

Page 4: ...g and maintaining your Mow n Machine Read it carefully It furnishes information and instructions that will help you achieve years of dependable performance These instructions have been compiled from extensive field experience and engineering data Some information may be general in nature due to unknown and varying operating conditions However through experience and these instructions you should be...

Page 5: ...led for your protection Do not disconnect disable over ride or execute any action that would cause this system to malfunction If malfunction occurs stop all operation and contact dealer for repair Remove accumulated debris from this equip ment power unit and engine to avoid fire hazard Keep children out of the mowing area and under the watchful care of a responsible adult other than the operator M...

Page 6: ...artificial light Keep hands feet hair and clothing away from equipment while engine is running Stay clear of all moving parts When improperly operated power unit can roll over or upset Use of rollover protective structure ROPS with seat belt securely fastened will reduce the possibility of injury or death if rollover or upset occurs Always use the seat belt when the foldable ROPS is in the upright...

Page 7: ...ition and remove key When using a sunshade and lifting hood for maintenance use caution around pinch points Before attempting to unplug vacuum hoses dis engage PTO stop power unit and remove key Before performing any service or maintenance lower attachment to ground turn off power unit engine remove key and disconnect battery ground cable negative Before working underneath read manual instructions...

Page 8: ...nd related accessories contain lead and lead com pounds chemicals known to the State of California to cause cancer and birth defects or other repro ductive harm WASH HANDS AFTER HANDLING STORAGE Keep children and bystanders away from stor age area Never store equipment where fuel or fumes could reach an open flame or spark Allow engine to cool before storing in an enclosure Never store the machine...

Page 9: ...ety 9 MAN1192 1 13 2017 3 SERIAL NUMBER PLATE 1 72407 Safety Decals continued on next page 2 72404 SAFETY INSTRUCTIONAL DECALS ATTENTION BECOME ALERT YOUR SAFETY IS INVOLVED Replace Immediately If Damaged ...

Page 10: ... high pressure water can enter through very small scratches or under edges of decals causing them to peel or come off Replacement safety decals can be ordered free from your Woods dealer or in the United States and Canada call 1 800 319 6637 Safety Decals continued from previous page SAFETY INSTRUCTIONAL DECALS ATTENTION BECOME ALERT YOUR SAFETY IS INVOLVED Replace Immediately If Damaged ...

Page 11: ...ght Power Tilt Adjustment Switch The deck height and Power Tilt switch is used with MXT Push the toggle switch forward to raise the deck and pull back to lower the deck to the desired cutting height For Power Tilt operation pull back and hold the toggle switch to lower the deck and cycle through to the tilt position Release switch when deck reaches maxi mum tilt position To lower the deck push and...

Page 12: ...engine manual for oil grade 2 Set throttle half way open 3 A warm battery has better starting capacity than a cold one 4 Use fresh fuel it is better for starting than leftover fuel STARTING MOWER OR ATTACHMENT Make sure people and objects are clear of attachment and discharge area before engaging PTO NOTICE Never engage PTO if the mower blades are plugged with grass or other material This may caus...

Page 13: ...he further forward or rearward the steering handles are moved the faster the machine will move Steering Handle Positions NOTICE If you become confused during operation return both handles to the center NEUTRAL posi tion and the power unit will stop Forward Both handles forward Reverse Both handles rearward Gentle Right Left handle further forward than right Gentle Left Right handle further forward...

Page 14: ...hen using weight transfer system correct counterweight must be used to maintain stability The weight transfer is designed to place an additional load on the drive wheels providing additional traction 1 Attach mower to power unit and set to desired cutting height 2 Torque bolt on both sides to 35 lbs in NOTE Counterweight is needed to provide adequate stability Optional coutnerweight kit 78727 is r...

Page 15: ...inutes of oper ation ___ Check to be sure engine is free of dirt and debris Pay particular attention to the cooling fins gover nor parts and muffler ___ Do not allow riders ___ Inspect area and remove stones branches or other hard objects that might be thrown causing injury or damage ___ Clean air intake screen Check air cleaner ser vice if necessary ___ Clean area around oil fill dipstick Remove ...

Page 16: ...ick 4 Add oil as necessary See engine owner s manual for specifications Change Engine Oil NOTICE Use care to prevent hot oil from contacting bare skin 1 Run engine to allow oil to become hot This will ensure that most foreign materials are in suspension and will be flushed out with the oil 2 Install hose on drain Open drain valve 3 Remove oil filter 4 Install new oil filter 5 Close drain valve rem...

Page 17: ...ith a good grade wheel bearing grease 6 Install wheel fork 10 bearing cones 6 and remaining hardware into assembly as shown 7 Set bearings by torquing nut to 26 lbs ft All bearing free play should be removed NOTE Proper bearing adjustment is essential to good bearing life If bearings are loose casters will wobble and or slap side to side If bearings are overtightened loosen hex nut and rap shaft w...

Page 18: ... fastened to the trunnion arm of the transaxle 5 Inspect the bypass mechanism on the transaxle and the vehicle linkage to insure that both actuate and release fully Service and Maintenance Procedures Some of the service procedures presented on the fol lowing pages can be performed while the transaxle is mounted on the vehicle Any repair procedures as mentioned in the repair section of this manual ...

Page 19: ...all and torque the top port plugs to 180 in lbs 20 3 Nm 12 Continue to fill the transaxles through the expansion tank until the Full Cold line is reached on the Hydro Gear expansion tank An additional 5 qt will be needed to fill expansion tank 13 Re install the expansion tank cap by hand Be careful to not over tighten 14 Proceed to the purge procedure PURGING PROCEDURES Due to the effects air has ...

Page 20: ...OFF for 30 seconds Repeat cycle 20 times NOTE The 30 seconds OFF allows clutch surface to cool RETURN TO OPERATION Make sure shields and guards are properly installed and in good condition Replace if damaged Make sure all safety decals are installed Replace if damaged See Safety Decals section for location CLEANING After Each Use Remove large debris such as clumps of dirt grass crop residue etc fr...

Page 21: ... and fan blades are clean NOTE Overheating can cause loss of power or fluid leaks from excess fluid expansion 3 Make sure dump valves are tightened down No Positive Neutral Position If drive wheels try to travel forward or reverse when parking brake is in the PARK position pivoted out ward adjustment of hydrostatic pumps is necessary 1 Block up power unit frame so both drive wheels are off the gro...

Page 22: ... wire harness underneath the seat pan by the left hand steering pivot linkage if there is not a deck or a standard deck is attached Check the deck safety switch refer to Figure 10 and troubleshooting deck safety switch If the deck switch is open the engine will kill when pull ing handles in Figure 10 Power Tilt Deck Safety Switch Layout If there is voltage at both pink black wires men tioned in th...

Page 23: ...r tight 3 Install small L bracket at the front and rear using long bolts through frame loosely 4 Install screws and nuts in the front and rear of the frame finger tight 5 With hydro positioned squarely tighten small L bracket nuts and then the longer screws through frame 6 Tighten outer nuts 7 Install belt and tighten spring to proper belt tension 8 Install expansion tank hose 9 Install brake arm ...

Page 24: ...nd of crank shaft 5 Remove clutch from crank shaft Be sure to capture spacer between clutch 1 and drive pulley 2 Drive pulley 2 is held on by drive belt If no drive belt is installed at this point drive pulley 2 and top spacer 3 will also come off of crankshaft Install Clutch 1 Install spacer 3 drive pulley 2 if previously removed 2 Install spacer 3 between drive pulley 2 and clutch 1 3 Align key ...

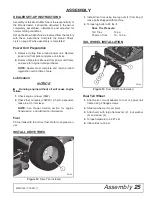
Page 25: ...cation NOTICE Running engine without oil will cause engine failure 1 Check engine oil level 30W 2 Check that oil levels 20W 50 in hydro expansion tank are at correct level NOTE See Owner Service section for engine transmission and lubrication information Fuel Fill fuel tank with the correct fuel Refer to engine man ual INSTALL DRIVE TIRES Figure 12 Drive Tire Installed 1 Install drive tires using ...

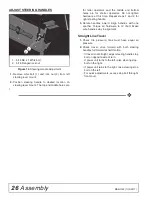
Page 26: ...otate handles inward Align handles with one another Torque all hardware to 12 lbs ft Make sure handles stay in alignment Straight Line Travel 1 Check tire pressure tires must have equal air pressure 2 Check travel drive forward with both steering handles full forward at half throttle If travel is not straight adjust steering handle stop bolt on opposite side of turn If power unit turns to the left...

Page 27: ...tion including hydrostatic neutral and safety switch system page 11 ___ Check all fluid levels See Lubrication page 25 ___ Check tire pressure See Drive Tire Pressure page 25 DELIVERY CHECK LIST DEALER S RESPONSIBILITY ___ Show customer how to make adjustments ___ Instruct customer how to lubricate and explain importance of lubrication ___ Point out the safety decals Explain their meaning and the ...

Page 28: ...28 Dealer Check Lists MAN1192 1 13 2017 NOTES ...

Page 29: ...22hp 32 HYDROSTAT DRIVE SYSTEM 33 PTO CLUTCH PUMP ASSEMBLY 34 35 PTO GEARBOX 35 SEAT ASSEMBLY 36 STEERING ASSEMBLY 37 WIRING DIAGRAM FZ22 2 Wiring Diagram 38 39 TAILWHEEL ASSEMBLY Wide Stance Tailwheel Assembly 40 HEADLIGHT KIT OPTIONAL 41 COUNTERWEIGHT MOUNT KIT 42 Parts Index Mow n Machine FZ22 2 ...

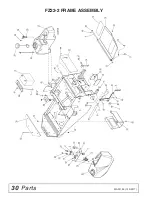
Page 30: ...30 Parts MAN1192 1 13 2017 FZ22 2 FRAME ASSEMBLY ...

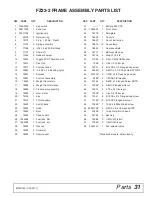
Page 31: ... 2 Gas cap 29 78799 2 Grommet 30 78335 2 Remote vent REF PART QTY DESCRIPTION 31 1 Battery 340 CCA 32 1044901 1 Front cover 33 78779 1 Skid plate 34 78606 1 Console 35 78607 1 Decal instruction 36 78610 12 Hose clamp 37 78632 1 Gearbox shield 38 78717 1 Battery hold down 39 78718 6 Weight 15 6 lb 40 11036 2 3 4x1 1 2x18GA Washer 41 1326 2 1 8 x 1 2 Cotter pin 42 16231 8 5 16 NC x 1 2 Flanged cap s...

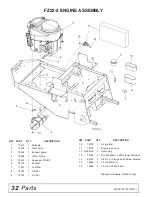
Page 32: ...FS651V 6 78778 1 Exhaust 7 71812 1 Fuel filter 8 78722 1 Oil filter 9 78723 1 Air filter 10 78724 1 Air pre filter 11 78725 1 Engine tune up kit 12 21536100 2 Spark plug 13 78738 4 Nut Whiz M8 x 1 25P Flange Stainless 14 62153 4 3 8 NC x 1 Flange Head Screw Serated 15 70065 4 1 4 NC Whiz nut 16 70068 4 1 4 NC x 3 4 Whiz bolt Standard Hardware Obtain Locally REF PART QTY DESCRIPTION ...

Page 33: ...tter hair pin 2 12 35155 4 5 16 SAE Flat washer ZP 13 62155 4 5 16 NC x 2 3 4 Cap screw GR5 14 70065 2 1 4 NC Whiz nut 15 71206 2 1 4 20 Flanged hex screw 16 71851 8 5 16 NC x 3 4 Flanged cap screw 17 73163 16 5 16 NC Flanged whiz nut 18 73955 2 23 x 10 50 Turf tire wheel or 18 74093 1 23 x 10 50 Chevron tire wheel right 18 74097 1 23 x 10 50 Chevron tire wheel left or 18 78625 2 23 x 8 50 Turf ti...

Page 34: ...34 Parts MAN1192 1 13 2017 PTO CLUTCH PUMP ASSEMBLY ...

Page 35: ...PTO 19 1033958 2 3 8NC x 1 1 4 Flanged screw 20 14350 2 3 8 NC Flanged lock nut 21 19025 2 5 8 NC Flanged lock nut 22 2864 3 3 4 SAE Hardened flat washer 23 2978 2 1 4 NC x 3 4 Socket Head Cap Screw 24 57817 3 5 8 SAE Hardenend flat washer 25 5849 1 3 4 NF Slotted hex nut 26 62533 1 7 16 NF x 2 Cap screw GR5 27 64291 1 5 32 x 1 Cotter pin 28 70065 4 1 4 NC Whiz nut 29 78188 1 3 8NF x 1 Cap screw G...

Page 36: ...Back cover 13M 16 78502 1 Wiring harness 13M 17 78504 1 Weight adjust knob 13M 18 78494 1 Arm rest assembly RH 13M REF PART QTY DESCRIPTION 19 78496 2 Arm rest pad 13M 20 78495 1 Arm rest assembly LH 13M 21 78497 1 2IN Retractable seat belt 13M 22 78503 1 4IN Track set 13M 23 78700 1 DCL Mown Machine 24 78834 2 DCL Model FZ22 2 27 78832 1 Seat platform w decals 28 19025 4 5 8 NC Flanged lock nut 2...

Page 37: ... 1 bolt 21 70423 2 1 2 Nylon washer 22 71314 1 Steering safety switch mount LH 22 71313 1 Steering safety switch mount RH 23 71323 4 1 2 Nylon Bushing REF PART QTY DESCRIPTION 24 71632 4 5 16 NC X 1 Whiz bolt 25 72886 4 Nylon shoulder washer 26 73023 2 Steering lever 27 73163 4 5 16 NC Flanged whiz nut 28 73581 2 Pivot bushing 29 73896 4 Weight transfer sleeve 30 75105 2 Steering safety switch 31 ...

Page 38: ...38 Parts MAN1192 1 13 2017 FZ22 2 WIRING DIAGRAM ...

Page 39: ...safety switch 8 75502 1 Seat switch 9 73902 1 Hour meter 10 71475 1 Bosch style relay 12 71385 1 Fuse 30 amp auto 13 71387 1 Fuse 7 5 amp auto 14 78043 1 Positive battery cable w terminal boot 15 78042 1 Negative battery cable 16 75310 1 Engine solenoid relay 17 75324 1 Ground wire solenoid 18 75390 1 Positive cable short 18A 75392 1 Boot not shown 19 75309 1 Engine wiring harness jumper 20 78636 ...

Page 40: ...ssembly tire 15 x 6 6 11 09231800 2 Spacer wheel 12 765 2 1 2 NC Lock nut 13 38107 2 1 2 NC x 9 HHCS 14 70417 2 Bushing washer 15 5849 2 3 4 NF Slotted hex nut 16 70332 2 Dust cap 17 64291 2 Cotter pin 5 32 x 1 21 62153 4 3 8 NC x 1 Flanged screw SRTD 22 70336 1 Axle beam includes item 22 23 73740 1 Rear axle pivot 24 74065 2 Oilite bushing 25 70602 1 Washer 1 2 x 2 1 4 26 855 1 1 2 Standard lock ...

Page 41: ... 73938 Headlight kit 1 73937 1 Light bracket left 2 73936 1 Light bracket right 3 73935 2 Rect work light with switch 4 07516000 4 Button bumper 5 6096 4 5 16 NC x 3 4 HHCS 6 2472 4 5 16 Lock washer REF PART QTY DESCRIPTION 7 4378 4 5 16 Flat washer 8 5288 2 1 4 NC Hex nut 9 1985 2 1 4 Lock washer 10 8 Plastic tie Standard hardware obtain locally ...

Page 42: ...42 Parts MAN1192 1 13 2017 78727 COUNTERWEIGHT MOUNT KIT OPTIONAL REF PART QTY DESCRIPTION 1 7 Weight 14 8 lb 2 78728 4 3 8 NC x 8 Carriage bolt GR5 ZP Standard hardware obtain locally ...

Page 43: ...1 1 2 467 634 722 979 1020 1383 Diameter Thread Pitch Millimeters Wrench Size Coarse Thread Fine Thread Diameter Thread Pitch Millimeters Marking on Head Marking on Head Metric 8 8 Metric 10 9 Metric 8 8 Metric 10 9 N m lbs ft N m lbs ft N m lbs ft N m lbs ft 6 x 1 0 10 mm 8 6 11 8 8 6 11 8 6 x 1 0 8 x 1 25 13 mm 20 15 27 20 21 16 29 22 8 x 1 0 10 x 1 5 16 mm 39 29 54 40 41 30 57 42 10 x 1 25 12 x...

Page 44: ...c HHCS Hex Head Cap Screw HT Heat Treated JIC Joint Industry Council 37 Degree Flare LH Left Hand LT Left m Meter mm Millimeter M Male MPa Mega Pascal N Newton NC National Coarse NF National Fine NPSM National Pipe Straight Mechanical NPT National Pipe Tapered NPT SWF National Pipe Tapered Swivel Female ORBM O Ring Boss Male P Pitch PBY Power Beyond psi Pounds per Square Inch PTO Power Take Off QD...

Page 45: ...Temperature Lights 11 Controls and Switches 11 Moving Disabled Power Unit 14 Owner Pre Operation Checklist Owner s Responsibility 15 Practice Operation 12 Uneven Terrain Operation 12 Safety Switch System 11 Start Engine 12 Cold Weather Starting Tips 12 Start Mower or Attachment 12 Stop Mower or Attachment 12 Steering Handle Operation 13 Steering Handle Positions 13 Stopping Engine 14 Weight Transf...

Page 46: ...e failure or loss caused by improper operation improper maintenance misuse or an accident WOODS obligation under this Warranty is limited to at WOODS option the repair or replacement free of charge of the product if the product is defective or in noncompliance with this Warranty The product must be returned to WOODS with proof of purchase within thirty 30 days after such defect or noncompliance is...

Page 47: ...irs made with parts other than those obtained through WOODS WOODS makes no warranty express or implied with respect to engines batteries tires or other parts or accessories with respect to which the manufacturer provides a separate warranty WHAT WOODS WILL DO TO CORRECT PROBLEMS WOODS obligation under this Warranty is limited to at WOODS option the repair or replacement free of charge of the produ...

Page 48: ...names or service marks not owned by Woods Equipment Company that appear in this manual are the property of their respec tive companies or mark holders Specifications subject to change without notice WOODS A Blount International Brand 2606 South Illinois Route 2 Post Office Box 1000 Oregon Illinois 61061 USA 800 319 6637 tel 800 399 6637 fax woodsequipment com ...

Reviews: