background image

46

 Appendix

Bolt Torque & Size Charts (Rev. 3/28/2007)

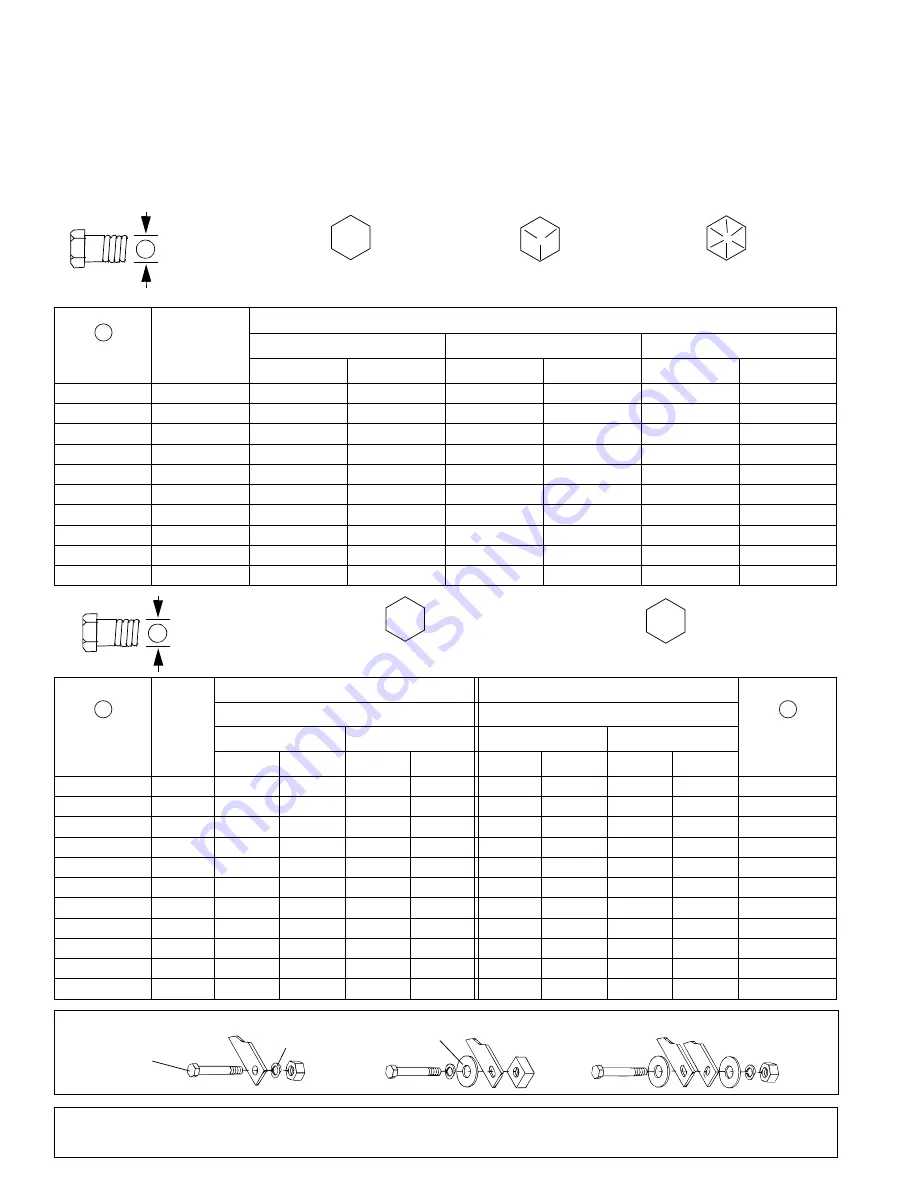
BOLT TORQUE CHART

Always tighten hardware to these values unless a different torque value or tightening procedure is listed for a specific 
application.

Fasteners must always be replaced with the same grade as specified in the manual parts list.

Always use the proper tool for tightening hardware: SAE for SAE hardware and Metric for metric hardware.

Make sure fastener threads are clean and you start thread engagement properly.  

All torque values are given to specifications used on hardware defined by SAE J1701 MAR 99 & J1701M JUL 96.

Diameter 

(Inches)

Wrench

Size

MARKING ON HEAD

SAE 2

SAE 5

SAE 8

lbs-ft

N-m

lbs-ft

N-m

lbs-ft

N-m

1/4"

7/16"

6

8

10

13

14

18

5/16"

1/2"

12

17

19

26

27

37

3/8"

9/16"

23

31

35

47

49

67

7/16"

5/8"

36

48

55

75

78

106

1/2"

3/4"

55

75

85

115

120

163

9/16"

13/16"

78

106

121

164

171

232

5/8"

15/16"

110

149

170

230

240

325

3/4"

1-1/8"

192

261

297

403

420

569

7/8"

1-5/16"

306

416

474

642

669

907

1"

1-1/2"

467

634

722

979

1020

1383

Diameter & 

Thread Pitch 

(Millimeters)

Wrench 

Size

COARSE THREAD

FINE THREAD

Diameter & 

Thread Pitch 

(Millimeters)

MARKING ON HEAD

MARKING ON HEAD

Metric 8.8

Metric 10.9

Metric 8.8

Metric 10.9

N-m

lbs-ft

N-m

lbs-ft

N-m

lbs-ft

N-m

lbs-ft

6 x 1.0

10 mm

8

6

11

8

8

6

11

8

6 x 1.0

8 x 1.25

13 mm

20

15

27

20

21

16

29

22

8 x 1.0

10 x 1.5

16 mm

39

29

54

40

41

30

57

42

10 x 1.25

12 x 1.75

18 mm

68

50

94

70

75

55

103

76

12 x 1.25

14 x 2.0

21 mm

109

80

151

111

118

87

163

120

14 x 1.5

16 x 2.0

24 mm

169

125

234

173

181

133

250

184

16 x 1.5

18 x 2.5

27 mm

234

172

323

239

263

194

363

268

18 x 1.5

20 x 2.5

30 mm

330

244

457

337

367

270

507

374

20 x 1.5

22 x 2.5

34 mm

451

332

623

460

495

365

684

505

22 x 1.5

24 x 3.0

36 mm

571

421

790

583

623

459

861

635

24 x 2.0

30 x 3.0

46 mm

1175

867

1626

1199

1258

928

1740

1283

30 x 2.0

A

SAE SERIES 
TORQUE 
CHART

SAE Bolt Head 

Identification

SAE Grade 2

(No Dashes)

SAE Grade 5

(3 Radial Dashes)

SAE Grade 8

(6 Radial Dashes)

A

METRIC SERIES 
TORQUE 
CHART

Metric Bolt Head 

Identification

8.8

Metric

Grade 10.9

10.9

Metric

Grade 8.8

A

A

A

Typical Washer 
Installations

Lock Washer

Flat Washer

8/9/00

Bolt

Summary of Contents for TURFKEEPER PRO TKP60.40

Page 1: ...OPERATOR S MANUAL TURFKEEPER PRO FINISH MOWER MAN1313 3 3 2021 TKP60 40 TKP72 40 TKP84 40...

Page 2: ...at www WoodsEquipment com or in the United States and Canada call 1 800 319 6637 The equipment you have purchased has been carefully engineered and manufactured to provide dependable and satisfactory...

Page 3: ...G TECHNIQUES 16 OPERATING TIPS 17 TRANSPORTATION 17 REMOVING MOWER FROM TRACTOR STORAGE 17 OWNER SERVICE 18 OWNER SERVICE 18 BLOCKING METHOD 18 LUBRICATION INFORMATION 18 BELT SERVICING 20 BLADE SERVI...

Page 4: ...to redesign and change the machines as may be necessary without notification Throughout this manual references are made to right and left directions These are determined by standing behind the tracto...

Page 5: ...ngth and can result in personal injury or death Before starting power unit check all equipment driveline guards for damage Replace any damaged guards Make sure all guards rotate freely on all drivelin...

Page 6: ...the influence of alcohol or drugs Operate only in daylight or good artificial light Keep hands feet hair and clothing away from equipment while engine is running Stay clear of all moving parts Always...

Page 7: ...oving parts Wear sturdy rough soled work shoes and protective equipment for eyes hair hands hearing and head and respirator or filter mask where appropriate Make sure attachment is properly secured ad...

Page 8: ...8 Safety RD 54 60 72 Rev 1 12 2007 STORAGE Follow manual instructions for storage Keep children and bystanders away from stor age area Rev 12 17 2020...

Page 9: ...ce and in good condition BLADE CONTACT OR THROWN OBJECTS CAN CAUSE SERIOUS INJURY OR DEATH DANGER 15503 C 1 15503 5 Serial Number Plate 2 18869 11 20106 Rear Reflector 12 13726 If shaft connection is...

Page 10: ...oo close to decals when using a pressure washer high pressure water can enter through very small scratches or under edges of decals causing them to peel or come off Replace safety decals if they are m...

Page 11: ...t 540 RPM Do not exceed Before working underneath carefully read Oper ator s Manual instructions disconnect driveline raise mower securely block up all corners with jackstands and check stability Secu...

Page 12: ...k hitch sleeves 14 over clevis pins 13 in mower lower hitch links 7 Install mower quick hitch a frame bars 68 over the clevis pins on the inside face of the mower lower hitch links Retain with klik pi...

Page 13: ...shaft until locking device engages To Remove Hold driveline into position pull locking collar back and slide driveline off tractor PTO shaft Figure 7 Lock Collar Front Caster Wheel Interference Check...

Page 14: ...s covered by the larger profile shield 4 Place driveline halves parallel to one another to determine how much to shorten the driveline Figure 9 Drive Halves Placed Parallel 5 Measure from end of the u...

Page 15: ...side to side Check by measuring distance from mower side frame to the ground at each deck rail 2 Verify that the same amount of spacers are under all caster arms 3 Control cutting height by adjusting...

Page 16: ...ngage brake and disengage tractor PTO OPERATING TECHNIQUE Starting and Stopping 1 Power for operating the mower is supplied by the tractor PTO Operate PTO at 540 RPM Know how to stop the tractor and m...

Page 17: ...er rain TRANSPORTATION Rotating blades Contact with rotating blades could cause seriou injury or death 1 Disengage the PTO and wait for all moving parts to come to a complete stop Raise the tractor 3...

Page 18: ...g devices for this mower are jackstands with a load rating of 1000 pounds or more One jackstand under each corner of the mower four total must be installed before working underneath this unit See Figu...

Page 19: ...rease 5 Locate grease access holes in the tractor end joint bellows Rotate driveline to align access hole with grease fitting in the tractor cross end cap Apply 2 full pumps of grease 6 Locate white p...

Page 20: ...Method 1 Insert 1 2 ratchet or breaker bar into square hole on idler arm Rotate idler arm clockwise to remove tension on belt Obtain enough belt length to route it over spring loaded idler B then slow...

Page 21: ...jury 1 Remove bolt 79 Figure 19 which has right hand threads 2 Remove belville washers 78 and blade 77 Sharpen Blades NOTICE When sharpening blades be sure to bal ance them Unbalanced blades will caus...

Page 22: ...of dirt grass crop residue etc from machine Inspect machine and replace worn or damaged parts Replace any safety decals that are missing or not readable supplied free by your Woods dealer Periodically...

Page 23: ...wet for mowing Allow grass to dry before mowing Blades unable to cut that part of grass pressed down by path of tractor tires Slow ground speed of tractor but keep engine running at full PTO RPM Cut t...

Page 24: ...under mower and around blade spindle shaft for wire rags or other foreign material Clean all mate rial from under mower Bearing failure Check that spindles turn freely Replace any spindle that does n...

Page 25: ...akes turn engine off remove key block tractor wheels front and rear and disconnect mower driveline from tractor The only approved blocking devices for this mower are jackstands with a load rating of 1...

Page 26: ...the side level plug Gearbox capacity is almost 4 pints Repair to this gearbox is limited to replacing bearings seals and gaskets Replacing gears shafts and a housing is not cost effective It is more...

Page 27: ...ips 4 Place seal squarely on housing spring loaded lip toward housing Select a piece of pipe or tubing with an OD that will sit on the outside edge of the seal but will clear the housing Tubing with a...

Page 28: ...move thumb screws from left and center belt shields Remove shields 5 Grasp belt on both sides of left spindle sheave and pull against spring loaded idler until belt slips over spindle sheave Carefully...

Page 29: ...rtical shaft remove vertical shaft oil seal 18 Replace with new seal see Seal Replacement page 26 Vertical seal should be recessed in housing Hori zontal seal should be pressed flush with outside of h...

Page 30: ...from the top of mower deck to the center line of the drive pulley must be 2 3 4 1 8 This is a critical dimension and must be carefully adjusted for proper belt life Add or subtract shim washers under...

Page 31: ...and tap on yoke to drive cup up out of yoke See Figure 28 3 Clamp cup in vise as shown in Figure 29 and tap on yoke to completely remove cup from yoke Repeat Step 2 Step 3 for opposite cup 4 Place uni...

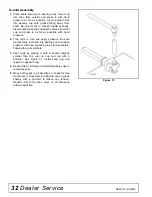
Page 32: ...n vise and apply pressure Be sure journal cross is started into bearings and continue pressure with vise squeezing in as far as possible Tapping the yoke will help 3 Seat cups by placing a drift or so...

Page 33: ...t ties and discard cardboard NOTICE Gearbox is filled at the factory Prior to delivery make sure each gearbox is half filled with 80W or 90W API GL 4 or GL 5 gear lube Check by removing sight plug in...

Page 34: ...quick hitch a frame bars when mower is disconnected from tractor Figure 32 Hitch Assembly Connect PTO driveline directly to power unit PTO shaft Never use adapter sleeves or adapter shafts Adapters ca...

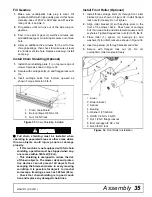
Page 35: ...ust be stopped when any one comes within 300 feet 92 m This shielding is designed to reduce the risk of thrown objects The mower deck and protec tive devices cannot prevent all objects from escaping t...

Page 36: ..._ Present Operator s Manual and request that customer and all operators read it before oper ating equipment Point out the manual safety rules explain their meanings and emphasize the increased safety...

Page 37: ...INDEX MAIN FRAME ASSEMBLY 38 40 GEARBOX ASSEMBLY 41 DRIVELINE ASSEMBLY 42 BLADE SPINDLE ASSEMBLY 43 REAR CHAIN SHIELDING ASSEMBLY OPTIONAL 44 FRONT ROLLER ASSEMBLY OPTIONAL 44 Turfkeeper Pro Finish Mo...

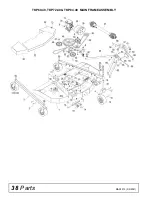
Page 38: ...38 Parts MAN1313 3 3 2021 TKP60 40 TKP72 40 TKP84 40 MAIN FRAME ASSEMBLY...

Page 39: ...ng idler 25 33034 33034 33034 4 Bolt carriage 5 8 NC X 1 3 4 GR5 ZP 26 578454 1 Bolt flanged 5 8 NC X 4 25 GR5 ZP 27 1598 1 Jam nut 5 8 NC 28 3379 3379 12 HHCS 1 2 NC X 1 5 GR5 ZP 28 3379 11 HHCS 1 2...

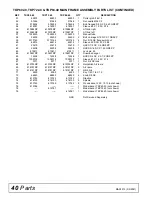
Page 40: ...2 88 61 23479 23479 23479 1 HHCS 1 2 NC X 5 GR5 ZP 62 24408 24408 24408 1 HHCS 5 16 NC X 1 50 GR5 ZP 63 613811 613811 613811 1 Lock pin 25 64 610657RP 610657RP 610657RP 1 Driveline hanger 65 12558 12...

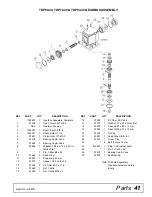
Page 41: ...4 x 50 10 57466 2 Snap Ring 11 20895 1 Snap Ring 45 mm 12 57373 1 Spacer 35 3 x 48 x 2 5 13 57328 2 Kit Shim 60 3 x 71 6 14 57468 1 Nut Castle 15 51946 1 Nut Castle M24 x 2 REF PART QTY DESCRIPTION 16...

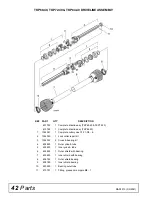
Page 42: ...84 40 1 1044051 1 Complete collar yoke C12 1 3 8 6 2 1044050 1 Lock collar repair kit 3 1044052 2 Cross bearing kit 4 603622 1 Outer yoke tube 5 603623 1 Inner yoke tube 6 603624 1 Outer shield with b...

Page 43: ...spacer 74 2 616109RP 616109RP 616109RP 1 Housing cast 74 3 616105RP 616105RP 616105RP 2 Bearing 1 Sealed 74 4 616104RP 616104RP 616104RP 1 Sleeve 1 03 X 1 25 X 2 72 74 5 616103RP 616103RP 616103RP 1...

Page 44: ...1 4 proof 2 4763 74 Chain 3 link 1 4 proof 3 1007855 1 Pin 49 to 51 chains 3 616096 1 Pin 56 to 58 chains 3 1007851 1 Pin 22 to 24 chains 4 24597 24597 24597 Bolt carriage 3 8 NC x 3 4 5 14350 14350 1...

Page 45: ...Warranty Product 48 Replacement Parts 49 Operation 10 Adjustment Cutting Height 15 Cutting Height Chart 15 Tractor Top Link 15 Attaching Mower to Tractor 11 Pre Operation Checklist 16 Front Caster Wh...

Page 46: ...1 2 467 634 722 979 1020 1383 Diameter Thread Pitch Millimeters Wrench Size COARSE THREAD FINE THREAD Diameter Thread Pitch Millimeters MARKING ON HEAD MARKING ON HEAD Metric 8 8 Metric 10 9 Metric 8...

Page 47: ...HHCS Hex Head Cap Screw HT Heat Treated JIC Joint Industry Council 37 Degree Flare LH Left Hand LT Left m Meter mm Millimeter M Male MPa Mega Pascal N Newton NC National Coarse NF National Fine NPSM...

Page 48: ...nce with this Warranty The product must be returned to WOODS with proof of purchase within thirty 30 days after such defect or noncompliance is discovered or should have been discovered routed through...

Page 49: ...product must be returned to WOODS with proof of purchase within thirty 30 days after such defect or noncompliance is discovered or should have been discovered routed through the dealer and distributo...

Page 50: ...ames or service marks not owned by Woods Equipment Company that appear in this manual are the property of their respec tive companies or mark holders Specifications subject to change without notice WO...

Reviews: