-14-
M1102/M1103 16-Speed Drill Press
SE
T
U
P
The headstock must be mounted on the column/base
assembly before the drill press can be operated. Moving
and installing the headstock is a two-person job.
Headstock
To install the headstock, do these steps:
1.
Loosen the two set screws on the right side of the
headstock enough so they are flush with the inside
pocket of the headstock.
The headstock is very heavy. In
the next step, you MUST have
assistance when moving, lifting or
mounting the headstock on the
column and base assembly.
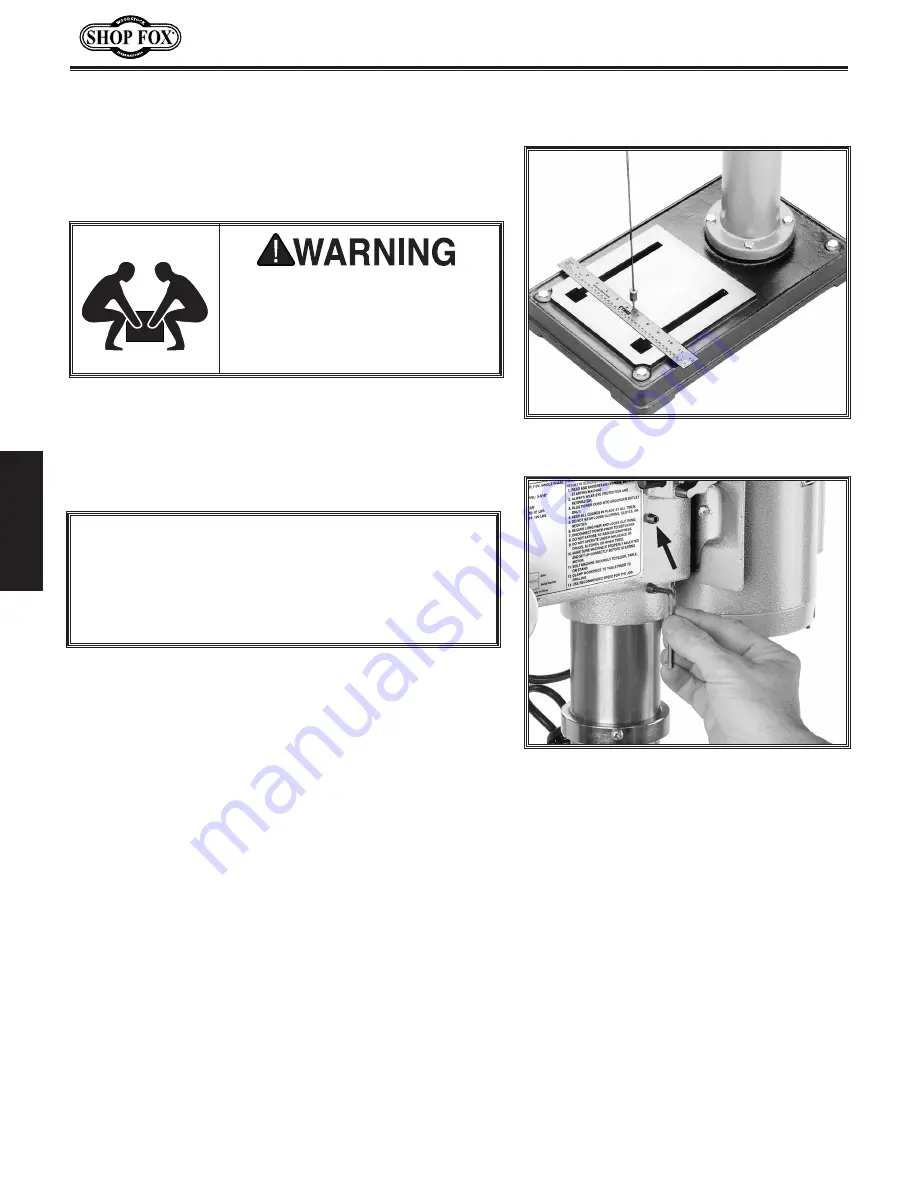
Figure 9.
Aligning headstock with a
typical drill press base.
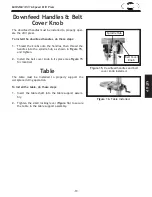
Figure 10.
Securing headstock to column.
2.
With the help of an assistant, lift the headstock
assembly above the column, and gently slide it down
the column as far as it will go.
Note:
An alternate method is to lay the headstock
on the packaging styrofoam and slide the column
into the headstock, tilt the assembly up, and posi-
tion the drill press on its base in the upright posi-
tion.
3.
Place a ruler or tape measure on the base and
suspend a plum bob from the center of the
headstock spindle so it is over the tape/ruler as
shown in
Figure 9
.
4.
Center the headstock directly over the base as
indicated by the plum bob and ruler.
5.
Tighten the two headstock setscrews to the column,
as shown in
Figure 10
.
NOTICE
When doing the next step, DO NOT force the head-
stock onto the column! If you do, you could damage
the headstock and the column.
Summary of Contents for SHOP FOX M1102
Page 2: ......
Page 25: ...23 M1102 M1103 16 Speed Drill Press OPERATIONS...
Page 26: ...24 M1102 M1103 16 Speed Drill Press OPERATIONS...
Page 35: ...33 M1102 M1103 16 Speed Drill Press SERVICE Service Notes...
Page 36: ...34 M1102 M1103 16 Speed Drill Press PARTS M1102 M1103 Parts Diagram...
Page 40: ...38 M1102 M1103 16 Speed Drill Press PARTS Parts Notes...
Page 44: ......


