-25-
Model W1704 (For Machines Mfd. Since 01/20)
O
PE
R
ATIO
NS
Installing/Removing.
Tailstock.Center
The included live center installs into the tailstock quill
with an MT#1 tapered fit.
Installing.Tailstock.Center
1.
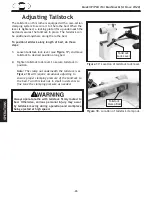
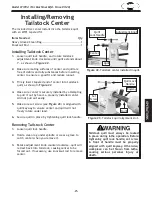
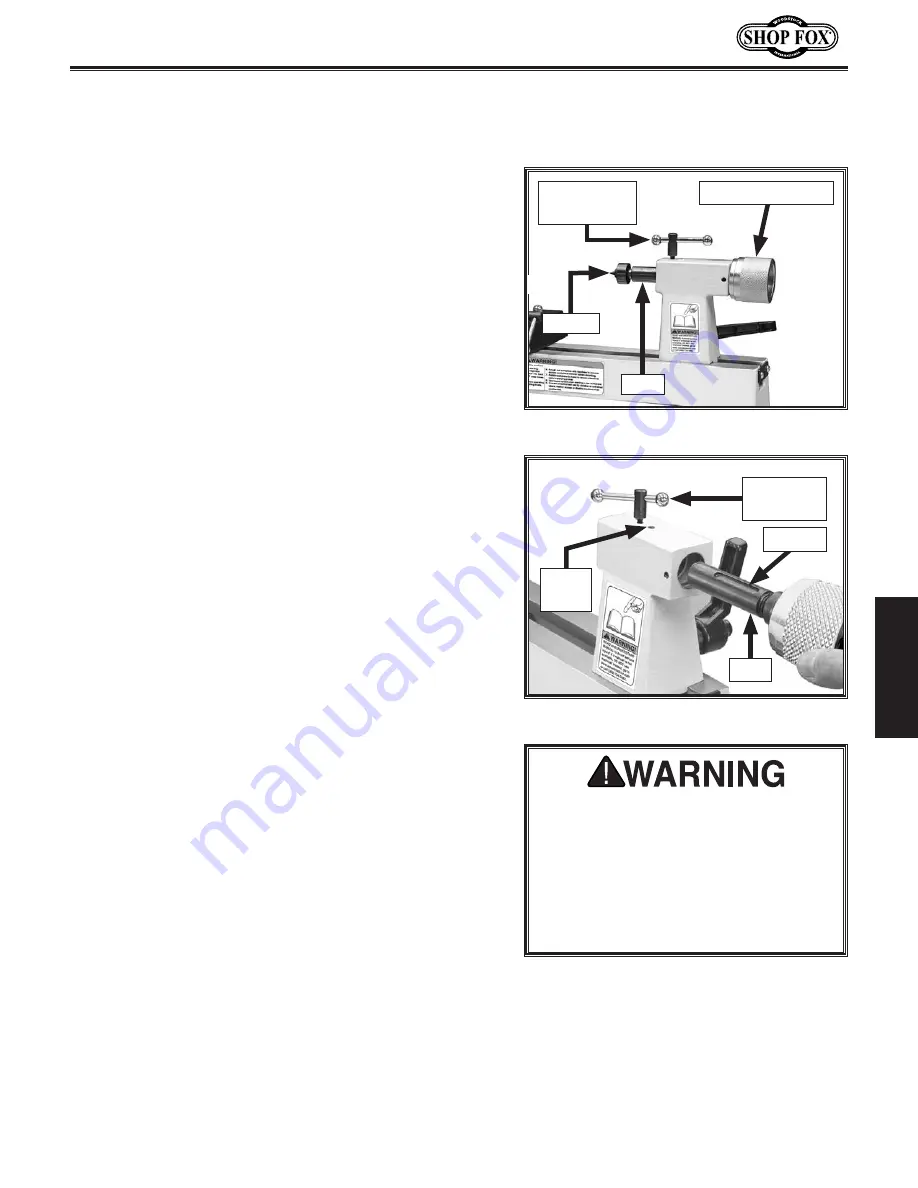
Loosen quill lock handle, and rotate tailstock
adjustment knob clockwise until quill extends about
1", as shown in
Figure.22
.
2..
Make sure mating surfaces of center and quill are
free of debris and oily substances before inserting
center to ensure a good fit and reduce runout.
3.
Firmly insert tapered end of center into tailstock
quill, as shown in
Figure.22
.
4.
Make sure center is securely installed by attempting
to pull it out by hand—a properly installed center
will not pull out easily.
5..
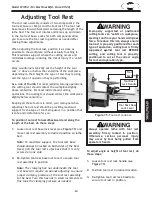
Make sure set screw (see
Figure.23
) is aligned with
quill keyway to ensure center and quill will not
freely rotate under load.
6.
Secure quill in place by tightening quill lock handle.
Removing.Tailstock.Center
1.
Loosen quill lock handle.
2.
Hold a clean rag under spindle or wear a glove to
catch center when you remove it.
3.
Rotate
adjustment knob counterclockwise—quill will
retract back into tailstock, causing center to be
forced out. If necessary, use knockout rod to remove
center.
Tailstock. quill. must. always. be. locked.
in.place.during.lathe.operation..Before.
tightening. quill. lock.handle,. set. screw.
in. front. of. handle. must. be. properly.
aligned. with. quill. keyway.. Otherwise,.
workpiece. can. be. thrown. from. lathe,.
causing. serious. personal. injury. or.
death.
Figure.22.
Tailstock center installed in quill.
Items.Needed.
Qty
Heavy Gloves/Clean Rag .......................................1
Knockout Rod ....................................................1
Quill
Adjustment Knob
Center
Figure.23.
Tailstock quill alignment slot.
Keyway
Quill
Set
Screw
Quill Lock
Handle
Quill
Lock Handle
Summary of Contents for SHOP FOX W1704
Page 48: ......

