37630 easYgen-3000XT Flash Instruction
w w w . w o o d w a r d . c o m
5
5
Update via USB:
Continue at Step 6
Update via Ethernet:
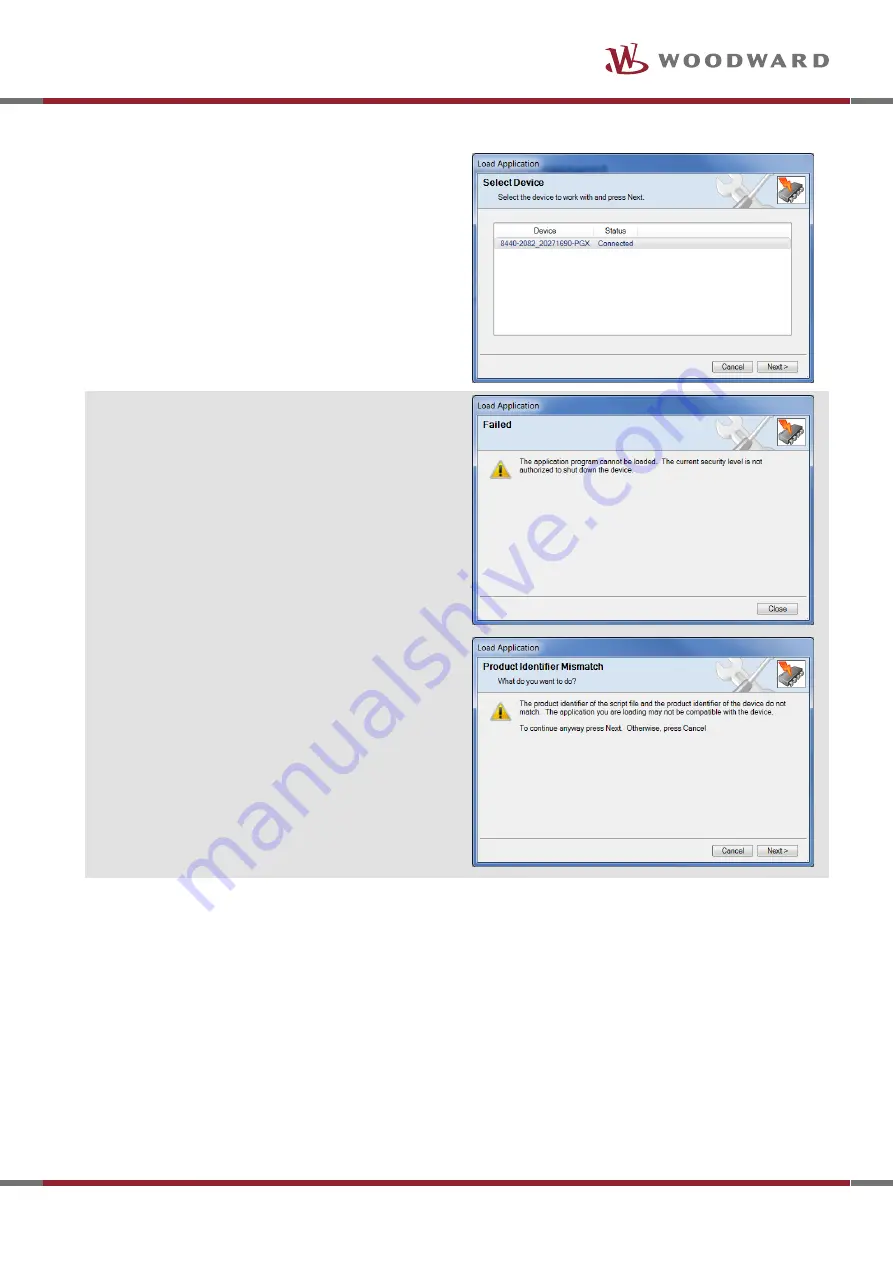
“Select Device” window
appears.
Notes!
Ensure that the device will
NOT BE SWITCHED OFF
during update process
before you
click “Next”!
Select you device if not already selected and
click “Next”
Notes!
If next window says “Failed”:
In this case the actually entered code is below
Code Level 5.
Click “Close” then “Disconnect” in ToolKit window.
Go back to
Chapter “Preparations” step 4 and
login with code for Code Level 5
If “Production Identifier Mismatch” window
appears:
The .scp file you have selected does not fit to the
hardware of that device.
Click “Cancel” and
check the selected file in step
3
.
6
The update process has now started, and ToolKit transfers the file to the memory of the device.
easYgen-3000XT with display:
The device switches off the display. Furthermore, “Ready for operation” relay de-energizes.
The buttons TEST, STOP, AUTO, MAN and the yellow alarm LED are illuminated
easYgen-3000XT with LEDs (metal housing):
LEDs “Communication” and “Operation” turn red. Furthermore, “Ready for operation” relay de-energizes.
Released


