Manual 26518V2
5009FT Installation/Hardware
Woodward
40
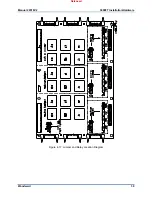
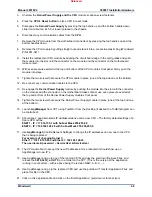
After all jumper-banks have been correctly positioned, mark the placement of each jumper-bank on the
FTM cover labels, located on each FTM’s outer cover. See Figure 4-18.
Figure 4-18. FTM Labels
Wiring Notes:
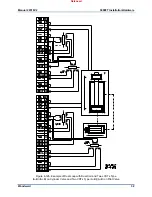
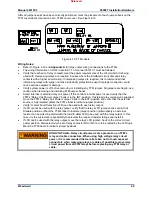
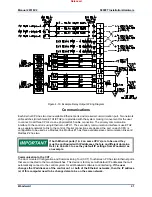
Refer to Figure 4-19 and
Appendix A
for relay output wiring connections to the FTMs.
The wiring information on DO’s in section 7.1 of manual 26167V1 must be followed.
Verify that each set of relay contacts meet the power requirements of the circuit which it is being
used with. Interposing relays are required in cases where the interfaced circuit demands relay
contacts with a higher power rating. If interposing relays are required, it is recommended that
interposing relays with surge (inductive kick-back) protection be used. Improper connection could
cause serious equipment damage.
Verify system power is off before removing or installing any FTM jumper. All jumpers are fragile, use
caution when removing and installing FTM jumper-banks.
Select internal or external relay coil power. If the control’s internal power is used verify that the
FTM’s “Relay Coil Power Jumper” bank is in the INT. position. If external relay coil power is supplied,
move the FTM’s “Relay Coil Power Jumper” bank to the EXT. position and verify that the external
source is fully isolated. (Mark the FTM’s label to indicate jumper position.)
Verify if Latent Fault Detection (LFD) can be used with each relay output.
If LFD cannot be used with the relay output, verify that the relay’s LFD jumper-banks are in their
Disable positions. (Mark the FTM’s label to indicate jumper position.) Alternatively an external
resistor can be wired in parallel with the load to allow LFD to be used with the relay output. In this
case it is the customer’s responsibility to calculate the required resistor ratings and install it.
If LFD can be used with the relay output, move the relay’s LFD jumper- bank to the correct circuit
power position. Also select which set of relay contacts (NO or NC) are to be tested by the LFD logic.
Mark the FTM labels to indicate jumper positions.
HIGH VOLTAGE—Relay circuit power is also present on an FTM’s
relay and cable connectors. When using high voltage relay circuit
power, it is recommended that care be taken not to touch exposed
connectors when replacing relays or cables. If possible remove relay
circuit power from all FTM relays before replacing any FTM relay or
cable.
Released
Summary of Contents for MicroNet TMR 5009FT
Page 65: ...Manual 26518V2 5009FT Installation Hardware Woodward 63 Figure 8 4 DSLC Control Released...
Page 67: ...Manual 26518V2 5009FT Installation Hardware Woodward 65 Figure 8 5 Real Power Sensor Released...
Page 70: ...Manual 26518V2 5009FT Installation Hardware Woodward 68 Released...
Page 71: ...Manual 26518V2 5009FT Installation Hardware Woodward 69 Released...
Page 72: ...Manual 26518V2 5009FT Installation Hardware Woodward 70 Released...
Page 73: ...Manual 26518V2 5009FT Installation Hardware Woodward 71 Released...
Page 74: ...Manual 26518V2 5009FT Installation Hardware Woodward 72 Released...
Page 75: ...Manual 26518V2 5009FT Installation Hardware Woodward 73 Released...
Page 76: ...Manual 26518V2 5009FT Installation Hardware Woodward 74 Released...
Page 77: ...Manual 26518V2 5009FT Installation Hardware Woodward 75 Released...
Page 78: ...Manual 26518V2 5009FT Installation Hardware Woodward 76 Released...
Page 79: ...Manual 26518V2 5009FT Installation Hardware Woodward 77 Released...
Page 80: ...Manual 26518V2 5009FT Installation Hardware Woodward 78 Released...
Page 81: ...Manual 26518V2 5009FT Installation Hardware Woodward 79 Released...
Page 82: ...Manual 26518V2 5009FT Installation Hardware Woodward 80 Released...
Page 83: ...Manual 26518V2 5009FT Installation Hardware Woodward 81 Released...
Page 84: ...Manual 26518V2 5009FT Installation Hardware Woodward 82 Released...
Page 85: ...Manual 26518V2 5009FT Installation Hardware Woodward 83 Released...
Page 86: ...Manual 26518V2 5009FT Installation Hardware Woodward 84 Released...
Page 87: ...Manual 26518V2 5009FT Installation Hardware Woodward 85 Released...
Page 88: ...Manual 26518V2 5009FT Installation Hardware Woodward 86 Released...
Page 90: ...Manual 26518V2 5009FT Installation Hardware Woodward 88 Released...
Page 91: ...Manual 26518V2 5009FT Installation Hardware Woodward 89 Released...
Page 92: ...Manual 26518V2 5009FT Installation Hardware Woodward 90 Released...
Page 94: ...Manual 26518V2 5009FT Installation Hardware Woodward 92 Declarations Released...


