WSP-i250 Rev. 1.0
http://www.woosim.com
18
2
2
.
.
6
6
.
.
1
1
.
.
G
G
A
A
P
P
/
/
H
H
O
O
L
L
E
E
S
S
E
E
N
N
S
S
O
O
R
R
S
S
E
E
T
T
T
T
I
I
N
N
G
G
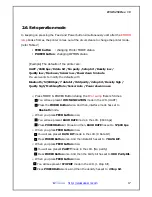
After setting GAP/HOLE of MARK and AUTO of SENSOR, the printer is required to save
the sensing Gap/Hole so please press the buttons by self-test way and keep pressing the
feed-button only and you can see "sensor setting" on LCD after the self-test ends up and
you can finish pressing the feed-button until after passing the 3rd label.
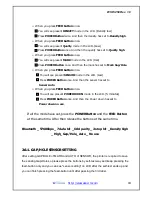
u
When you press
FEED button
once.
→
You will see present
DENSITY
mode in the LCD.
(Density low)
→
Press
POWER Button
twice.
And then the density has set to
Density high
.
u
When you press
FEED button
once.
→
You will see present
Quality
mode in the LCD.
(Low)
→
Press
POWER Button
once. And then the quality has set to
Quality high
.
u
When you press
FEED button
once.
→
You will see present
MARK
mode in the LCD. (
Use)
→
Press
POWER Button
once. And then the mark has set to
Mark Gap/Hole
.
u
When you press
FEED button
once.
→
Y
ou will see present
SENSOR
mode in the LCD.
(Low)
→
Press
POWER Button
once.
And then the sensor has set to
Sensor Auto
.
u
When you press
FEED button
once.
→
Y
ou will see present
POWER DOWN
mode in the LCD.
(5 minutes)
→
Press
POWER Button
once. And then the Power down has set to
Power down no use
.
If all the mode have set, press the
POWER Button
and the
FEED Button
at the same time. After then release the buttons at the same time.
Bluetooth _ 57600bps _ 7 data bit _ Odd parity _ 2 stop bit _ Density high
_ High_ Gap/Hole_ Auto _ No use


