Replacement parts
Greenstar 4000 – 6 720 891 162 (2020/09)
66
9.3
Removing the heat exchanger assembly
▶ Remove the fan, gas hose, mixing device and burner cover as
described in Chapter 8.7.1 "Checking the electrodes and cleaning
the heat exchanger", page 60.
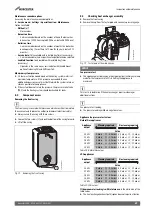
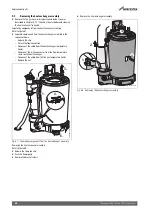
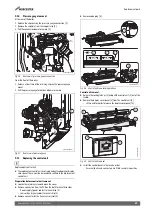
Separating components from the heat exchanger assembly.
Refer to figure 87.
▶ Separate components from the heat exchanger assembly in the
sequence shown.
– Release the clip.
– Detach the flow connection.
– Disconnect the cable from the heat exchanger temperature
limiter.
– Disconnect the in-line connector from the flow temperature
sensor on the heat exchanger.
– Disconnect the cable from the flue gas temperature limiter.
– Remove the nut.
Fig. 87 Separating components from the heat exchanger assembly
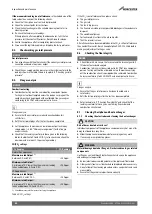
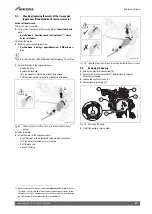
Removing the heat exchanger assembly
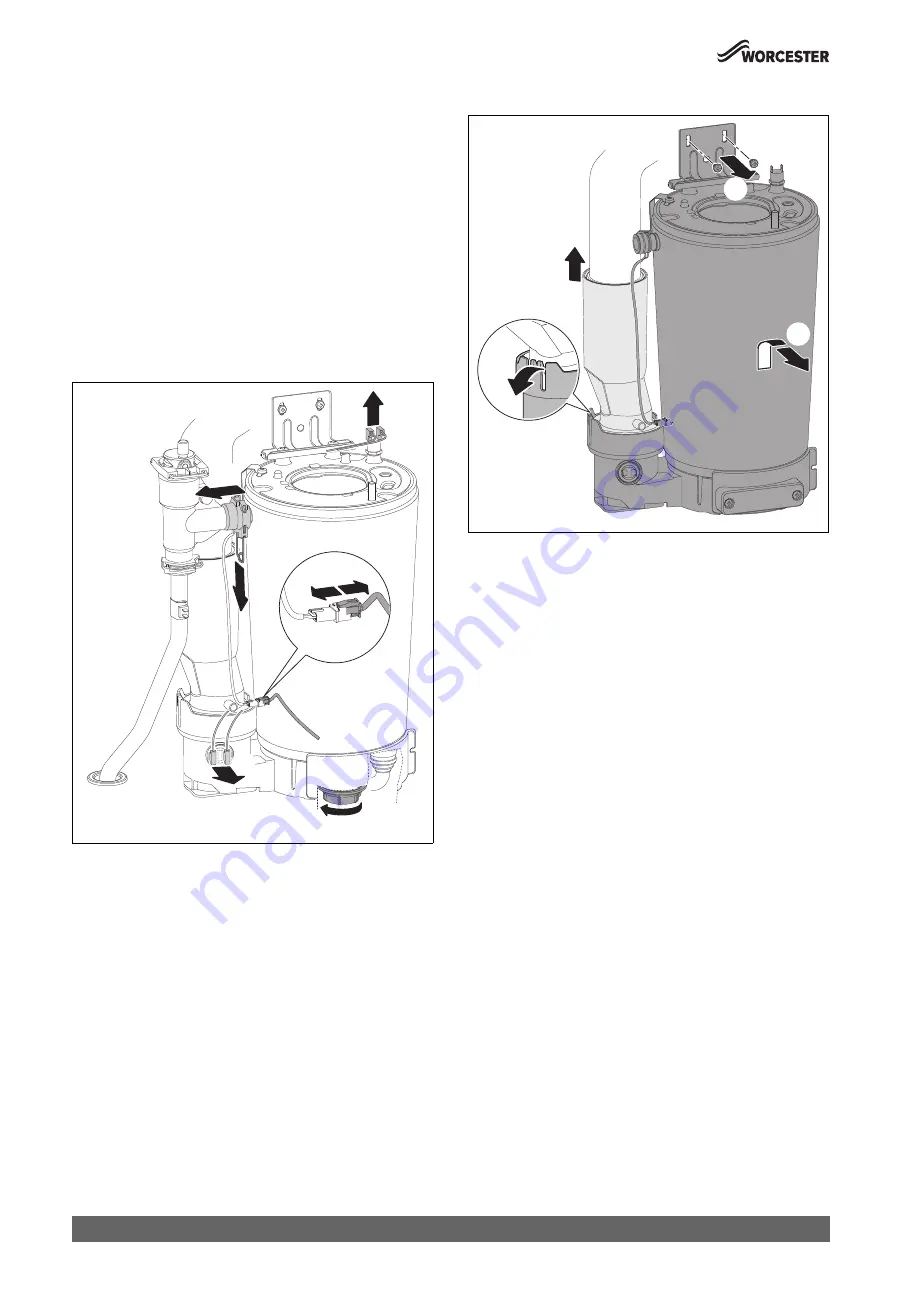
Refer to figure 88.
▶ Release the flue pipe clip.
▶ Push the flue pipe up.
▶ Remove the bracket screws.
▶ Remove the heat exchanger assembly.
Fig. 88 Removing the heat exchanger assembly
0010036210-001
3.
6.
4.
1.
5.
2.
0010036212-001
4.
2.
3.
1.

