21
Hold the machine onto the workpiece in its resting position when you switch the machine
on or off. The miller in the chuck could damage the workpiece.
• Clamp the workpiece into place or secure it in some other way so that it doesn‘t slide
around during the work.
• Hold the machine securely and move it across the workpiece evenly.
• Only use millers that show no signs of wear. Worn millers have a negative influence on
the effectiveness of the machine.
• When the work is finished, always switch the machine off before you pull the mains
plug.
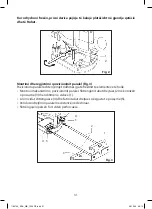
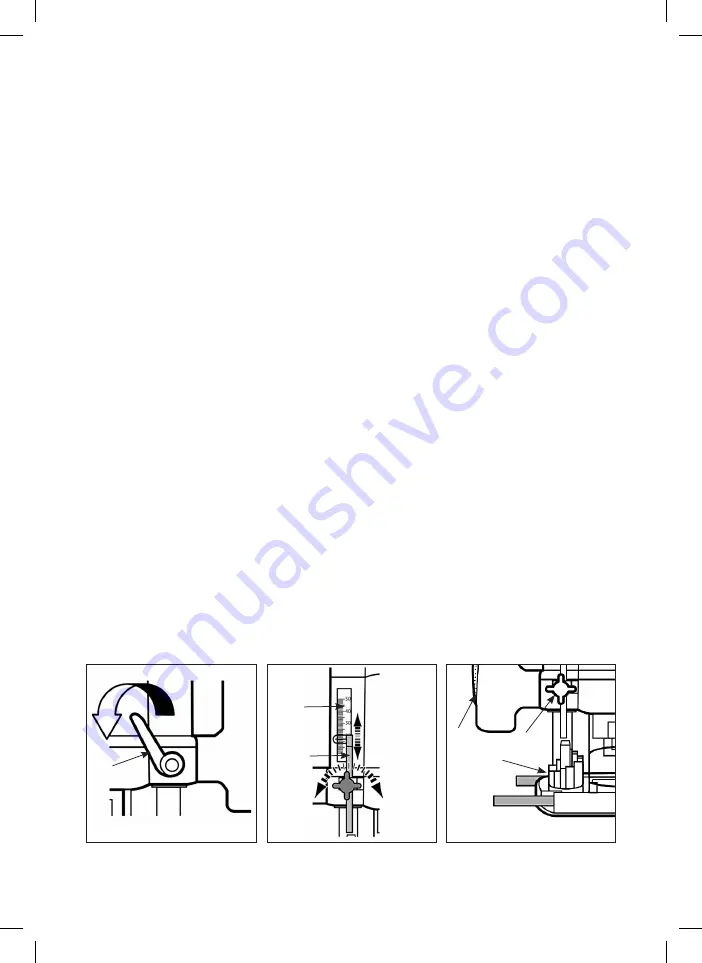
Fixing and setting the depth stop (fig. 6, fig. 7, fig. 8)
The depth stop (5) makes it possible to set the desired routing depth.
1. Loosen the blocking lever (4)
2. Turn the index stop (6) so that the lowest step is set under the depth stop (5).
3. Make sure that the locking screw (13) for the depth stop is loosened.
4. Push the power tool down by the handles (11) until the milling tool touches the
workpiece.
5. Tighten the blocking lever (4) again.
6. Read the depth indicated on the depth scale (3) and add the desired routing depth.
7. Set the depth stop to the total depth and tighten the locking screw (13) to secure the
depth stop in the position.
8. Loosen the blocking lever (4)
9. The adjustable index stop (6) makes it possible to firmly set seven stop positions for
the depth. This makes it possible to precisely set routing depths that have already
been used.
10. Loosen the blocking lever (4) and turn the index stop (6) until the desired step is
positioned under the depth stop (5). Make sure that it is locked in this position.
Note: The seven depth settings of the index stop must always be re-adjusted after a
change of milling tools, since every milling tool is of a different length and is fixed in
place in a different way.
fig. 6
4
fig. 8
6
13
11
fig. 7
5
3
1192734_BDA_WB_1200 OF.indd 21
1192734_BDA_WB_1200 OF.indd 21
28.12.20 09:13
28.12.20 09:13

