
— GENERAL INFORMATION
— WARRANTY / PARTS / SERVICE
— OPERATION
WARNING:
Some chemicals will damage the pump valves if allowed to soak untreated for a long period of time.
Always flush the pump with water after use. Do not allow chemicals to sit in pump for extended times of idleness.
Follow chemical manufacturers instructions on disposal of all waste water from the sprayer.
— AFTER SPRAYING
— WINTER STORAGE
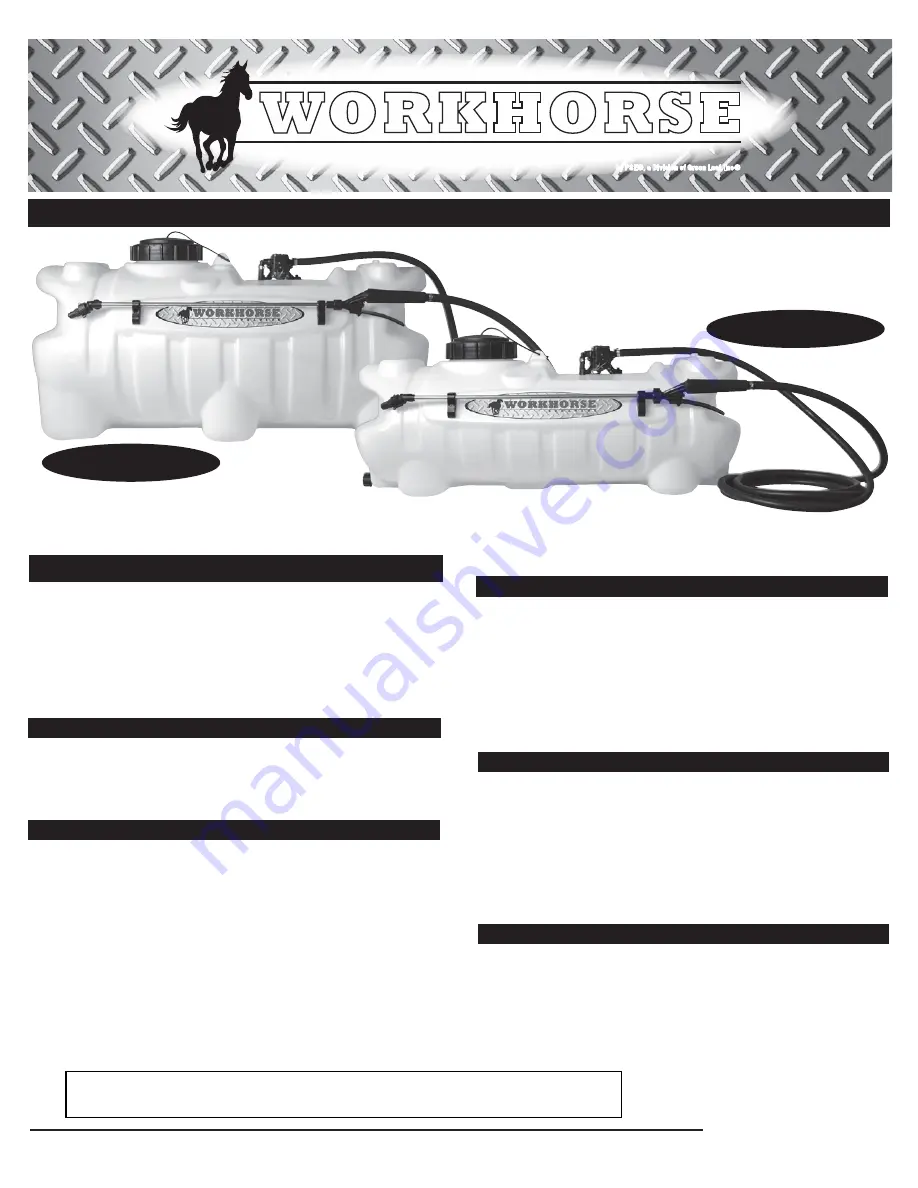
25 & 15 GAL. ECONOMY SPOT SPRAYER
MODEL # LG25 ESS and LG15 ESS
Products are warranted for one year from date of purchase against
manufacturer or workmanship defects.
Your authorized dealer is the best source of replacement parts and
service. To obtain prompt, efficient service, always remember to give
the following information:
1) Correct part description and part number.
2) Model number of your sprayer.
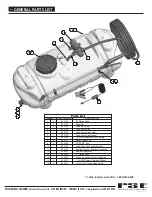
Part description and part numbers can be obtained from the
illustrated parts list section of this manual.
Whenever you need parts or repair service, contact your distributor /
dealer first. For warranty work always take your original sales slip, or
other evidence of purchase date, to your distributor / dealer.
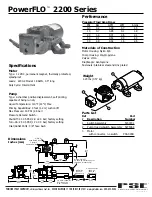
The pumping system draws solution from the tank, through the
strainer and to the pump. The pump forces the solution under
pressure to the spray wand.
The pump has a pressure switch which will shut the pump off when it
reaches 40 PSI.
Regularly inspect the suction supply screen on the inside of the tank.
Flush with water to clear any accumulated debris.
*These sprayers are designed to be attached to a stable surface.
The purpose of this manual is to assist you in assembling, operating
and maintaining your lawn and garden sprayer.
Please read it carefully as it furnishes information which will help you
achieve years of dependable trouble-free operation.
After use, fill the sprayer part way with water. Start the sprayer and
allow clear water to be pumped through the plumbing system and out
through the spray wand.
Refill the tank about half full with plain water and use a chemical
neutralizer such as Nutra-Sol® or equivalent and repeat cleaning
instructions. Flush the entire sprayer with the neutralizing agent.
Follow the chemical manufacturer’s disposal instructions of all wash
or rinsing water.
Drain all water and chemical out of sprayer, paying special attention
to pump and valves. These items are especially prone to damage
from chemicals and freezing weather.
The sprayer should be winterized before storage by pumping a
solution of RV antifreeze through the entire plumbing. Proper care
and maintenance will prolong the life of the sprayer.
• Polyethylene Tank
• 12 Volt Diaphragm Pump
• 1.0 G.P.M.
• Lever Handgun
• 15 Ft. of 3/8” Hose (Handgun)
Assembly / Operation Instructions / Parts
LG15 ESS
LG25 ESS
PRECISION SPRAY EQUIPMENT, a divison of Green Leaf, Inc. 9490 N BALDWIN ST FONTANET, IN 47851 www.grnleafinc.com 800-654-9808
a division of Green Leaf, Inc
®
P R E C I S I O N S P R AY E Q U I P M E N T
PSE
®
WORKHORSE
WORKHORSE
S P R A Y E R S
by PSE®, a Division of Green Leaf, Inc®
by PSE®, a Division of Green Leaf, Inc®
®


