7 of 8
Line of Sight | (800) 463-7731 | los.workriteergo.com
18
Remove Protective Tape & Replace Front and Rear Panels
18.1 Remove the protective tape on the Panels and Chassis
18.2 Reattach your front and rear panels. You now have a
complete Workcenter. Finish building all Workcenters
before proceeding to final room assembly.
15
Install Optional Accessories for Your Configuration
With the monitors and power components installed, you will now need to add your optional accessories
like Worksurface Grommets, Remote Controls and CPU Holders. Follow the instructions with the Optional
Accessories to complete this step.
16
Install Technology for Your Configuration
With all Line of Sight components installed, you will now need to install all the technology components to
complete your system. Install all computers, peripherals like keyboards and mice, and network cabling to
complete your installation according to the manufacturers specifications and your specific application.
14
Install Power Distribution Options for Your Configuration
With the Workcenter built, you will now need to add your power options for your specific configuration. Follow
the instructions that came with the Power System Options to complete your configuration.
If you did not purchase the Power Track or Power Bar, skip to
Step 15.
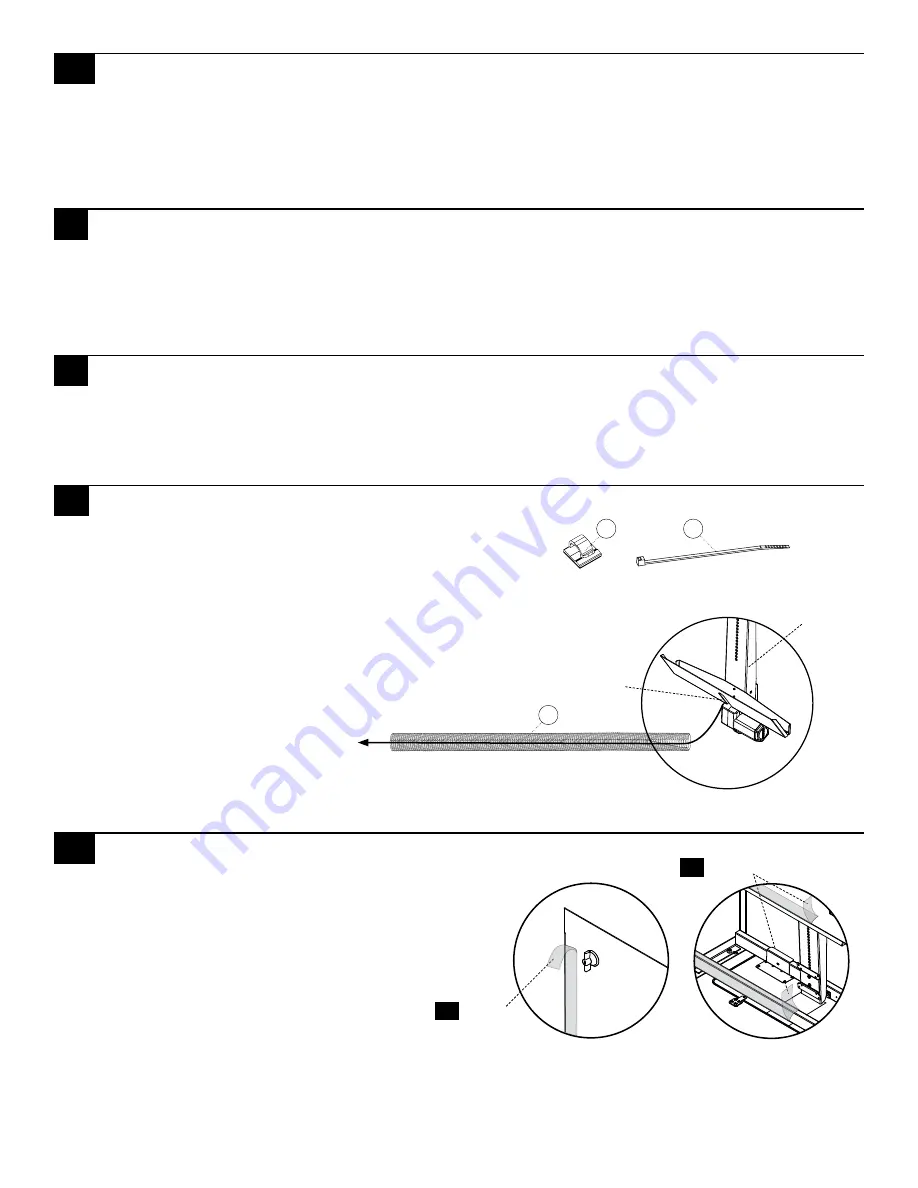
17
Manage Cabling
With monitors and technology installed, you'll want to
start considering all the cabling requirements.
Note: It is critical that no wires interfere with the travel
of the Monitor Lift. Use Cable Clips (T) for single wires
(mouse & keyboard) and Cable Ties (U) for multiple wires
to fasten all cabling securely out of the way of all moving
Monitor Lift components.
Use the Wire Loom (V) to
manage all user cables
routing from the keyboard
tray to the CPU. This may
include keyboard, mouse,
monitor and data cables.
Remove
Front & Rear
Panels
Chassis
Remove
18.1
18.2
V
T
U
Keyboard tray
cable access
Monitor Lift
To CPU


