Step 5
Using a second person to assist you, carefully turn the table right side up. Place the completed assembly
into the desired location and then finalize any leveling adjustments using the adjustable levelers
as shown. Place Umbrella Wooden Cap (G) into the umbrella hole. Assembly is now complete and the
product is ready for use.
CAUTION:
Adjust pre-installed levelers only
AFTER
the unit has been moved into the desired location
for use.
DO NOT
drag the unit as this may damage the levelers.
TOP
NOTE: Levelers can be used for additional
adjustment if needed.
(H-7)
(H-6)
(H-5)
(H-4)
Allen Key x 1
(H-8)
H-7
H-4
H-5
H-6
H-8
H-3
G
Page 6
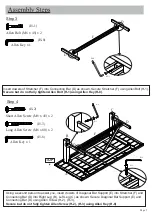
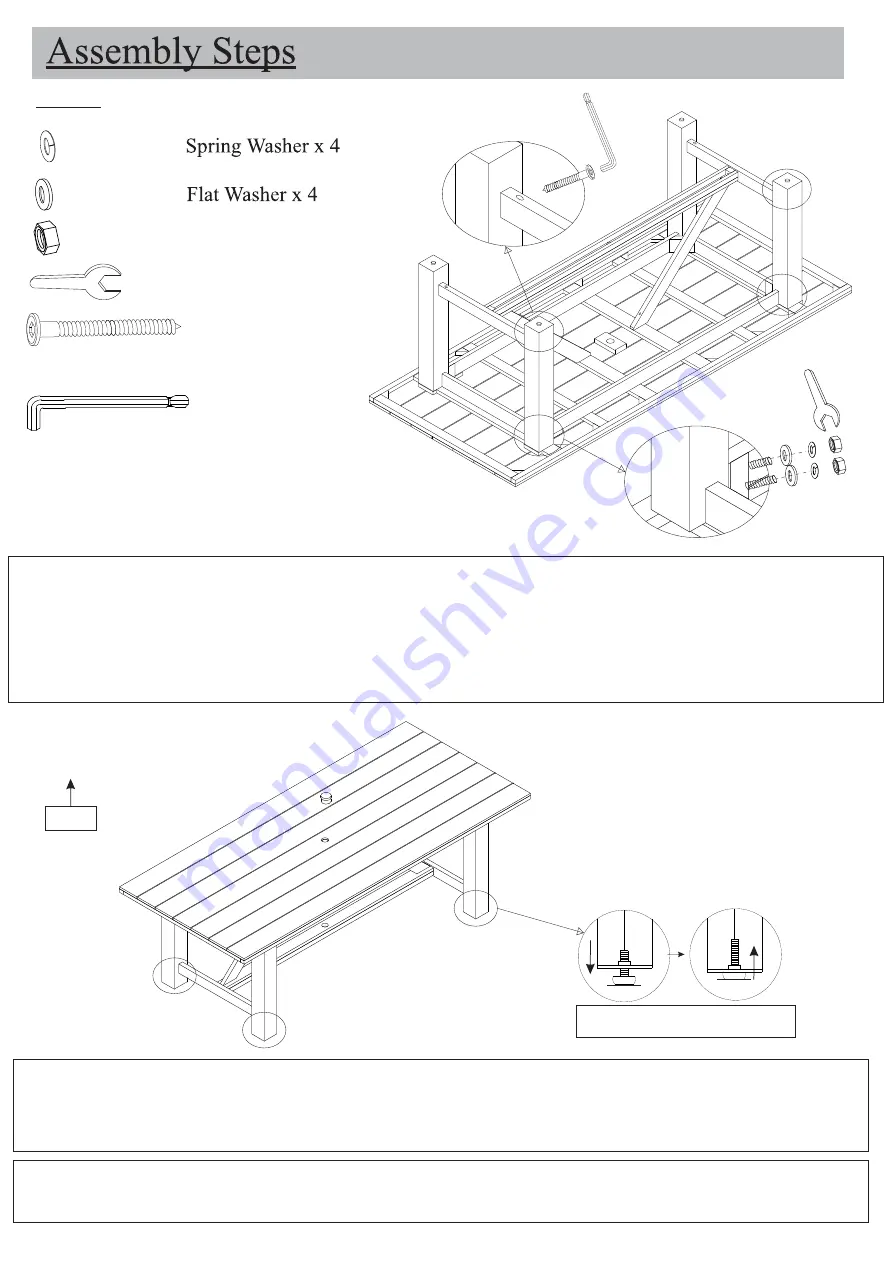
Using a second person to assist you, insert Connecting Bar (D) into the other corresponding Right Leg (B), Left
Leg (C) as shown, and also make sure the hanger bolts on Right Leg (B), Left Leg(C) fit through the pre-drilled
corner holes on Table Top (A). Secure both Right Leg (B), Left Leg(C) using Spring Washer (H-4),Flat Washer
(H-5) and Hexagonal Nut (H-6).
Secure but do not fully tighten Hexagonal Nut using Open Wrench (H-7)
.
Secure Connecting Bar (D) to corresponding Right Leg (B), Left Leg (C) using Long Allen Screw (H-3) as shown.
Fully tighten all Hexagonal Nuts (H-6), Allen Bolts (H-1) and Allen Screw (H-2), (H-3) from Steps 1-5 using
Open Wrench (H-7) and Allen Key (H-8)
.
Long Allen Screw (M6 x 80) x 2
(H-3)
C
B
C
B
Hex Nut M8 x 4
Open Wrench x 1
Summary of Contents for Netanya 597165
Page 1: ...Page 1 SKU 597165 Netanya Two Tone Trestle Table...
Page 3: ...Page 3...


