Assembly Steps
Page 5
Step-3
Step-4
2x
H-3
T-1
H-1
B
B
D
Top
Front
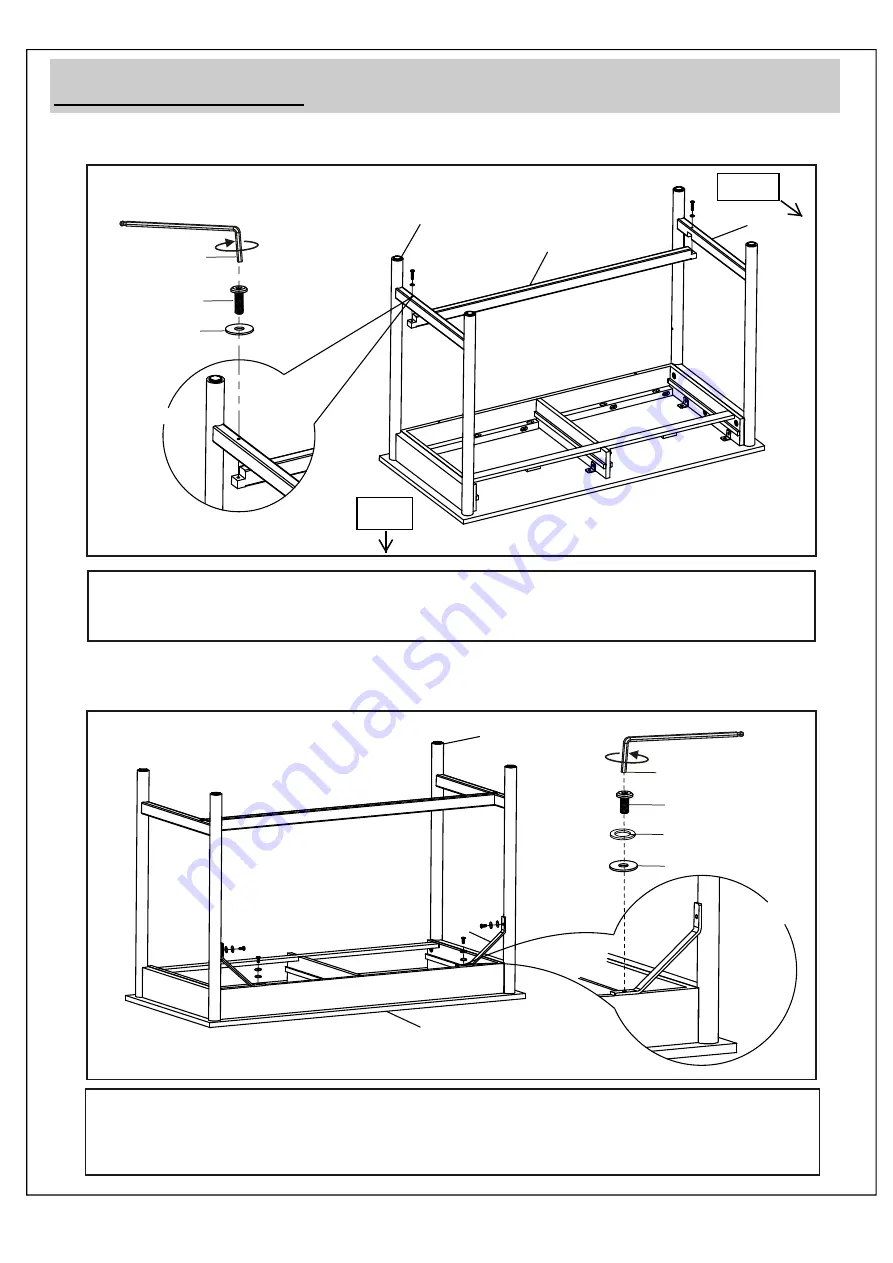
On the back side align the Metal Bracket (C) with the pre-drilled holes on the Legs (B)
and underneath Top (A) as illustrated.
With the help of Allen Key (T1) s
ecure connection using
Short
Allen Bolt (H
2
)
,
Spring Washer (H4)
and Washer (H3)
in the sequence as illustrated above.
Do not fully tighten connection.
T-1
H-2
4x
A
B
C
H-4
H-
3
Align the stretcher (D) to the pre-cut slot on the Leg (B) ensuring the holes on the stretcher
matches holes on the Leg. Secure connection using longer Long Allen Bolt (H1) and Washer (H3)
with the help of Allen Key (T1). Do not fully tighten connection.
Summary of Contents for Rianna Ribbed 608144
Page 8: ...Page 8...


