background image

SYNCING THE DRONE TO THE TRANSMITTER

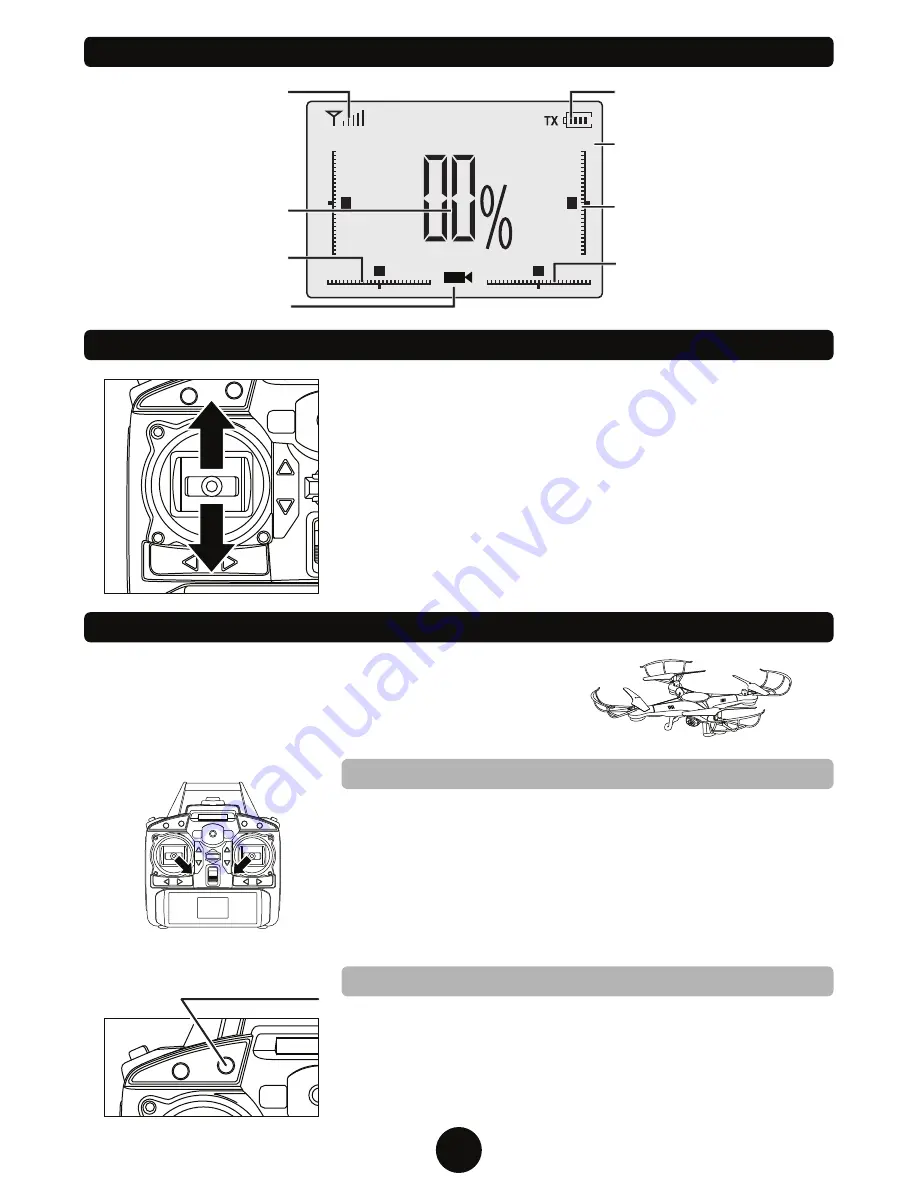
TRANSMITTER LCD INTERFACE

Signal Icon

Battery Level
Stick Mode

Display
Forward/Backward

Trim Display
Move Left/Right

Trim Display

Speed Display

Camera Indicator

Left/Right Turn

Trimming Display

Switch ON the drone and place it on a flat surface. The drone’s LED 

lights will start flashing rapidly. Switch ON the transmitter, it will emit 

a short beep and the power indicator light will start flashing, the 

drone’s LED lights will begin to flash slowly. Push the 

Ascend/Descend stick (left joystick) all the way up, then all the way 

down. The transmitter will emit a single long beep when the joystick 

is in the up and down position, the power indicator will stop flashing 

and the drones lights will stay on. The transmitter has successfully 

paired with the drone and control information will now appear on the 

LCD screen.

1

2

7

ROTOR UNLOCK/LOCK - AUTO-TAKE OFF/LAND

LANDING

AUTOPILOT

When you are ready to land, press the 

AUTOPILOT

 button 

again and the drone will slowly descend and land. The rotors 

will eventually stop spinning.

Before flying your drone for the first time please read all the 

instructions carefully and make sure you fully understand how 

to control it. 

You will not be able to control your drone until 

you unlock the rotors at the start of each flight.

UNLOCK/LOCK - AUTO-TAKE OFF

Once you’ve synced the drone and transmitter, you must unlock 

the drone’s rotors. To unlock or lock the rotors you must pull 

both transmitter joysticks down and inward as shown for a few 

seconds. The rotors will begin to spin when unlocked. Repeat 

the steps to lock the rotors. You can now slowly press up on the 

Ascend/Descend stick (left joystick) and the drone will take off. 

To Auto-Take Off press the 

AUTOPILOT

 button and the drone 

will begin to ascend and hover in place.

Rotor Unlock/Lock

Summary of Contents for STRIKER-X

Page 1: ...ITEM NO 33042...

Page 2: ...R TRANSMITTER LCD INTERFACE FLIGHT CONTROLS INSTALLING THE MEMORY CARD USING THE DRONE CAMERA CAMERA INDICATOR LIGHT VIEWING VIDEO PHOTO FILES ON THE COMPUTER ADJUSTING THE TRIM SPECIAL ACTIONS POST F...

Page 3: ...d flying area is 25ft x 25ft x 15ft 2 Be sure that the transmitter and drone batteries are fully charged 3 Be sure that the throttle is at its lowest position to avoid premature flight 4 Always turn o...

Page 4: ...ideo Camera 720p Landing Skids LED Lights BOTTOM OF DRONE Power Switch Battery Compartment Video Record Control Autopilot Antenna Easy Mode Speed Control Power Indicator Ascend Descend Turn Left Right...

Page 5: ...ion Push the battery compartment door away from the center of the drone and swing it open Slide the battery pack into the battery compartment Plug the battery pack into the drone then close and snap t...

Page 6: ...ONE BATTERY USB CHARGER LED LIGHT INDICATOR Please Note The USB charger light will turn on when plugged in to indicate there is power running through the USB Once the battery is connected the light wi...

Page 7: ...nformation will now appear on the LCD screen 1 2 7 ROTOR UNLOCK LOCK AUTO TAKE OFF LAND LANDING AUTOPILOT When you are ready to land press the AUTOPILOT button again and the drone will slowly descend...

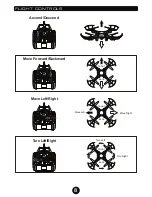
Page 8: ...FLIGHT CONTROLS Turn Left Right Turn Left Turn Right Move Right Move Left FRONT BACK FRONT BACK Ascend Descend Move Forward Backward Move Left Right 8 FRONT BACK...

Page 9: ...the drone and transmitter are turned on the memory card is properly installed and the transmitter is synced with the drone NO LIGHT BLUE RED LIGHT FLASHING SOLID BLUE LIGHT FLASHING RED LIGHT RED LIG...

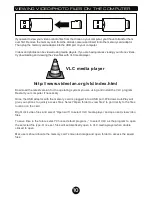
Page 10: ...a USB port Windows AutoPlay will give you options to quickly access files Select Open folder to view files to go directly to the files location on the card Right click video files and select Open with...

Page 11: ...Turn Left Trim Drone is moving forward Drone is turning to the left Push the RIGHT TRIM button until the drone stops turning Turn Right Trim FRONT BACK Push the FORWARD TRIM button until the drone sto...

Page 12: ...the illustration to the right flight area To activate Easy Mode press the button once while the drone is in flight Once Easy Mode is activated the drone control will be relative to the direction of p...

Page 13: ...rrect location FRONT BACK B A A B Use the included screwdriver to unscrew and remove the screw on the rotor Remove the damaged rotor by lifting upward Be sure not to misplace the screw Place the corre...

Page 14: ...t misplace it Remove the rotor guard by lifting upward Be sure not to misplace the screw The drone comes with its 4 rotor guards already installed It is recommended that you leave the rotor guards in...

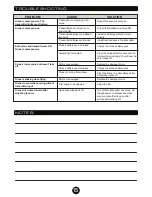
Page 15: ...f Transmitter batteries are installed incorrectly Transmitter and or drone is not powered ON Turn both transmitter and drone ON Transmitter batteries are drained Drone s battery pack is drained Autopi...

Page 16: ...terference will not occur in a particular installation If this equipment does cause harmful interference to radio or television reception which can be determined by turning the equipment off and on th...

Reviews: