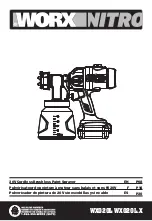
20V Cordless Brushless Paint Sprayer EN
13
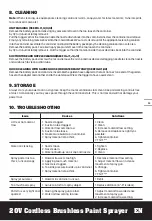
8. CLEANING
Note:
When cleaning, use appropriate cleaning solutions (warm, soapy water for latex materials; mineral spirits
for oil-based materials).
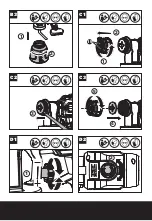
UNIT FLUSHING (SEE FIG. I1, I2, I3,I4)
Remove the battery pack.For relieving any pressure left over in the too, loosen the container
by 1/2 turn ,but not totally remove it .
Pull the trigger so that the material inside the nozzle drains back into the container.Unscrew the container and remove.
Empty any remaining material back into the material bucket.Pour a small amount of the appropriate cleaning solution
into the container.Assemble the container and install the battery pack.Spray the cleaning solution into a safe area.
Remove the battery pack. For relieving any pressure left over in the too, loosen the container
by 1/2 turn ,but not totally remove it . Pull the trigger so that the material inside the nozzle drains back into the container.
SUCTION TUBE AND NOZZLE CLEANING(SEE FIG. J1, J2, J3)
Remove the battery pack.Unscrew the nut and remove the air cap and nozzle.Use declogging needle to clean the nozzle
and wire brush to clean suction tube.
QUICK CLEANING WITH GARDEN HOSE (FOR WATER PAINT ONLY) (SEE FIG. K1 ,K2)
Remove the battery pack and container.Assemble the garden hose adapter to the tool. Connect one end of the garden
hose to the adapter and another end to the waterspout.Press the trigger to have a quick clean .
9. STORAGE
Always store your power tool in a dry place. Keep the motor ventilation slots clean. Keep all working controls free
of dust. Occasionally you may see sparks through the ventilation slots. This is normal and will not damage your
power tool.
10. TROUBLESHOOTING
Issue
Causes
Solutions
Little or no material
flow
1. Nozzle clogged.
2. Suction tube clogged.
3. Material flow sets too low.
5. Suction tube loose.
6. No pressure builds up in container.
7. Spray material is too thick.
1. Clean.
2. Clean.
3. Increase material flow setting.
5. Remove and replace as tightly as
possible.
6. Tighten container.
7. Thin****.
Material is leaking
1. Nozzle loose.
2. Nozzle worn.
3. Material build-up on air cap and nozzle
1. Tighten.
2. Replace.
3. Clean.
Spray pattern is too
thick, runs and sags
1. Material flow sets too high.
3. Applying too much material.
4. Nozzle is clogged.
6. Too little pressure builds up in container.
7. Spray material is too thick.
1. Decrease material flow setting.
3. Adjust material flow or increase
movement of spray gun.
5. Change.
6. Tighten container.
7. Thin****.
Spray jet pulsates
1. Material in container runs out.
1. Refill.
Too much overspray
1. Gun is too far from spray object.
1. Reduce distance (6”-8” is ideal).
Pattern is very light and
spotted
1. Moving the spray gun too fast.
2. Material flow setting too low.
1. Adjust material flow or decrease
movement of spray gun.
2. Increase material flow setting.
Summary of Contents for WX020L
Page 2: ......
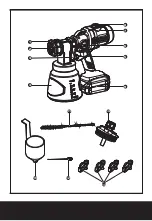
Page 3: ...1 2 12 10 3 4 5 6 7 8 9 13 14 11 2 6 2 2 1 8 1 5...
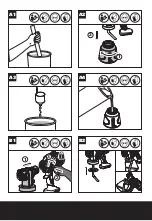
Page 4: ...A1 A2 B1 B2 A3 A4 1 2 1 2 3...
Page 5: ...B3 C2 C3 3 4 5 C1 1 2 15 D1 D2 1 2 1 2...
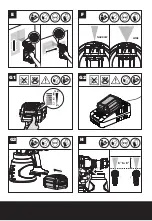
Page 6: ...G1 G2 G3 H 6 to 8 100 0 E F WIDE NARROW...
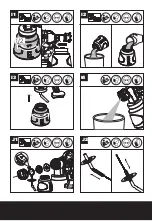
Page 7: ...I3 I4 J1 J2 I1 I2 1 2...
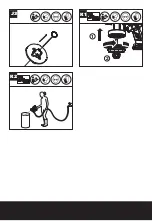
Page 8: ...K2 J3 K1 1 2...

