22
EN
Getting started
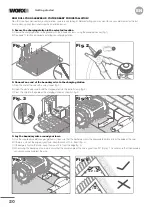
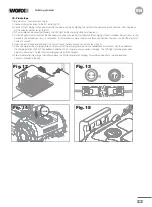
Included with Landroid are two small, waterproof boundary wire connectors (Item B). They can be used for the following:
A. When your lawn has a very long perimeter and you need extra boundary wire to complete the installation. Please do not exceed
984 ft. of boundary wire: this is the maximum length of the boundary wire perimeter.
B. When the boundary wire is cut by accident and you need to fix it.
C. When you decide to rework your garden in the future and need to modify the original boundary wire installation.
Proper use of the boundary wire connectors
A. Insert both ends of the wire into any two of the three holes of the connector; no need to strip the wires.
B. Insert the wires fully until both wire ends are visible on the other side of the connector.
C. Press the connector firmly by using a pair of pliers. Make sure that the blue clamp is fully seated into the connector body. Check that the
wires are securely connected by slightly pulling on them. If any of the wire ends comes out, then the crimping process should be repeated.
Attention:
it is not recommended to simply splice the boundary wire with insulating tape or use a screw terminal block for connection. A
broken circuit may occur after a period of time as soil moisture can oxidize the wire.
8. Using the Wire Connectors
Fig. 2
Fig. 1
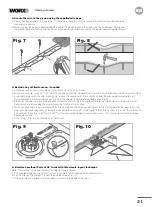
7. Complete the perimeter boundary loop
Once you have completed laying the wire around the perimeter
of your lawn, you will arrive back to the charging station.
A. Place the wire into the guide of the charging station, up to
the black clamp (fig. 11).
B. Cut the excess wire and strip the end with a pair of
wire cutters.
C. Insert the stripped end into the black wire clamp on the right.
There should be no excess wire hanging out of the terminal
cover. This may cause improper docking of the mower.
IN
Fig. 11
>36 in.
9. Zones
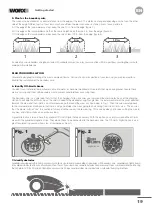
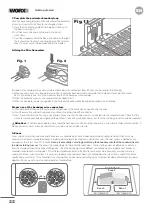
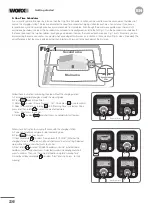
If your yard has more than one area and these areas are separated by a narrow opening or corridor (see figure below), then it may be
necessary to establish user-defined zones in order to aid Landroid in reaching every part of your yard. The term narrow is defined as any
passageway that is less than 2 ft. in width.
A zone is essentially a starting point along the boundary wire that the Landroid travels
to before starting to mow.
This allows the mower to get to those hard to reach areas. These starting points are defined as a distance
from the charging station to the zone starting point. Once the starting points are defined, you will also be able to define how frequently
Landroid travels to each starting point. This will allow Landroid to travel to the hard to reach areas more frequently, ensuring that every
square inch of your yard is mowed. It is necessary to define zone frequency because Landroid does not stay within a specific zone for a
specified amount of time. Once Landroid starts mowing from a particular zone starting point, it will mow randomly according to its normal
algorithm. Zones are set up via the control panel or Landroid App.
Zone 3
Zone 2
Zone 2 starting point
Zone 1 starting point
Zone 3 starting point
Zone 1
Main area
Second area
<2ft
<2ft
No gap between
wires
Fig. 1
Fig. 1
Summary of Contents for Landroid WR147
Page 1: ...Owner s manual WR165 WR147 WR155 ...
Page 2: ......
Page 3: ...Owner s manual Manuel utilisateur Instrucciones de usuario P04 P37 P70 EN F ES ...
Page 103: ......
Page 104: ......


