background image

9

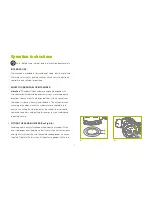
the sanding paper is even with the edges and that the sanding paper 
is taut on the pad.
Remove the abrasive paper by pinching an edge and peeling off. (See 
Fig B)

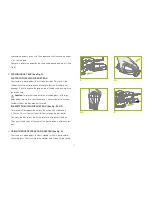
CYCLONIC DUST BOX (See Fig. C)
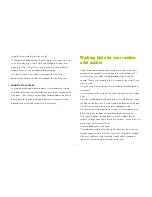
A) ATTACH THE CYCLONIC DUST BOX

Your sander is equipped with a cyclonic dust box. To attach, slide 
the box onto the outlet piece and take care that the latching lever 
engages. Pay attention to the gap on top of the box and locking in the 
pin of housing.

 Caution:

 To prevent the possibility of sanding dust or foreign 

body being thrown into your face or eyes, never attempt to use your 
sander without the box properly installed.

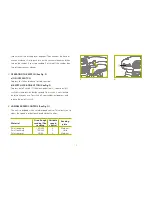
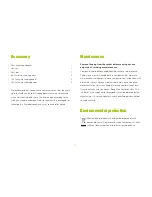
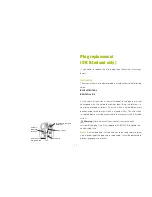
B) EMPTY THE CYCLONIC DUST BOX (See Fig. D1, D2)

For more efficient operation, empty the cyclonic dust box every 
5-10mins. This will permit the air to flow through the box better. 
To empty the box, press the latching lever in and pull off the box. 
Then press the button at the rear of the box to open it, and shake out 
dust. 

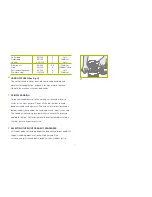
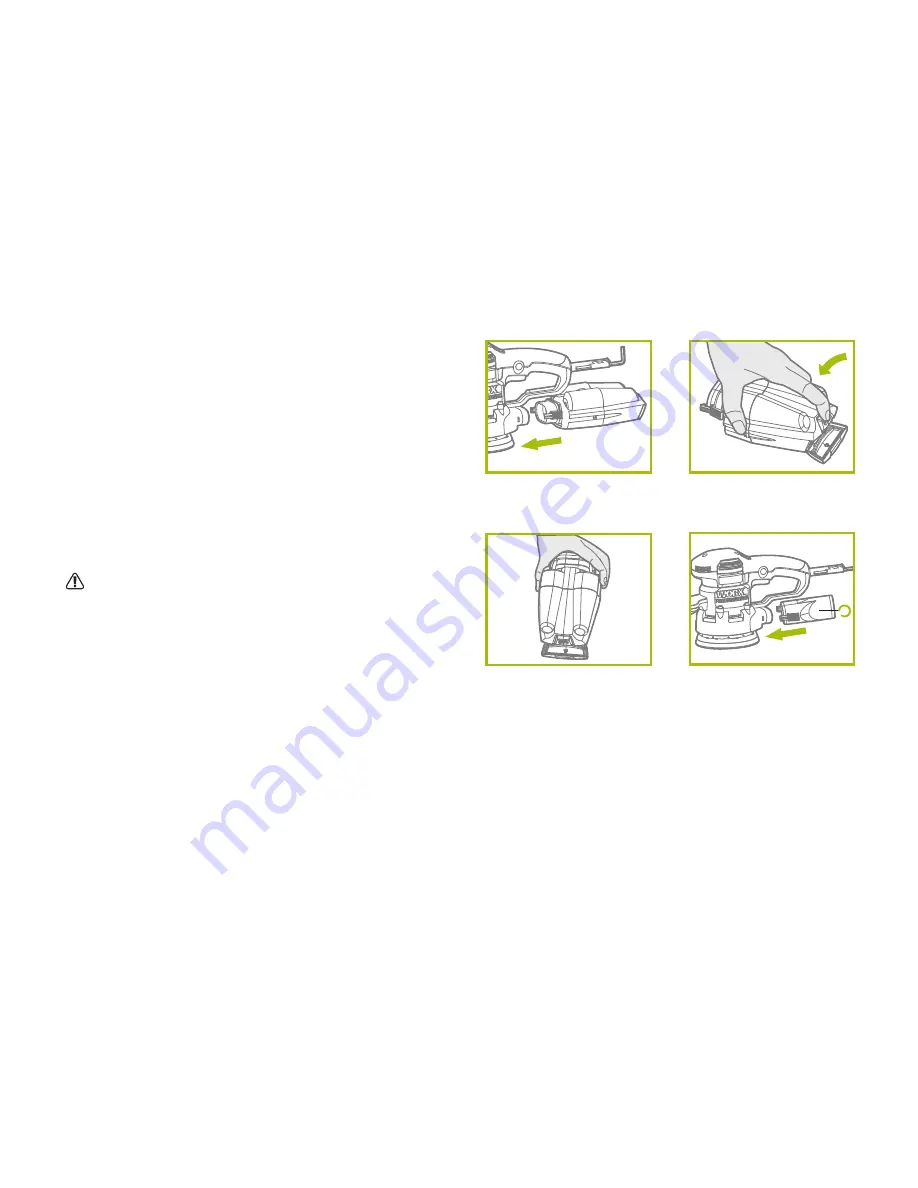
USING THE DUST EXTRACTION ADAPTER (See Fig. E)

Your sander is equipped with a dust adapter, which is designed for 
collecting dust. To attach, slide the adapter onto the outlet piece and 

2

3

1

2

3

4

5

6

7

10

8

9

11b

11a

12

B

A

D.2

D.1

C

E

Summary of Contents for Professional WU654

Page 1: ...Random orbit sander WU654 SAFETY AND OPERATING MANUAL ORIGINAL INSTRUCTIONS ...

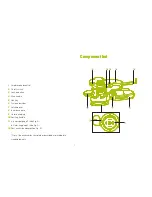
Page 2: ...f switch Lock on button Main handle Hex key Cyclonic dust box Latching lever Inner base plate Outer base plate Auxiliary handle a Inner spot paper See Fig A b Outer ring paper See Fig A Dust extraction adaptor See Fig E Not all the accessories illustrated or described are included in standard delivery ...

Page 3: ...d surfaces such as pipes radiators ranges and refrigerators There is an increased risk of electric shock if your body is earthed or grounded Do not expose power tools to rain or wet conditions Water entering a power tool will increase the risk of electric shock Do not abuse the cord Never use the cord for carrying pulling or unplugging the power tool Keep cord away from heat oil sharp edges or mov...

Page 4: ... tool will do the job better and safer at the rate for which it was designed Do not use the power tool if the switch does not turn it on and off Any power tool that cannot be controlled with the switch is dangerous and must be repaired Disconnect the plug from the power source and or the battery pack from the power tool before making any adjustments changing accessories or storing power tools Such...

Page 5: ... of the power tool is maintained a Symbols To reduce the risk of injury user must read instruction manual Warning Wear eye protection Wear dust mask Wear ear protection Double insulated Waste electrical products should not be disposed of with household waste Please recycle where facilities exist Check with your local authorities or retailer for recycling advice ...

Page 6: ...ndom orbit Sander Type WU654 650 659 designation of machinery representative of Random orbit Sander Voltage 220 240V 50Hz Power input 440W No load speed 4000 9500opm Base size 150mm Orbital dia 4mm Protection class II Machine weight 2 7kg ...

Page 7: ...ness of the grip on the handles and if any anti vibration accessories are used And the tool is being used as intended by its design and these instructions This tool may cause hand arm vibration syndrome if its use is not adequately managed Warning To be accurate an estimation of exposure level in the actual conditions of use should also take account of all parts of the operating cycle such as the ...

Page 8: ...gn platform virtually cancels out the sander s vibration in every load condition This active vibration canceling technology makes this sander more comfortable and easy to use taking the vibration out of the sander the workpiece your hands and arms and putting this energy to work sanding and removing material FITTING THE SANDING PAPER See Fig A B Sanding paper is easily attached on the pad of your ...

Page 9: ...sanding dust or foreign body being thrown into your face or eyes never attempt to use your sander without the box properly installed B EMPTY THE CYCLONIC DUST BOX See Fig D1 D2 For more efficient operation empty the cyclonic dust box every 5 10mins This will permit the air to flow through the box better To empty the box press the latching lever in and pull off the box Then press the button at the ...

Page 10: ... F Depress on off switch 2 then lock on button 3 release on off switch first and lock on button second Your switch is now locked on for continuous use To switch off your sander just depress and release the on off switch VARIABLE SPEED CONTROL See Fig G The unit is equipped with a variable speed control This allows you to adjust the speed in order to achieve different finishes Material Grain Rough ...

Page 11: ...to the working surface and move it in circles or in a cross pattern Do not tilt the tool in order to avoid deep unwanted sanding marks The amount of material removed is determined by the speed of the sanding disc and the grit size used The speed of the sanding disc diminishes relative to the pressure applied to the tool For faster removal do not increase pressure on the tool but use a coarser grit...

Page 12: ...to maximum and run it with no load for 2 3 minutes to cool the motor Avoid prolonged usage at very low speeds Always use sand paper that is suitable for the material you want to sand Always ensure the work piece is firmly held or clamped to prevent movement Any movement of the material may affect the quality of the sanding finish Start your sander before sanding and turn it off only after you stop...

Page 13: ...aintenance Your power tool requires no additional lubrication or maintenance There are no user serviceable parts in your power tool Never use water or chemical cleaners to clean your power tool Wipe clean with a dry cloth Always store your power tool in a dry place Keep the motor ventilation slots clean Keep all working controls free of dust Occasionally you may see sparks through the ventilation ...

Page 14: ...wire which is colored blue must be connected to the terminal which is marked with N The wire which is colored brown must be connected to the terminal which is marked with L Warning Never connect live or neutral wires to the earth terminal of the plug Only fit an approved 13ABS1363 A plug and the correct rated fuse Note If a moulded plug is fitted and has to be removed take great care in disposing ...

Page 15: ...rial using an abrasive medium Complies with the following Directives EC Machinery Directive 2006 42 EC EC Low Voltage Directive 2006 95 EC EC Electromagnetic Compatibility Directive 2004 108 EC Standards conform to EN 55014 1 EN 61000 3 3 EN 55014 2 EN 60745 1 EN 61000 3 2 EN 60745 2 4 The person authorized to compile the technical file Name Russell Nicholson Address Positec Powertools Europe LTD ...

Page 16: ...Copyright 2012 Positec All Rights Reserved 2PES05PPK11001A0 ...

Reviews: