background image

12

EN

2-in-1 Cordless Grass 

Trimmer/Edger 

ASSEMBLY & OPERATION

Action Figure

Assembly

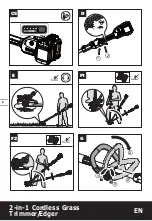
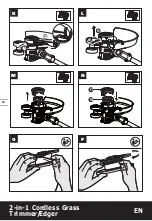
Assembling the Main Handle

See Fig. A

Assembling the Safety Guard

See Fig. B

Installing and Removing the 
Battery Pack

NOTE:
• This machine will only run 
when 2 batteries are installed. 
It is recommended to use 
the same two batteries and 
charge the two batteries at 
the same time.
• Using two different sized 
batteries or if one battery 
isn’t fully charged then the 
machine will only run to the 
lowest common denominator.

See Fig. C1, C2

Checking the battery charge 
condition

NOTE:

 Fig. C3 only applies for 

the battery pack with battery 
indicator light.

See Fig. C3

Charging the battery pack

NOTE:

• The batteries are shipped 
uncharged. Each battery must be 
fully charged before the first use.
• Always fully charge the two 
batteries at same time. More 
details can be found in charger’s 
manual.

See Fig. C4

Battery power indicator on the 
machine
See details in BATTERY STATUS 
section

See Fig. C5

Operation 

On/Off Switch

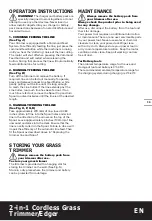
WARNING! 

The cutting 

head continues to rotate 

after the trimmer has been 
switched off; wait until it has 
completely stopped then lay 
down the tool.

See Fig. D

Trimming

See Fig. E

-Adjusting the Trimmer Head

See Fig. F1, F2

-Adjusting the Auxiliary handle

See Fig. G

Edging

See Fig. H1-H4

-Edger wheel storage

See Fig. I

Command feeding the line

See Fig. J

Manually feeding the line

See Fig. K

Replacing the trimmer line and 
spool

See Fig. L, 
M, N

Manually winding the line

See Fig. O, P, 
Q, R

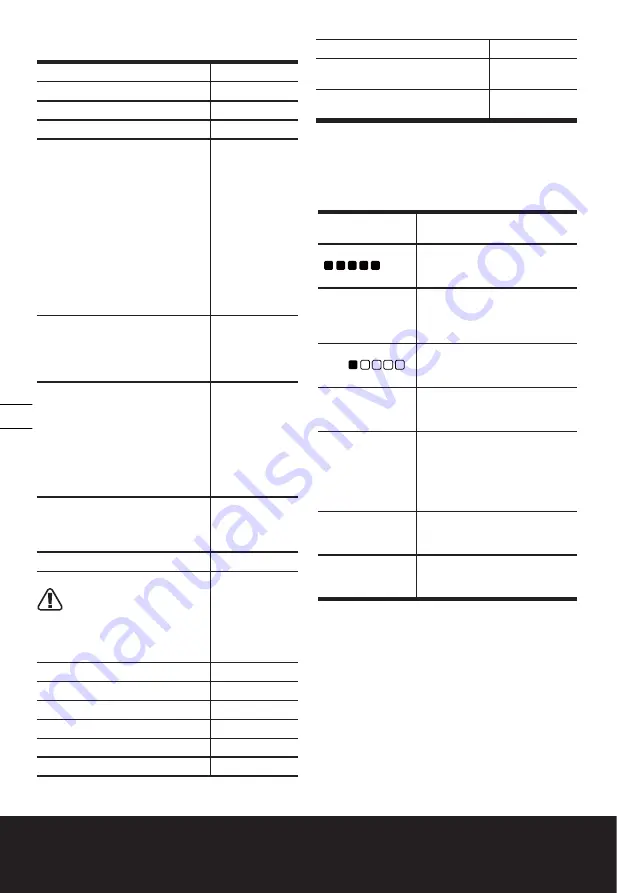
BATTERY STATUS (See Fig. C5)

Before starting or after use, press the button beside 
the power indicator light on the machine to check 
the battery capacity. The indicator lights displays the 
battery condition as follows:

Battery power 

indicator status

Battery condition

Five green lights 

 ) are 

illuminated.

The two batteries are in a 
highly charged condition.

Two, three or four 
green lights are 
illuminated.

The two batteries have a 
remaining charge. The more 
lights are illuminated, the more 
battery capacity.

Only one green 
light ( 


) is illuminated.

At least one battery is 
depleted and needs to be 
charged.

No light is 
illuminated.

At least one battery is not fully 
installed or battery may be 
defective.

Only one light is 
flashing twice per 
cycle. 

At least one battery is over 
discharged (please refer to 
the battery charge condition), 
please recharge the two 
batteries at once before use 
again or storage.

Only one light 
is flashing three 
times per cycle.

At least one battery is hot, 
wait for them cool down 
before start again.

Only one light is 
flashing four times 
per cycle.

The machine is over load. 
Raise the cutting height or 
push slowly.

Summary of Contents for WG184

Page 1: ...P02 P15 P24 WG184 WG184 9 2 in 1 Cordless Grass Trimmer Edger EN Coupe gazon Taille bordure sans rallonge 2 en 1 F Rebordeador ribeteador de c sped 2 en 1 inal mbrico ES...

Page 2: ...damaged have it repaired by an authorized service facility Inspect extension cords periodically and replace if damaged Keep handles dry clean and free from oil and grease 12 Check Damaged Parts Before...

Page 3: ...s and batteries clean and dry Wipe the cell or battery terminals with a clean dry cloth if they become dirty 12 Do not maintain secondary cells and batteries on charge when not in use 13 Retain the or...

Page 4: ...nging accessories Trimming Edging Lock Unlock High speed Low speed Correct Incorrect POSITEC Inc has established a partnership with the RBRC Corporation to recycle any Positec batteries with the RBRC...

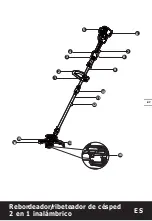
Page 5: ...5 EN 2 in 1 Cordless Grass Trimmer Edger 6 4 5 3 1 2 15 14 13 12 10 11 9 8 7 16...

Page 6: ...g Diameter 13 Line Diameter 0 08 Battery type Lithium ion Battery Model WA3575 2 0Ah Charger Model WA3878 Charger rating Input 120V 60Hz 100W Output 1 20V 2 0A Output 2 20V 2 0A Charging time approx B...

Page 7: ...7 EN 2 in 1 Cordless Grass Trimmer Edger 2 1 1 3 Click 2 2 1 C3 C4 C2 A B C1 100 0...

Page 8: ...8 EN 2 in 1 Cordless Grass Trimmer Edger 2 1 3 2 2 1 F1 F2 G D E C5...

Page 9: ...9 EN 2 in 1 Cordless Grass Trimmer Edger 0o 90o H1 H3 H4 I J H2...

Page 10: ...10 EN 2 in 1 Cordless Grass Trimmer Edger 2 1 2 1 17 18 P K L M N O...

Page 11: ...11 EN 2 in 1 Cordless Grass Trimmer Edger Q R S...

Page 12: ...e Fig F1 F2 Adjusting the Auxiliary handle See Fig G Edging See Fig H1 H4 Edger wheel storage See Fig I Command feeding the line See Fig J Manually feeding the line See Fig K Replacing the trimmer lin...

Page 13: ...e approximately 20ft 6m of line Insert 0 080 inches 2mm of line into the Spool holes and wind line in the direction of the arrows on the top of the Spool Leave approximately 4 inches 100mm of line unw...

Page 14: ...d for long period or only charged for short term Grass too high Battery defective Fully charge battery also see the content in charger manual Cut in stages Replace the battery Machine does not cut Lin...

Page 15: ...oins Gardez les ar tes de coupe aiguis es et propres pour une meilleure performance et risque r duit de blessure Suivez les instructions pour lubri er et changer les accessoires Gardez les poign es s...

Page 16: ...caniques 11 Gardez les piles cellulaires et les batteries propres et s ches Essuyez les bornes de la pile cellulaire ou de la batterie avec un chiffon propre et sec si elles sont sales 12 Ne laissez...

Page 17: ...ie avant de remplacer des accessoires Tonte Tonte de bordure Verrouiller D verrouiller Haute vitesse Basse vitesse Correct Incorrect POSITEC Inc a form un partenariat avec RBRC Corporation pour le rec...

Page 18: ...18 F Coupe gazon Taille bordure sans rallonge 2 en 1 6 4 5 3 1 2 15 14 13 12 10 11 9 8 7 16...

Page 19: ...2x20V MAX Vitesse vide 7500 min Diam tre de coupe 330mm 13 po Diam tre du l 2mm 0 08 po Type de batterie Lithium ion Mod le de batterie WA3575 2 0Ah Mod le de chargeur WA3878 Valeurs nominales du cha...

Page 20: ...rupteur marche arr AVERTISSEMENT la t te coupante continue de tourner apr s avoir teint l alimentation de la tondeuse attendez que le moteur soit compl tement arr t pour coucher l outil Voir Fig D Ton...

Page 21: ...ez la bobine en sens inverse des aiguilles d une montre jusqu ce que le cordon de coupe soit la longueur d sir e 3 Pour embobiner le cordon de coupe manuellement Voir Fig O P Q R Prenez approximativem...

Page 22: ...fs Appareil d fecteux Bobine du l coupant est mal enroul Consulter un agent de soutien technique Rebobiner le l Voir Changement de la bobine du cordon de coupe Le d lai de coupe par charge de batterie...

Page 23: ...prise principale dans le socle verrouillage V ri er la tension des c bles d alimentation principale faites v ri er le chargeur de batterie par un agent autoris de soutien technique apr s vente La com...

Page 24: ...es para la lubricaci n y el cambio de accesorios Mantenga los mangos secos limpios y libres de aceite y grasa 12 Veri que las piezas da adas Las guardas protectoras u otras partes da adas deben veri c...

Page 25: ...limpias y secas Limpie las terminales de bater a o celda con un pa o seco y limpio si se ensucian 12 No mantenga en carga las celdas y bater as secundarias cuando no est n en uso 13 Conserve la inform...

Page 26: ...ntes de cambiar los accesorios Desmalezado Bordeado Bloqueo Desbloqueo Alta velocidad Baja velocidad Correcto Incorrecto POSITEC Inc ha establecido una asociaci n con la empresa RBRC para el reciclaje...

Page 27: ...27 ES Rebordeador ribeteador de c sped 2 en 1 inal mbrico 6 4 5 3 1 2 15 14 13 12 10 11 9 8 7 16...
Page 28: ...de corte 13 pulg 330mm Di metro del Hilo 0 08 pulg 2mm Tipo de bater a Litio Modelo de la bater a WA3575 2 0Ah Modelo del cargador WA3878 Clasi caci n de voltaje del cargador Entrada 120V 60Hz 100W Sa...

Page 29: ...do Vea la Fig E Ajuste del cabezal de la cortadora de c sped Vea la Fig F1 F2 Ajuste del mango auxiliar Vea la Fig G Bordeado Vea la Fig H1 H4 Almacenamiento de la rueda bordeadora Vea la Fig I Abaste...

Page 30: ...e aproximadamente 6 metros de hilo e inserte 2 mm dentro de uno de los ori cios de la parte superior de la bobina Enrolle el hilo en la direcci n de las echas sobre la parte superior de la bobina Siem...

Page 31: ...por carga de la bater a es demasiado bajo No se utiliz la bater a durante un per odo de tiempo extenso o se la carg s lo durante poco tiempo C sped demasiado alto Bater a defectuosa Cargue por complet...

Page 32: ...Copyright 2018 Positec All Rights Reserved Copyright 2018 Positec Tous droits r serv s Derechos reservados 2018 Positec Todos los derechos reservados AR01347900 www worx com...

Reviews: