Cordless chain saw
EN
13
3
2
2
W
Y
Z
X
2˝
2˝
1
1
1
2
2/3
1
1/3
1
2
2/3
1/3
Fig.1
Fig.2
Fig.3
Fig.4
Fig.5
Fig.6
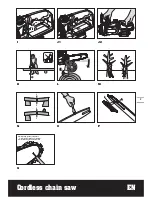
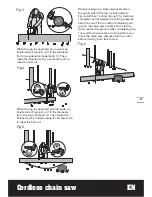
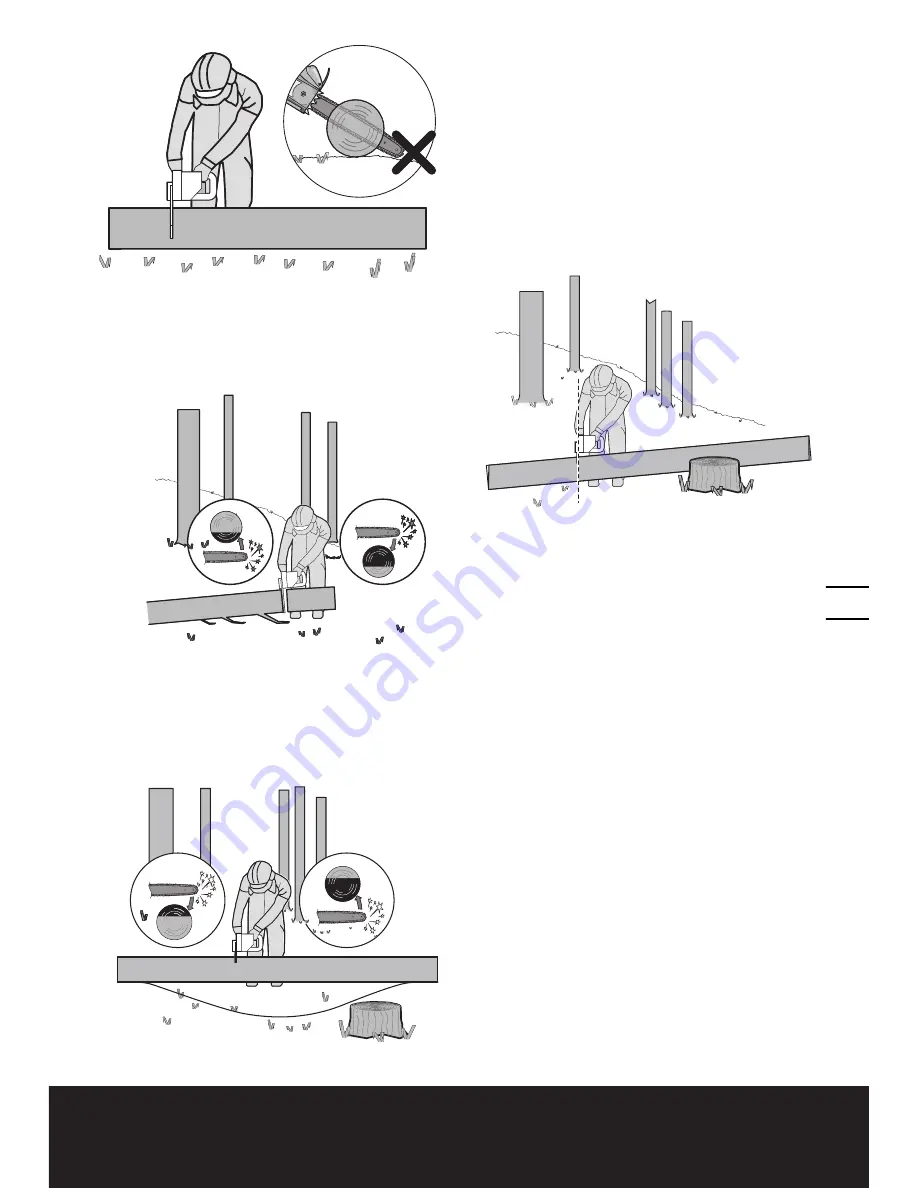
When the log is supported on one end, as
illustrated in Figure 5, cut 1/3 the diameter
from the underside (underbuck) (1). Then
make the finished cut by overbucking (2) to
meet the first cut.
3
2
2
W
Y
Z
X
2˝
2˝
1
1
1
2
2/3
1
1/3
1
2
2/3
1/3
Fig.1
Fig.2
Fig.3
Fig.4
Fig.5
Fig.6
When the log is supported on both ends, as
illustrated in Figure 6, cut 1/3 the diameter
from the top (overbuck) (1). Then make the
finished cut by underbucking (2) the lower 2/3
to meet the first cut.
3
2
2
W
Y
Z
X
2˝
2˝
1
1
1
2
2/3
1
1/3
1
2
2/3
1/3
Fig.1
Fig.2
Fig.3
Fig.4
Fig.5
Fig.6
When bucking on a slope always stand on
the uphill side of the log, as illustrated in
Figure 6. When “cutting through”, to maintain
complete control release the cutting pressure
near the end of the cut without relaxing your
grip on the chain saw handles. Don’t let the
chain contact the ground. After completing the
cut, wait for the saw chain to stop before you
move the chain saw. Always stop the motor
before moving from tree to tree.
3
2
2
W
Y
Z
X
2˝
2˝
1
1
1
2
2/3
1
1/3
1
2
2/3
1/3
Fig.1
Fig.2
Fig.3
Fig.4
Fig.5
Fig.6


