background image

13A Electric Pressure Washer


EN

10

OPERATING INSTRUCTIONS

NOTE: 

Before using the tool, read the 

instruction book carefully.

INTENDED USE  

The electric high pressure washer is intended for 

residential cleaning projects-from porch to patio, 

driveways and decks, boats, pavers, bricks, BBQs and 

more.

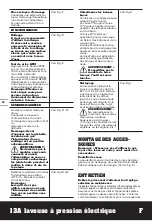
ASSEMBLY & OPERATION

ACTION

FIGURE

ASSEMBLY

Attach the middle 

extension lance to wand

Note: 

when attaching, align 

the two projections on the 

lance with the grooves on the 

wand.

Attach the front lance to 

the middle extension lance

Note: 

When attaching, align 

the projection on the front 

lance with the groove on the 

middle extension lance with 

the button held.

See Fig. A1 

A2,A3,A4

Attach& Detach the high 

pressure hose

Note:

 after the high pressure 

hose is connected, check the 

connection by gently pulling 

on the hose to ensure it stays 

connected. Press the release 

trigger on the wand to detach 

the hose.

Note: 

For detaching the hose 

easily, please pull the trigger 

to drain water from wand 

when operation is completed 

and switch is in “OFF/II ”posi-

tion.

See Fig. 

B1,B2,B3,B4

Attach the garden hose

Connect one end of the home 

garden hose (not supplied) to 

the adapter and another end 

to waterspout.

See Fig. C

OPERATION 

Extension cord

It is not recommended to 

use the extension cord. If 

necessary, ensure the plug 

and extension cord con-

nection is on an elevated 

surface that does not 

contact the water area.

See Fig. D

GFCI plug test 

Press “test”, the light will be 

out.

Press “reset”, the power 

regains and the light will il-

luminate.

Note: To keep good opera-

tion of GFCI, please imple-

ment it once a month.

See Fig. E

START/STOP

Turn on the water supply tap. 

Connect the washer to the 

power supply and turn the 

switch to “ON/I ”position. 

Then press trigger

Note: Before pressing 

trigger, make sure Lock-

off switch is in “unlock” 

position.

WARNING: Do not 

start the machine 

without connecting 

and turning on the water 

supply because it may 

cause damage to high 

pressure seals and reduce 

the service life of pump.  

See Fig. F1,F2

Release the trigger and turn 

the switch to “OFF/II”position. 

Turn Off the water supply tap 

Note: When not in use, 

make sure Lock-off switch 

is in “lock” position.

See Fig.G1,G2

Select the right nozzles 

Select the suitable nozzle for 

different cleaning jobs.

Nozzle 0

0

(red) and Nozzle 15

0


(yellow) are applicable for 

cleaning stubborn stain on 

concrete.

Nozzle 25

0

(green) is applicable 

for cleaning on concrete, 

bricks and masonry.

Nozzle 40

0

(white) is applicable 

for cleaning on wooden and 

other soft objects .

Turbo nozzle is applicable for 

cleaning concrete, bricks and 

masonry.

WARNING: Do not 

change the nozzle 

pattern when the 

tool is powered on.

See Fig.H

Cleaning

Begin with the nozzle 1-2ft 

away from the surface and 

approach with caution until it 

reaches the desired position 

for overly close spray may do 

harm to surface.

WARNING

: Do not 

connect the machine to 

water supplies that are 

dirty, rusty, muddy, or 

corrosive. (Including window 

cleaning liquids, plant foods, 

or fertilizers etc.)

See Fig. I

Summary of Contents for WG601

Page 1: ...13A Electric Pressure Washer EN 13A laveuse à pression électrique F Lavadora a presión eléctrica de 13A ES P02 P12 P18 WG601 WG601 X ...

Page 2: ...hock Should replacement of the plug or cord become necessary use only identical replacement parts that include GFCI protection 2 SERVICING OF A DOUBLE INSULATED APPLIANCE In a double insulated product two systems of insulation are provided instead of grounding No grounding means is provided on a double insulated product nor should a means for grounding be added to the product Servicing a double in...

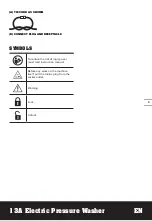
Page 3: ...r EN 3 A TIE CORD AS SHOWN B CONNECT PLUG AND RECEPTACLE SYMBOLS To reduce the risk of injury user must read instruction manual Before any work on the machine itself pull the mains plug from the socket outlet Warning Lock Unlock ...

Page 4: ...13A Electric Pressure Washer EN 4 8 14 10 1 2 5 11 12 13 9 6 3 4 15 19 7 ...

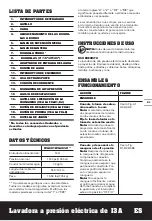
Page 5: ... are included in standard delivery TECHNICAL DATA WG601 WG601 X Power input 13 A Rated pressure 1500 psi 103 bar Rated water flow rate 1 2 gpm Power cord length 35 ft 10 5 m Machine weight 15 56 lbs 7 05 kg X may be followed by one or two characters All models are the same except model number and trademark The suffix in models may be number from 1 to 999 or English letter A to Z or M1 to M9 which ...

Page 6: ...1 2 16 16 Click Cliquez Clic A1 A2 A3 A4 D B1 B2 ...

Page 7: ...17 18 2 1 B4 B3 D D C E F1 ...

Page 8: ...2 1 2 1 G1 F2 G2 D I J 1 2 3 H ...

Page 9: ...1 2 K ...

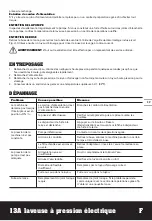
Page 10: ... See Fig D GFCI plug test Press test the light will be out Press reset the power regains and the light will il luminate Note To keep good opera tion of GFCI please imple ment it once a month See Fig E START STOP Turn on the water supply tap Connect the washer to the power supply and turn the switch to ON I position Then press trigger Note Before pressing trigger make sure Lock off switch is in unl...

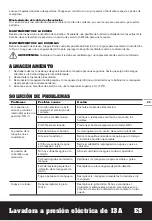
Page 11: ...n authorized service representative STORAGE 1 Disconnect the water source Turn on the pressure washers for a few seconds until the remaining water flows out Then turn it off quickly 2 Unplug the power supply 3 Disconnect the high pressure hose and the garden hose not supplied and coil high pressure hose for storage 4 Store in a frost free area with a temperature above 0 C 32 F TROUBLESHOOTING Symp...

Page 12: ...sjoncteur de fuite à la terre intégré dans la fiche du cordon d alimentation Ce dispositif offre une protection supplémentaire contre les décharges électriques S il est nécessaire de procéder au remplacement de la fiche ou du cordon utiliser exclusivement des pièces identiques à celles d origine qui incluent un disjoncteur de fuite à la terre 2 ENTRETIEN D UN APPAREIL DOUBLE ISOLATION Dans un prod...

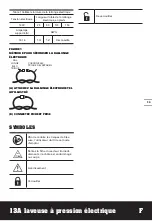
Page 13: ... 12 Déconseillé FIGURE 1 MÉTHODE POUR SÉCURISER LA RALLONGE ÉLECTRIQUE RAL LONGE ÉLEC TRIQUE CORDON ÉLEC TRIQUE DE L APPAREIL A ATTACHEZ LA RALLONGE ÉLECTRIQUE TEL QU ILLUSTRÉ B CONNECTEZ FICHE ET PRISE SYMBOLES Afin de réduire les risques de bles sure l utilisateur doit lire ce mode d emploi Retirez la fiche du secteur immédi atement si le câble est endommagé ou coupé Avertissement Verrouiller Dé...

Page 14: ...14 13A laveuse à pression électrique F 8 14 10 1 2 5 11 12 13 9 6 3 4 15 19 7 ...

Page 15: ...ommandons d acheter vos accessoires dans le magasin qui vous a vendu l outil Pour de plus amples renseignements consultez l emballage de l accessoire Le personnel du magasin peut également vous conseiller INSTRUCTIONS D UTILISATION REMARQUE Avant d utiliser cet outil assurez vous de lire attentivement le manuel d utilisation UTILISATION CONFORME Le nettoyeur haute pression électrique est destiné a...

Page 16: ... lage est en position ver rouillé Voir Fig G1 G2 Sélectionnez les bonnes buses Choisissez un modèle de buse adapté à votre travail Les buse 00 rouge et buse 150 jaune s appliquent pour nettoyer des taches resitantes sur du béton La buse 250 verte est applicable pour le nettoyage du béton des briques et de la maçonnerie La buse 400 blanche est ap plicable pour le nettoyage des objets en bois et aut...

Page 17: ...oit sans gel avec une température supérieure à 0 32O F DÉPANNAGE Problème Causes possibles Mesures La machine ne démarre pas lorsque l interrupteur est en position ON I Le cordon d alimentation n est pas branché dans la source d alimentation Branchez le cordon d alimentation la prise est défectueuse Vérifier ou remplacer la prise la prise murale les fusibles Le disjoncteur de fuite à la terre est ...

Page 18: ...rdón eléctrico Este dispositivo proporciona protección contra el riesgo de descargas eléctricas Si debe reemplazar la clavija o el cordón sólo utilice piezas de repuesto idénticas que incluyan la protección con GFCI 2 SERVICIO DE UN APARATO DE DOBLE AISLAMIENTO En un producto con doble aislamiento se proporcionan dos sistemas de aislamiento en lugar de una conexión a tierra No se proporcionan medi...

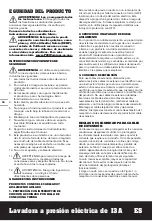
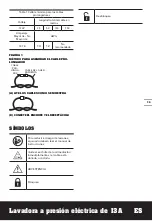
Page 19: ...14 12 No recomendado FIGURA 1 MÉTODO PARA ASEGURAR EL CABLE PRO LONGADOR CABLE PRO LONGA DOR CABLE DE LA HER RAMIENTA A ATE LOS CABLES COMO SE MUESTRA B CONECTE EL ENCHUFE Y EL RECEPTÁCULO SÍMBOLOS Para reducir el riesgo de lesiones el usuario deberá leer el manual de instrucciones Quite el enchufe de la alimentación inmediatamente si el cable está dañado o cortado ADVERTENCIA Bloqueo Desbloqueo ...

Page 20: ...20 Lavadora a presión eléctrica de 13A ES 8 14 10 1 2 5 11 12 13 9 6 3 4 15 19 7 ...

Page 21: ...ecomendamos que compre sus accesorios en la misma tienda que le vendió la herramienta Consulte el empaque de los accesorios para obtener más detalles El personal de la tienda también puede ayudarle y aconsejarle INSTRUCCIONES DE USO NOTA Antes de usar la herramienta lea atentamente el manual de instrucciones USO PREVISTO La lavadora de alta presión eléctrica está destinada a proyectos de limpieza ...

Page 22: ... de que el interruptor de bloqueo esté en la posición de bloqueo See Fig G1 G2 Seleccione las boquillas correctas Elija un patrón de boquilla adecuado según su trabajo La boquilla de 00 roja y la boquilla de 150 amarilla se pueden aplicar para limpiar manchas rebeldes sobre concreto La boquilla 250 verde es aplicable para la limpieza en concreto ladrillos y mampostería La boquilla 400 blanco es ap...

Page 23: ... presión para almacenamiento 4 Almacene en un área libre de escarcha con una temperatura superior a 0 32O F SOLUCIÓN DE PROBLEMAS Problemas Posibles causas Acción La máquina no arranca cuando el interruptor está en la posición ON I El cordón eléctrico no está conectado al suministro de corriente Enchufe el cable de alimentación El zócalo está defectuoso Verifique o reemplace el enchufe el enchufe ...

Page 24: ...www worx com Copyright 2020 Positec All Rights Reserved Copyright 2020 Positec Tous droits réservés Derechos reservados 2020 Positec Todos los derechos reservados ...

Reviews: