13
12
Electric Lawn Mower
EN
13
12
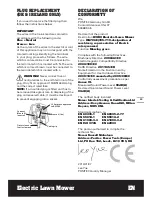
Always handle the blade with care-sharp
edges could cause injury use gloves.
Follow these procedures to remove and
replace the blade. You will need garden
gloves (not provided) and a spanner wrench
(not provided) to remove the blade. Hold
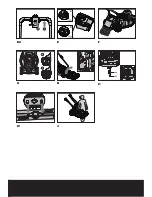
the blade (14) and unscrew the blade bolt
(13) anticlockwise using a spanner wrench.
Remove blade and attach a new one to the
blade bolt.
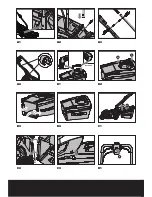
Ensure that the blade is properly positioned as
seen in Fig.I1, then firmly tighten the bolt.
Do
not over tighten.
Renew your metal blade after 50hrs mowing
or 2 years, which ever is the sooner-regardless
of condition.
If the blade is cracked or damaged
replace it with a new one.
STORAGE: (See fig. J)
Clean the exterior of the machine thoroughly
using a soft brush and cloth. Do not use water,
solvents or polishes. Remove all grass and
debris, especially from the ventilation slots.
Turn the machine on its side and clean the
blade area. If grass cuttings are compacted
in the blade area, remove with a wooden or
plastic implement.
Store the machine in a dry place. Do not place
other objects on top of the machine.
To aid storage loosen the handle knobs and
fold the handles.
You could carry the mower by carry handle
(11).
Ensure cables are not stuck or entangled when
folding or unfolding upper handles.
Do not
drop the handles.
ENVIRONMENTAL
PROTECTION
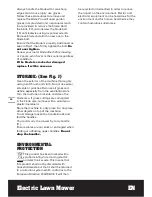
This product has been marked with a
symbol relating to removing electric
and electronic waste. This means that
this product shall not be discarded with
household waste but that it shall be returned
to a collection system which conforms to the
European Directive 2002/96/CE. It will then
be recycled or dismantled in order to reduce
the impact on the environment. Electric and
electronic equipment can be hazardous for the
environment and for human health since they
contain hazardous substances.
Summary of Contents for wg706e
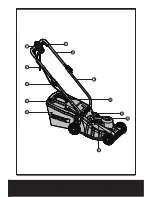
Page 3: ...1 2 3 4 5 6 7 8 9 10 11 12...
Page 4: ...Front Part Back Part a 1 a 1 2 3 2 1 A1 A2 A3 A4 B1 B2 B3 B4 C1 C2 C3 D1...
Page 5: ...1 2 a b 14 13 1 2 1 2 C2 C3 D1 D2 E F I1 G H I2 J...
Page 99: ...99 99 GR 1 2 3 4 5 6 7 8 9 10 11 12 13 I1 14 I1...
Page 101: ...101 101 GR 1 2 3 4 1 2 3 4 1 2 3 4 5 6 7 8 9 10 11 12 13...
Page 102: ...102 GR 102 14 1 2 3 4 RCD 30mA...
Page 104: ...104 GR 104 B2 4 B3 B1 3 C1 C2 C3 1 2 3 a C2 4 C3 4 10 5 10 1 D1 D2 D1 D2 2 3 E...
Page 105: ...105 105 GR 4 F 5 G 1 2 20mm TURBO TURBO 6 H 3 20mm 60mm I1 I2 14 13 I1 50 2...
Page 107: ...107 107 RU 1 2 3 4 5 6 7 8 9 10 11 12 13 I1 14 I1...
Page 109: ...109 RU 1 2 3 4 1 2 3 4 1 2 3 4 5 6 7 8 9...
Page 110: ...110 RU 10 11 12 13 14 1 2 3 4 30...
Page 111: ...111 RU 1 A1 A2 A3 A4 1 X 2 A1 2 9 3 A2 4 8 3 9 A3 5 3 6 2 P A4 2 B1 B4 1 2002 96 CE...
Page 112: ...112 RU P B2 2 P B2 3 P B2 4 P C3 B1 3 C1 C2 C3 1 2 3 a C2 4 y C3 4 10 5 10 1 D1 D2 D1 D2 2 3 E...
Page 113: ...113 RU a b 4 F 5 G 1 2 20 N 6 H 3 20 60 I1 I2...
Page 114: ...114 RU 14 13 I1 50 2 J 11 2002 96 CE...
Page 116: ...Copyright 2013 Positec All Rights Reserved 2GLM11APK11001A2...

