background image

SAFETY AND OPERATING MANUAL

ORIGINAL INSTRUCTIONS

Electric Lawn Mower 

WG717E

Summary of Contents for WG717E

Page 1: ...SAFETY AND OPERATING MANUAL ORIGINAL INSTRUCTIONS Electric Lawn Mower WG717E ...

Page 2: ...id wearing clothing that is loose fitting or that has hanging cords or ties b Thoroughly inspect the area where the equipment is to be used and remove all objects which can be thrown by the machine c Before using always visually inspect to see that the blade blade bolt and the blade assembly are not worn or damaged Replace worn or damaged blades and bolts in sets to preserve balance Replace damage...

Page 3: ...Use only genuine replacement parts and accessories d Be careful during adjustment of the machine to prevent entrapment of the fingers between moving blades and fixed parts of the machine e On machines with multi blade take care as rotating one blade can cause other blades to rotate f Always allow the machine to cool down before storing g When servicing the blades be aware that even though the powe...

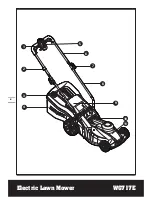
Page 4: ...4 Electric Lawn Mower WG717E 1 2 3 4 5 6 7 8 9 10 11 ...

Page 5: ... accessories illustrated or described are included in standard delivery TECHNICAL DATA Type WG717E 705 719 designation of machinery representative of Electric lawn mower Rated Voltage 220 240V 50 60Hz Rated Power 1400W Cutting diameter 36cm Cutting height 20 70mm Cutting height positions 6 Grass collection capacity 40L Protection Class II Machine Weight 12 9kg NOISE DATA A weighted sound pressure ...

Page 6: ...on of exposure level in the actual conditions of use should also take account of all parts of the operating cycle such as the times when the tool is switched off and when it is running idle but not actually doing the job This may significantly reduce the exposure level over the total working period Helping to minimise your vibration exposure risk ALWAYS use sharp chisels drills and blades Maintain...

Page 7: ...deck provided See Fig A2 3 Secure with the screws provided See Fig A2 4 Attach the Upper Handle 6 with the bolts and Lock Cam Lever 7 to the Lower Handle See Fig A3 5 Tightening the two Lock Cam Levers Check that the handle is FULLY secured The cam lever pressure can be adjusted by adjusting the Lock Cam Lever clockwise counter clockwise DO NOT OVERTIGHTEN See Fig A4 NOTE Ensure the bolts are full...

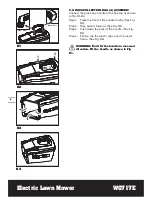
Page 8: ... 1 Press the front of the handle briefly See Fig B2 Step 2 Then push it forward See Fig B2 Step 3 Push down the back of the handle See Fig B2 Step 4 Finally clip the plastic clips over the metal frame See Fig B3 WARNING Don t fit the handle in reversed direction Fit the handle as shown in Fig B1 Front Part Back Part 1 2 3 B1 B2 B3 B4 ...

Page 9: ...se the safety guard to lock the grass bag into position Ensure the Grass Collection Bag is installed securely See Fig C3 NOTE Depress the Grass Collection Bag slightly to ensure that it is completely installed 4 REMOVING EMPTYING Hold the Grass Collection Bag lift the Safety Flap 9 and hold up Remove the Grass Collection Bag WARNING Always check the safety flap can close the discharge outlet tight...

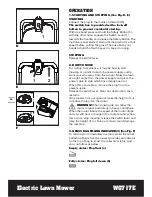
Page 10: ... at a right angle from the power supply and place the power cable to side which has already been cut When this occurs stop remove the plug from the power supply Release the switch lever Clear any obstruction then restart it If the mower cuts out again increase the height of cut to reduce the load on the motor WARNING When mowing do not allow the motor to labor particularly in heavy conditions When...

Page 11: ...the grass is wet from rain or dew Wet grass may form clumps which interfere with the mulching action and reduce runtime The best time to mow grass is in the late afternoon when the grass is dry and the newly cut area will not be exposed to direct sunlight 2 For best mulching performance set the cutting height to remove about one third of the grass blade length ideally no more than 38mm at one time...

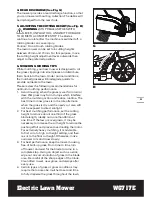
Page 12: ...r should happen to fail despite regular maintenance please call our customer helpline for advice BLADE 13 MAINTENANCE See Fig I1 I2 WARNING Never carry out any assembly operations or adjustments with the power connected to the mower Always ensure that the power button is in the off position and that the power plug is disconnected from the supply Always handle the blade with care sharp edges could ...

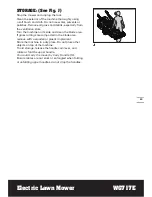
Page 13: ...s Turn the machine on its side and clean the blade area If grass cuttings are compacted in the blade area remove with a wooden or plastic implement Store the machine in a dry place Do not place other objects on top of the machine To aid storage release the handle cam lever and rotate or fold the upper handle You could carry the mover by Carry Handle 10 Ensure cables are not stuck or entangled when...

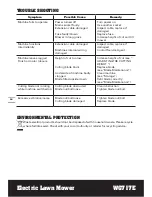
Page 14: ... Height of cut too low Cutting blade blunt Underside of machine badly clogged Blade fitted upside down Increase height of cut see ADJUSTINGTHE CUTTING HEIGHT Replace blade see Blade Maintenance Clean machine see Storage Refit blade correctly see Blade Maintenance Cutting blade not rotating while machine switched on Cutting blade obstructed Blade nut bolt loose Clear obstruction Tighten blade nut b...

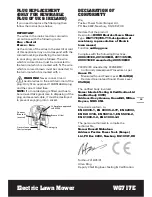
Page 15: ...to a socket Connect Blue to N neutral Outer sleeve firmly clamped Cable grip Brown L live 13 Amp fuse approved to BS1362 DECLARATION OF CONFORMITY We Positec PowerTools Europe Ltd PO Box 6242 Newbury RG14 9LT UK Declare that the product Description WORX Electrical Lawn Mower Type WG717E 705 719 designation of machinery representative of Electric lawn mower Function cutting grass Complies with the ...

Page 16: ...Copyright 2016 Positec All Rights Reserved AR01171701 www worx com ...

Reviews: