17
WG743E WG743E.X Cordless Lawn mower
CUTTING AREA
The cutting area can be affected by several factors,
such as cutting height, lawn humidity, grass length
and density. Besides, starting and stopping the
mower too many times during operation will reduce
the cutting area.
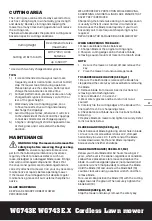
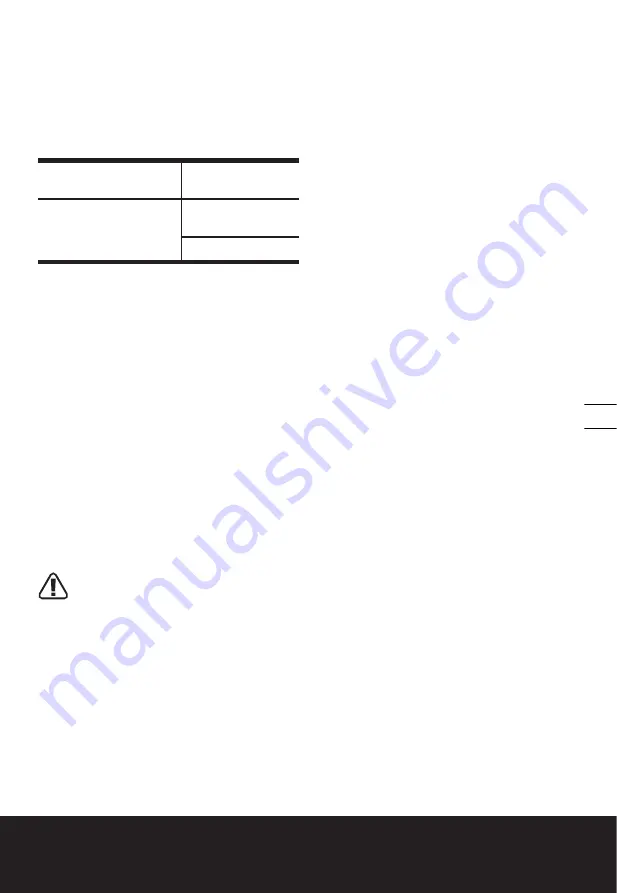
The below table provides the potential cutting areas
based on specific cutting conditions.
Cutting Height
Recommend lot size
(maximum)
Cutting off 8cm to 6cm
With 2*20V / 4.0Ah
batteries
up to 500m
2
*
* Used with two fully charged battery packs.
TIPS:
1)
It is recommended to mow your lawn more
frequently, walk at normal pace, and not to start/
stop the mower too often during operation.
Please always use the same two batteries and
charge the two batteries at same time.
2) For best performance, please ensure use a fully
charged battery pack and always cut off 1/3 or
less of the grass height.
3) Walk slowly when cutting long grass, so as
to have more effective cutting and properly
discharge the clippings.
4) Avoid cutting wet grass, otherwise it will stick
to the underside of the deck and the clippings
cannot be collected or discharged properly.
5) A higher cutting height shall be applied to new
or thick grass and it will extend the battery
duration.
MAINTENANCE
WARNING: Stop the mower and remove the
safety key before removing the grass bag.
NOTE:
To ensure long and reliable service,
perform the following maintenance procedures
regularly. Check for obvious defects such as a
loose, dislodged or a damaged blade, loose fittings,
and worn or damaged components. Check that
the covers and guards are all undamaged and are
correctly attached to mower. Carry out any necessary
maintenance or repairs before operating mower.
If the mower should happen to fail despite regular
maintenance, please call our customer helpline for
advice.
BLADE SHARPENING
KEEP BLADE SHARP FOR BEST MOWER
PERFORMANCE.
WEAR PROPER EYE PROTECTION WHILE REMOVING,
SHARPENING, AND INSTALLING BLADE. ENSURE THAT
SAFETY KEY IS REMOVED.
Sharpening the blade twice during a mowing season
is usually sufficient under normal circumstances.
Sand causes the blade to dull quickly. If your lawn
has sandy soil, more frequent sharpening may be
required.
REPLACE BENT OR DAMAGED BLADE IMMEDIATELY.
WHEN SHARPENING THE BLADE:
1. Make sure blade remains balanced.
2. Sharpen blade at the original cutting angle.
3. Sharpen cutting edges on both ends of blade,
removing equal amounts of material from both ends.
NOTE:
1. Be sure the mower is turned off and remove the
key.
2. Place the mower in stand up storage mode.
TO SHARPEN BLADE IN A VISE (SEE Fig.L1)
1. Be sure the bail handle is released, the blade has
stopped and the safety key removed before removing
the blade.
2. Remove blade from mower. See instructions for
removing and attaching blade.
3. Secure blade L1-1 in a vise L1-2.
4. Wear safety glasses and be careful not to cut
yourself.
5. Carefully file the cutting edges of the blade with a
fine tooth file L1-3 or sharpening stone.
6. Check balance of blade. See instructions for blade
balancing.
7. Replace blade on mower and tighten securely. Refer
to instructions below.
BLADE BALANCING (SEE Fig.L2)
Check balance of blade by placing center hole in blade
L2-1 over a nail or screwdriver shank L2-2, clamped
horizontally in a vise L2-3. If either end of the blade
rotates downward, file that end. Blade is properly
balanced when neither end drops.
BLADE MAINTENANCE (SEE FIG. M1, M2)
Renew your metal blade after 50 hours mowing or 2
years, which ever is the sooner-regardless of condition.
Follow these procedures to remove and replace the
blade. You will need garden gloves (not provided) and
a spanner wrench (not provided) to remove the blade.
Hold the blade (19) and unscrew the blade bolt (18)
counter-clockwise using a spanner wrench, and then
remove blade.
To re-assemble, position the blade (19) with the cutting
edges towards the ground. Then securely tighten the
blade bolt (18).
STORAGE (SEE Fig. K1, K2)
Stop the mower and always remove the safety key.
Summary of Contents for WG743E
Page 1: ...WG743E WG743E X Cordless Lawn mower SAFETY AND OPERATING MANUAL ORIGINALINSTRUCTIONS...
Page 2: ......
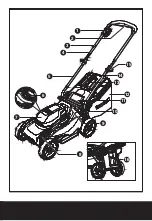
Page 3: ...5 7 6 10 16 11 12 13 14 2 3 4 1 8 9 15...
Page 4: ...2 1 A5 B1 A1 A2 A4 A3...
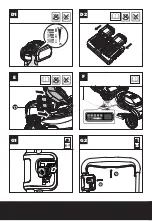
Page 5: ...3 2 1 1 2 1 2 C2 C3 B2 B3 C1 B4...
Page 6: ...1 2 100 0 17 D1 D2 E F G1 G2...
Page 8: ...WG743E WG743E X Cordless Lawn mower L2 1 L2 2 L2 3 19 18 L1 1 L1 2 L1 3 L L1 M1 L2 O2 M2...

